Adding New Page
How to Create a New Page and Make Use of the Page on the Site?
ZenBasket is a platform that enables you to create and add new web pages to your websites. With ZenBasket, you have the flexibility to create custom sections or incorporate existing sections from a wide range of templates available. This allows you to easily customize your website and tailor it to your specific needs.
How to Create a New Page by Adding Templates from the Existing Section?
-
From the ZenBasket admin, choose the Design menu.
-
Under the Start Editing section, click on the Start Editing button.
-
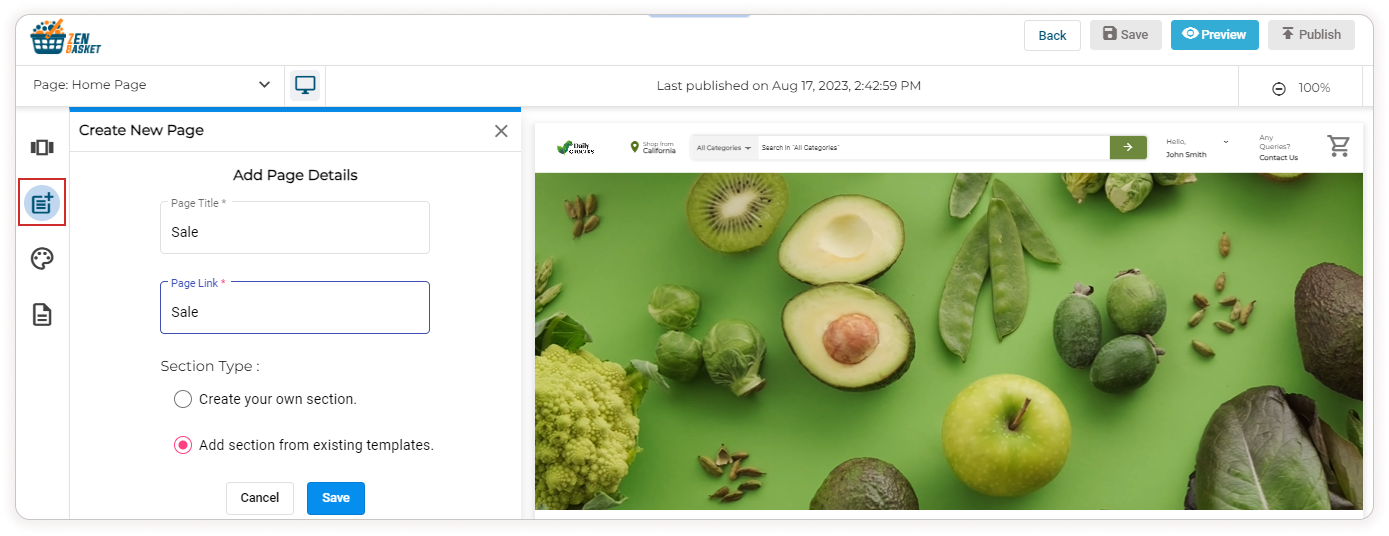
Now click on the Add New Page icon on the left panel to add a new page to your website (storefront).
-
Enter the Page Title and Page link (displayed as a part of the page URL).
-
Now choose Add Section from existing templates, if you want to just add sections from the templates to your new page.
-
Click Save.
-
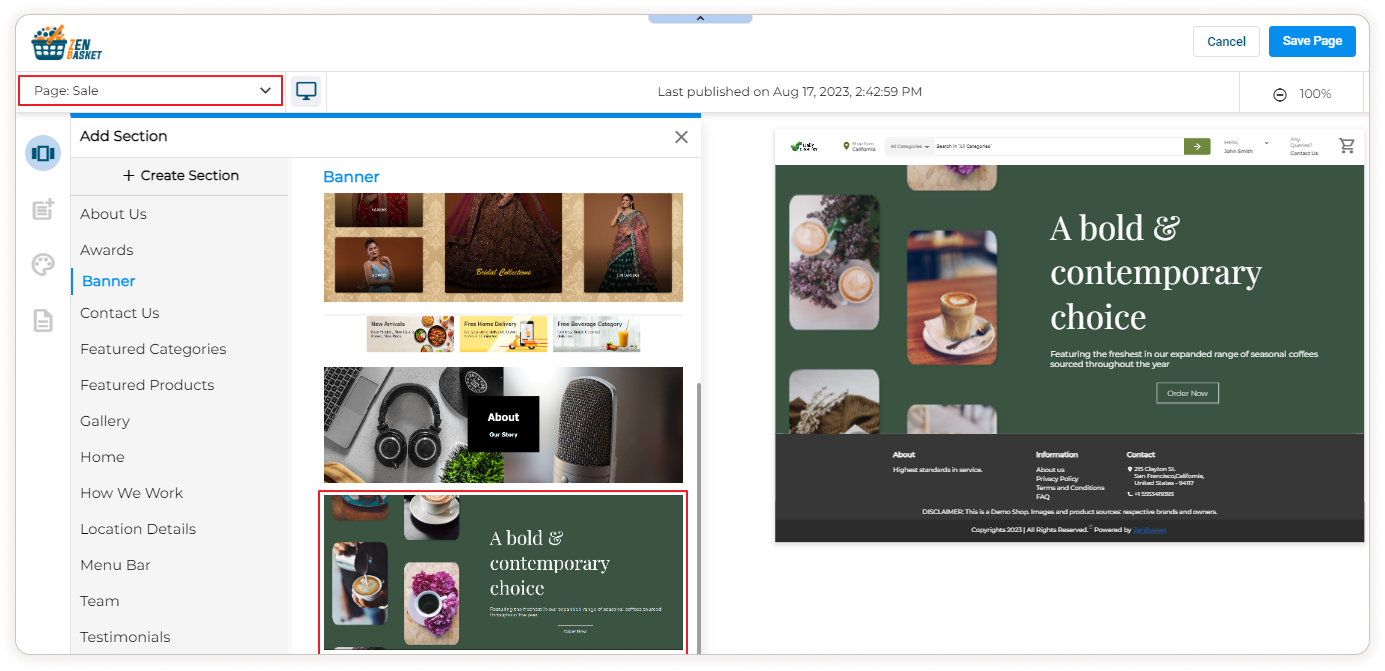
Now on this page you can add sections. There is a list of templates. Just drag and drop any of these to your page preview on the right panel.
-
To edit the added section click on the Edit icon on the right in each section.
-
In the pop-up, you can modify various settings, which may vary depending on the section templates you select.

-
You may add any number of templates as per your needs. Adjust the position of the sections by using the up/down arrows.
-
Once you have added all the sections click the Save page button on the top.
-
Your page is saved successfully.
How to Create a New Page by Creating Custom Sections?
-
From the ZenBasket admin, choose the Design menu.
-
Under the Start Editing section, click on the Start Editing button.
-
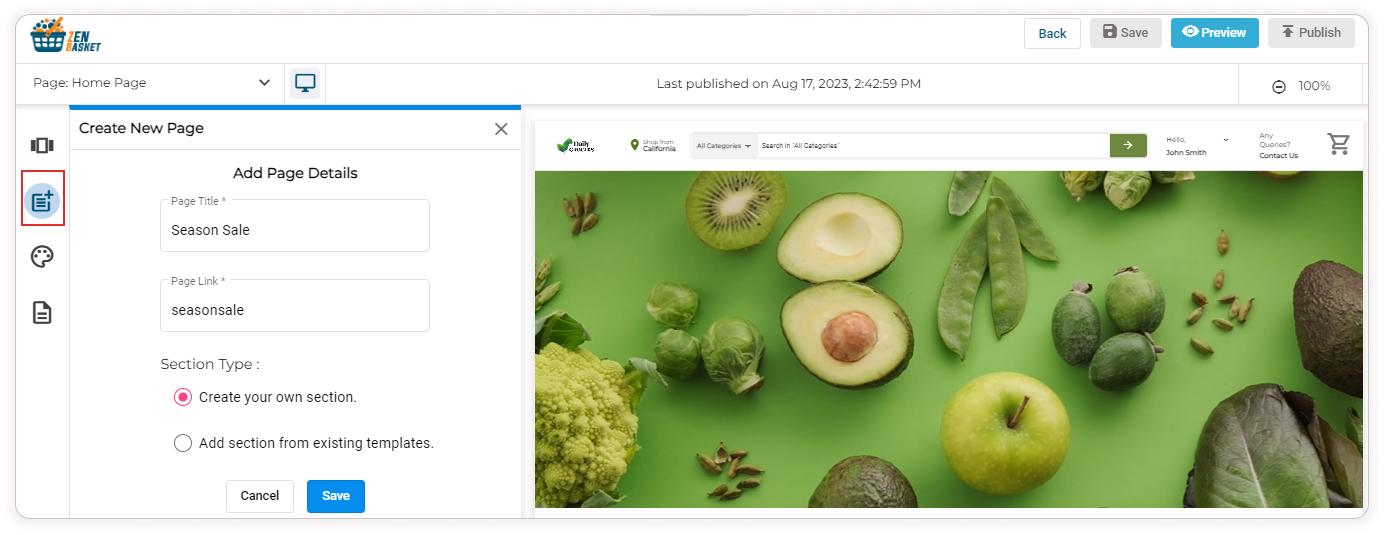
Now click on the Add New Page icon on the left panel to add a new page to your website (storefront).
-
Enter the Page Title and Page link (displayed as a part of the page URL).
-
Now choose Create your section, if you want to create custom sections.
-
Click Save.
-
Now on this page, you can add a new section to your home page ( storefront).
-
Enter a section name.
-
Select the checkbox if you wish to set content to full width.

-
Now on the right you have a lot of options that you can add to your new section. It includes Columns, Headings, Text, Images, Buttons, Dividers, HTML code, Menus and Social.
-
Just click and drag any of those components to your section.
-
To add a heading, click and drag Headings from the right to the the left. Click on the heading to adjust the text settings.

-
Similarly you may add images by dragging the image component to the section and upload images from your device.
-
You can add more components like button, menu, social icons etc.. to your section.
-
You can Undo and Redo the changes made to your section.
-
Once you are done, click on the Append Section button. Then click the Save Page button on the top.
-
Your page is saved successfully.
-
Add as many sections as you need. To learn more about Adding new sections to the homepage refer the help article.

How to Add the Newly Created Pages to your Website?
-
From the ZenBasket admin, choose the Design menu.
-
Under the Build Custom menus section, click on the Create Custom menus button.

-
Click on Add Custom Menus to add new menu.

-
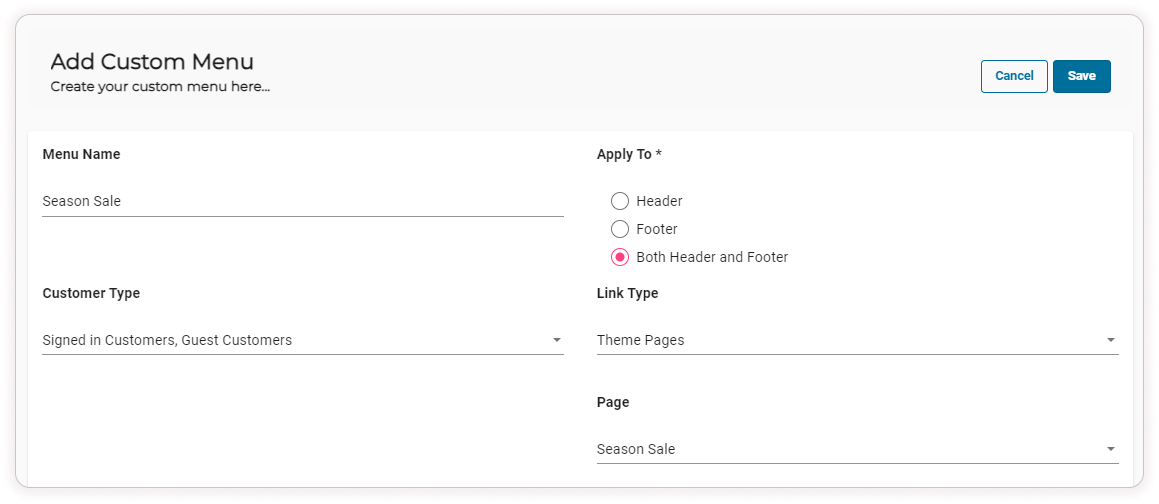
Enter the Menu Name, choose whether you want to apply this menu to header, footer or both.
-
Select the Customer Type to whom this menu should be visible.
-
Choose the Link Type and choose the New Page you just created.
-
Finally click Save.The page gets added to the custom menu list.
-
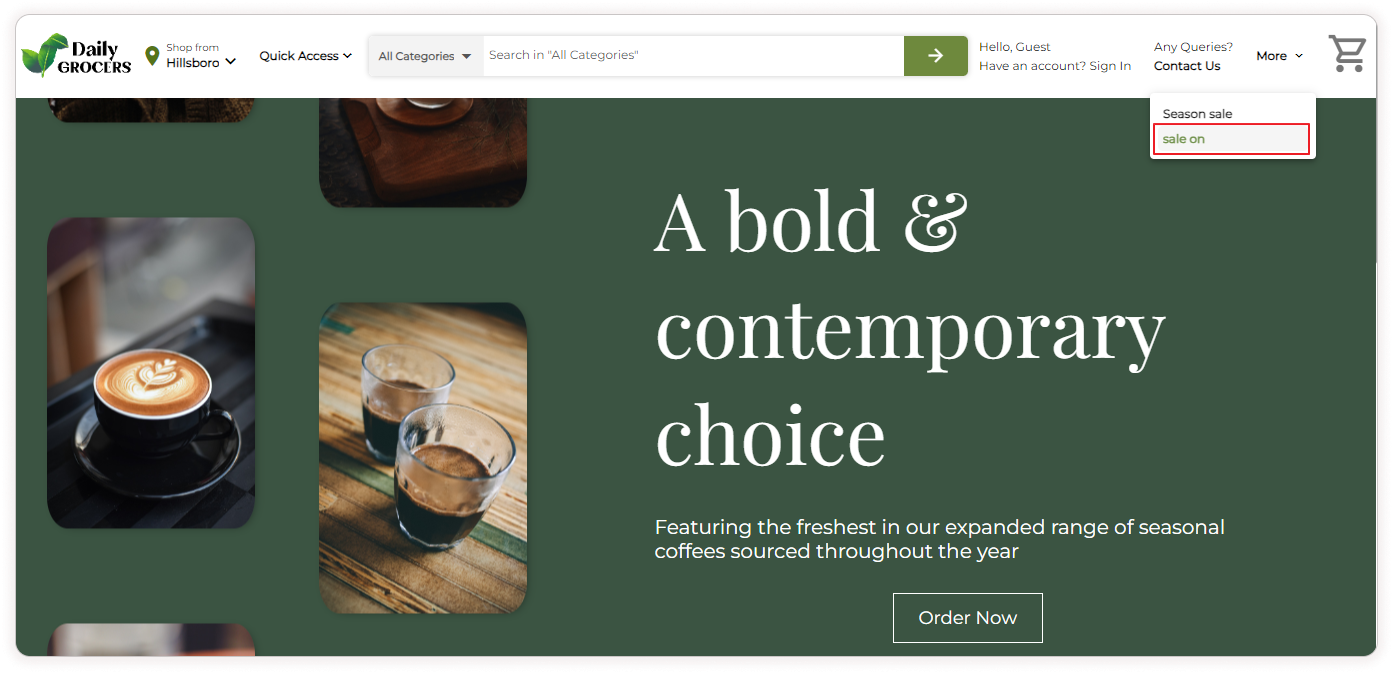
Now you can find this page under the More Menu on your home page and also on the Footer section under Other Menus.

-
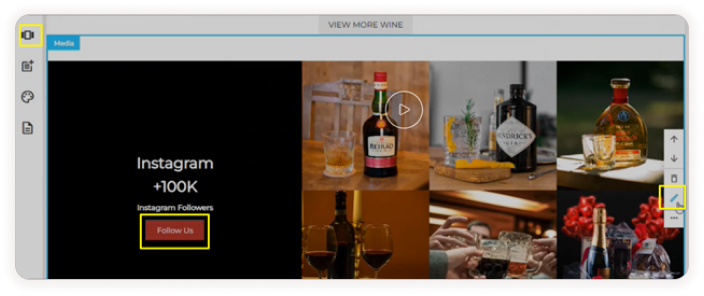
To associate the newly created page with the button, click on the Edit icon.
-
Inside the editing interface, locate and click on the Redirect To option.
-
From the dropdown menu that appears, select the new page you want the button to lead to. Confirm your choice, ensuring that when the button is clicked, it will redirect users to the newly created page.
-
Now, click the Save button to save this action.
-
After saving, click the Publish button to make the page visible on your website.
-
With the publication complete, return to the homepage’s specific section.
-
Click on the Button Link in this section. Now, you will be redirected to the newly created page.
Video Tutorial
