
Adding New Sections
In ZenBasket admin, you can change the look and feel of your online store by customizing the category, typography, images and other designs. Once you update the design setting, that would be immediately reflected on the store.
How to Add a Section from Existing Templates to your Homepage/Storefront?
-
In the control panel, choose the Design menu.
-
Under the Start Editing section, click on the Start Editing button.
-
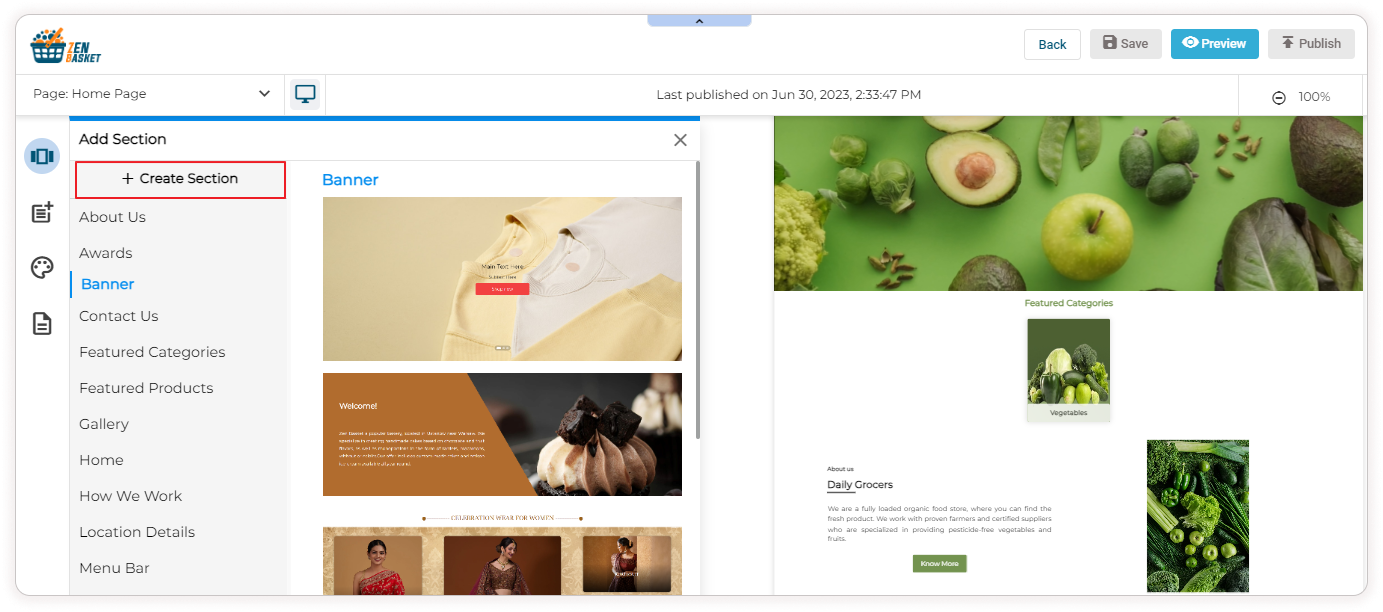
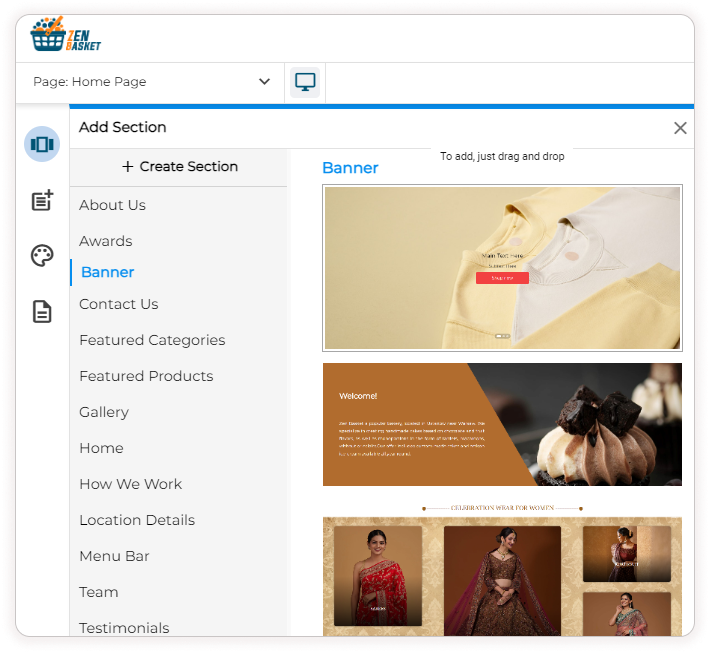
Now click on the Add section icon on the left panel to add a new section to your home page (storefront).
-
On this page, you may make all the customizations you need.
-
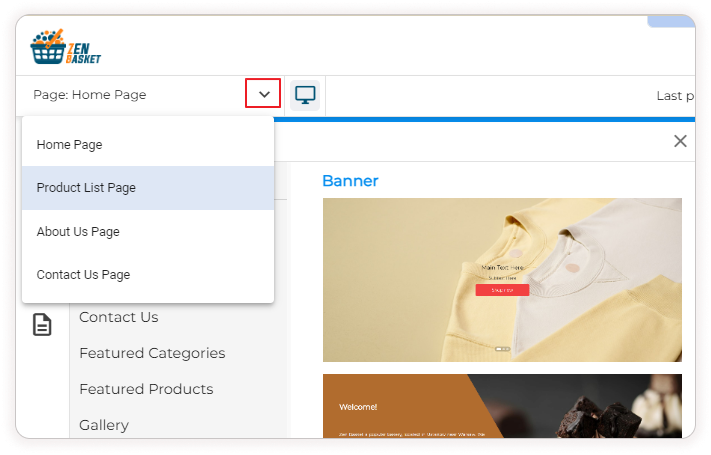
Choose the page by clicking on the down arrow.
-
On the left, you have the list of all the pre-existing section templates like About Us, Awards, Banner, Contact Us, etc.
-
Click on any of these sections and choose from the variety of templates on the right. Just click and drag the section onto the home page preview on the rightmost column.

-
Click on Save to save the changes. You can preview the section on your home page by clicking on the preview button. For these changes to be reflected on your home page click on the Publish button.
-
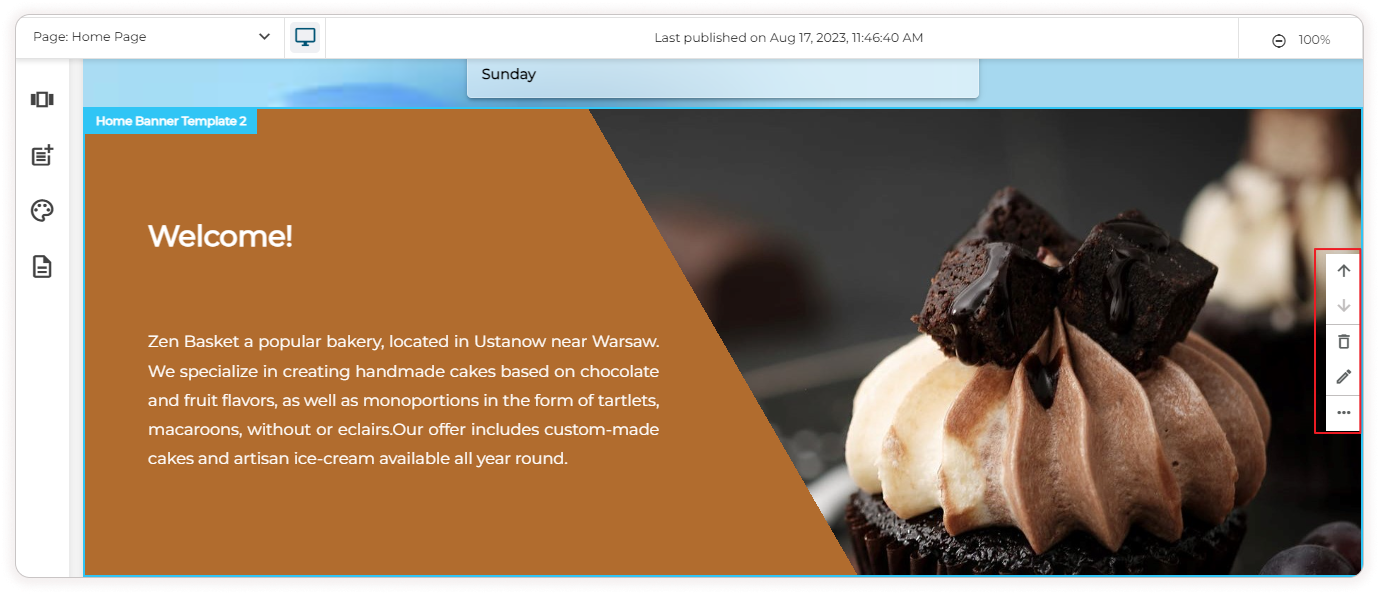
Once the section gets added to the homepage, you can make changes to the text or image by clicking on the Edit icon on the right. You can also move this section upwards or downwards using the up and down arrows. Click on Delete to delete the section. Click on the three dots for More Options.

How to Create a Custom Component and Add it to the Storefront?
ZenBasket offers the flexibility for users to create their own custom sections on their home page, rather than being limited to using pre-existing templates. This allows individuals to design and organize their pages according to their specific needs and preferences.
Let’s consider an example. To create a section as given below, follow these steps.

-
In the control panel, choose the Design menu.
-
Under the Start Editing section, click on the Start Editing button.
-
Now click on the Add section icon on the left and then click on Create section to add a new section to your home page (storefront).
-
Enter a Section Name.
-
Select the checkbox if you wish to set content to full width.

-
Now on the right you have a lot of options that you can add to your new section. It includes Columns, Headings, Text, Images, Buttons, Dividers, HTML code, Social or Menus.
-
Just Click and Drag any of those components to your section.
-
To give a heading to the section click and drag Heading from the right to the left portion. Now double-click on the heading and change the text.
-
On the right panel, you can change the Heading Type, Font, Font Weight(Regular or Bold), Font Size, Color, Text alignment(Left, center, right, justify) and Line Height.
-
Enable the toggle Inherit Body Styles to use the global settings in this section too. Disable it if you want to customize the settings as per your choice.
-
Adjust the container padding for increasing or decreasing spaces within the container. Enable the More Options toggle to adjust the top, bottom, left and right padding separately.
-
Enable the Hide On Desktop toggle to hide a particular section in your desktop view.
-
You can edit all these settings for mobile and tablet views as well.

-
Now click and drag column and choose how many columns you need on the right.

-
You can add an image to the left column and text to the right column. This can be done by clicking and dragging the components from the right panel onto the columns on the left.
-
To add an image click on the image column and then click on the Upload image button on the right panel. Browse the image from your device and choose it. Your image is uploaded successfully.

-
Now to add text, click on the Text column and add your text.

-
On the right panel you can adjust the settings like Font, Font Weight, Size, Color etc.
-
Now to place a button, first drag and drop a block that has three columns. Placing the button in the middle column aligns the button to the center.

-
Now from the content section, click and drag the Button to the middle column.

-
Now change the button text, color, font and spacing. Under the Action section on the right panel, You can mention the URL to which the click on this button must navigate. Mention whether the page should open on the same tab or new tab by choosing from the Target drop down.

-
Similarly you can add HTML code to customize your section. You can also add menus by clicking and dragging the components.
-
You can add Social links by clicking and dragging the social component .you can choose the social icons and enter the URL for it.
-
In the Body section, you can change the text color or the background color of the section. You can also change the font settings,email settings and links.

-
You can Undo or Redo the changes that you have made by clicking the respective buttons.
-
Once you’re done with all the changes, click on the Append Section button.
-
Click on the Publish button to see the changes on your home page.

-
Just click on the section to edit it, or use the three dots for options like Move Section Up, Quick Edit, Duplicate, Delete, etc. Make sure to Save the changes after updates and publish the changes.


Video Tutorial