Shipyaari
For a store owner, order fulfillment can be a complex and time-consuming process. Shipyaari helps streamline the end-to-end fulfillment operations and ensures hassle-free deliveries at the lowest cost.
With Shipyaari, orders are processed quickly and efficiently by letting your customers choose from a list of delivery partners. You can track your inventory and orders in one place, which makes it easy to make smarter business decisions and enhance sales.
How to Get the AVN Key for Shipyaari Integration?
-
Start by visiting the Shipyaari Sign up page here
-
You can create your account using Google or manually enter your details in the respective fields (Referral code is optional, if you sign up through referral code, you will enter it) and Click on the Sign up button.
-
Once you sign up, the next stage is mobile verification, here you enter your Mobile number and click on the Verify number.
-
Once you have verified, you move to the account setup process, here click on the Setup of your account.
-
Complete your profile, answer the questions such as describe yourself (trader/ wholesaler/reseller/d2dbrand), and enter your daily order volume how do you sell your product (Instagram, Flipkart, Amazon, Facebook) and which products are you looking for (Sy Express, Sprint-Same Delivery, next day delivery and hyperlocal) and select the industry of your business and click on the Proceed for KYC to enter your KYC details.
-
Now you have successfully set up your account on Shipyaari.
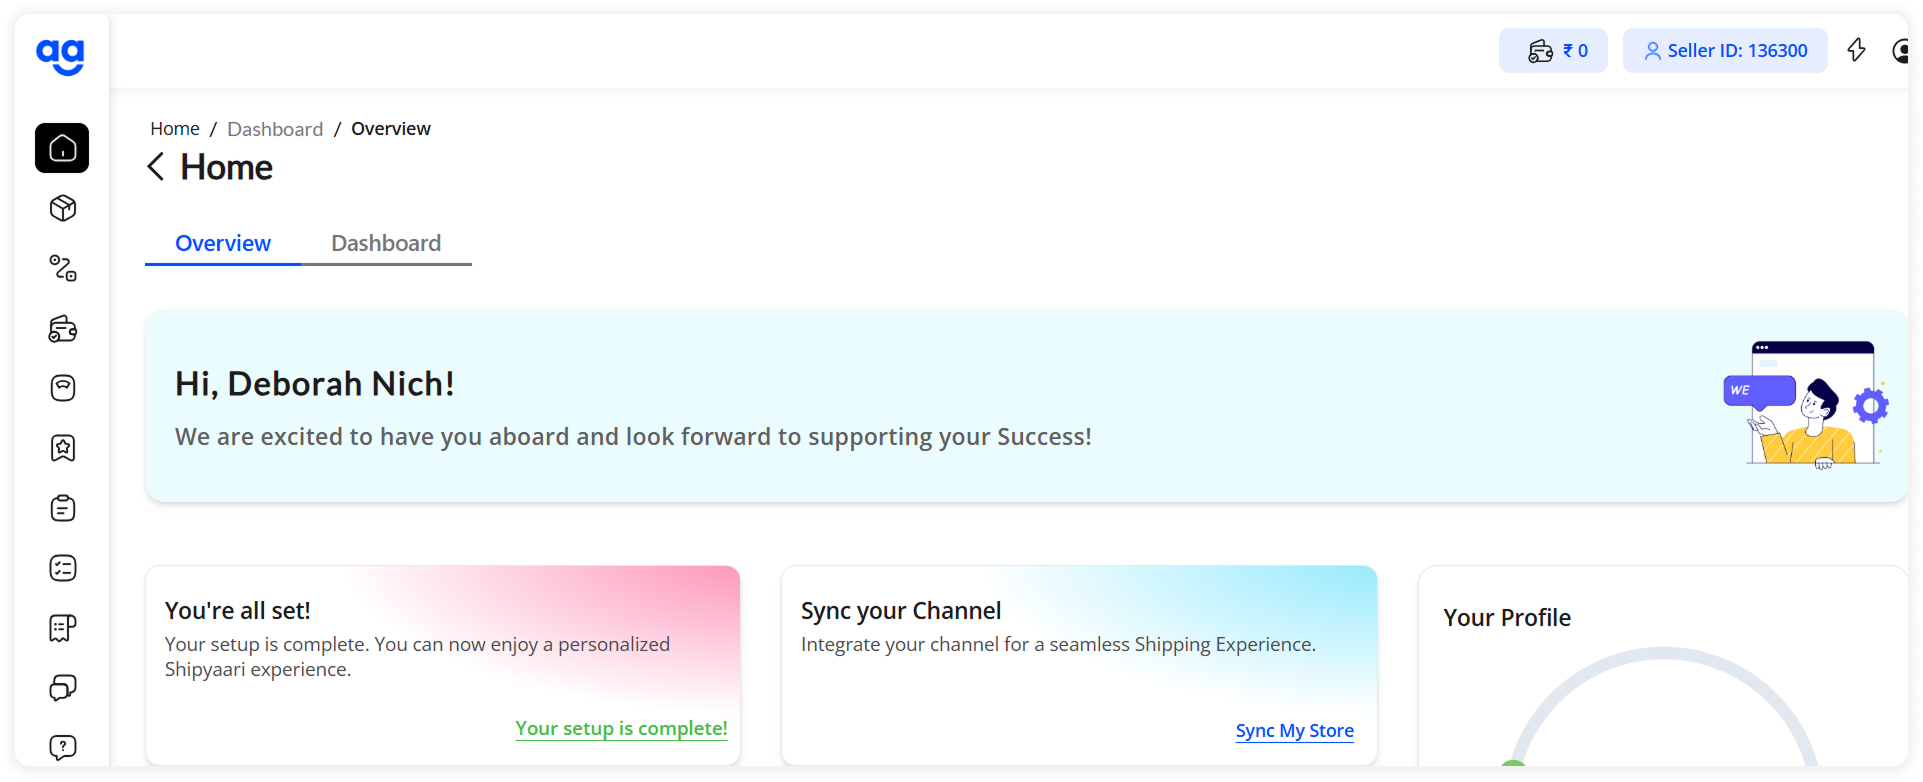
How to Enable Shipyaari Plugin in ZenBasket?
To activate Shipyaari, from the ZenBasket admin, go to the Plugins menu and Select the Plugin List sub-menu. In the Plugins List, choose Shipping from the list of plugins, and then select Shipyaari or search for Shipyaari in the search bar. Click on the Activate button enter the registered shipyaari mail ID, enter avn key and click on the Save.


How to View the Shipyaari Orders?
-
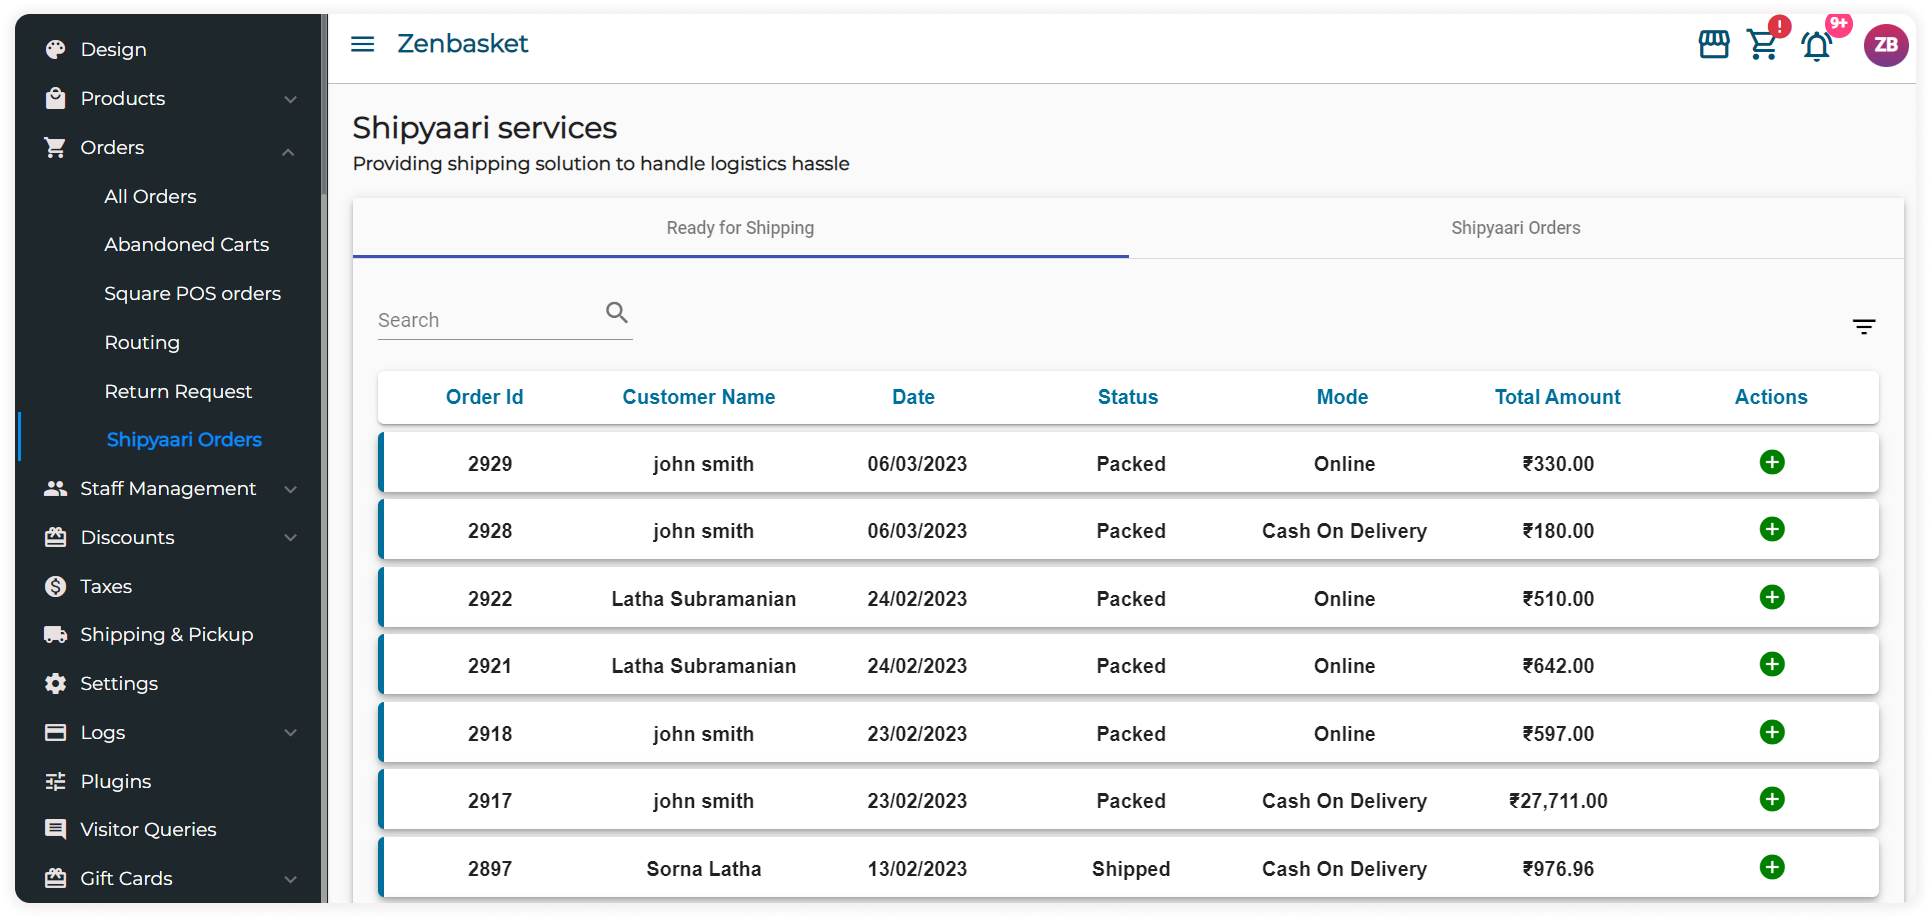
In the Orders menu, click on the Shipyaari Orders.
-
In the Ready for Shipping tab, a table contains all the packed orders.
-
Click on the Add symbol to add the shipping details.
-
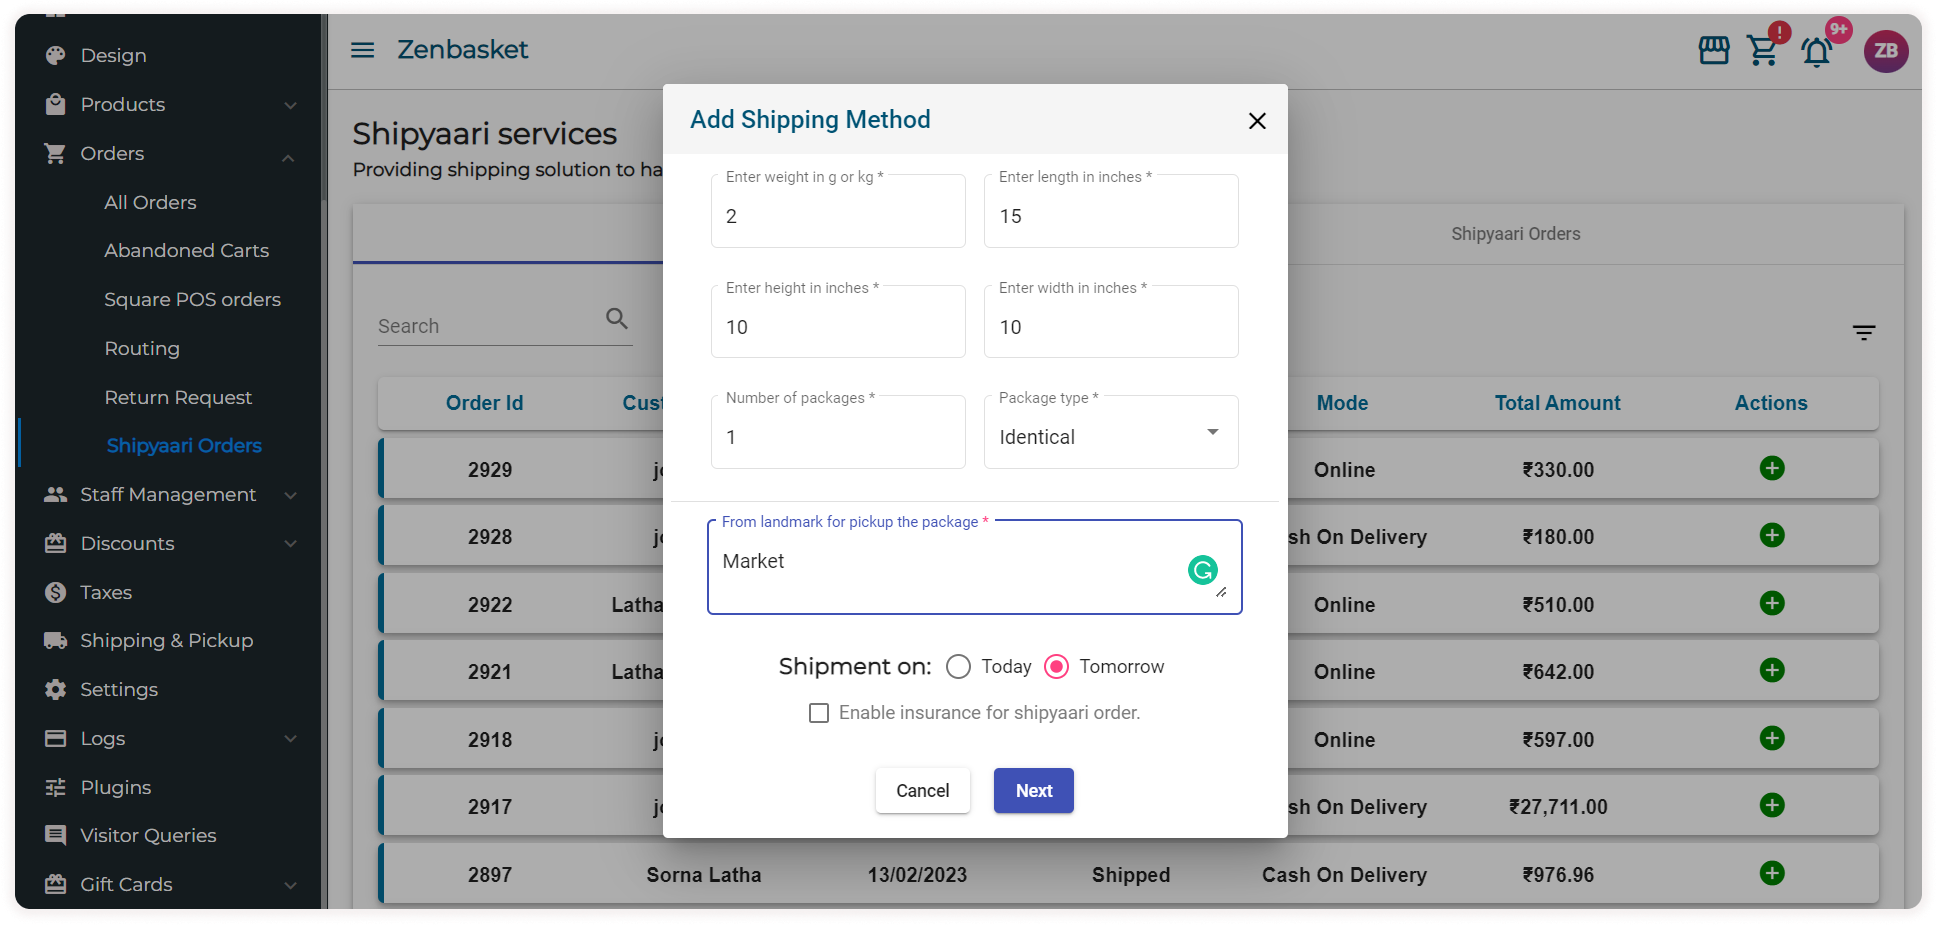
Enter the weight, length, width and height of the package. Then enter the number of packages and package type. Choose Identical if there are the same kind of products in the package or choose Different if there are different types of products in the package.
-
Mention the landmark from where the package has to be picked up.
-
Choose when the shipment has to be done. Click Next.
-
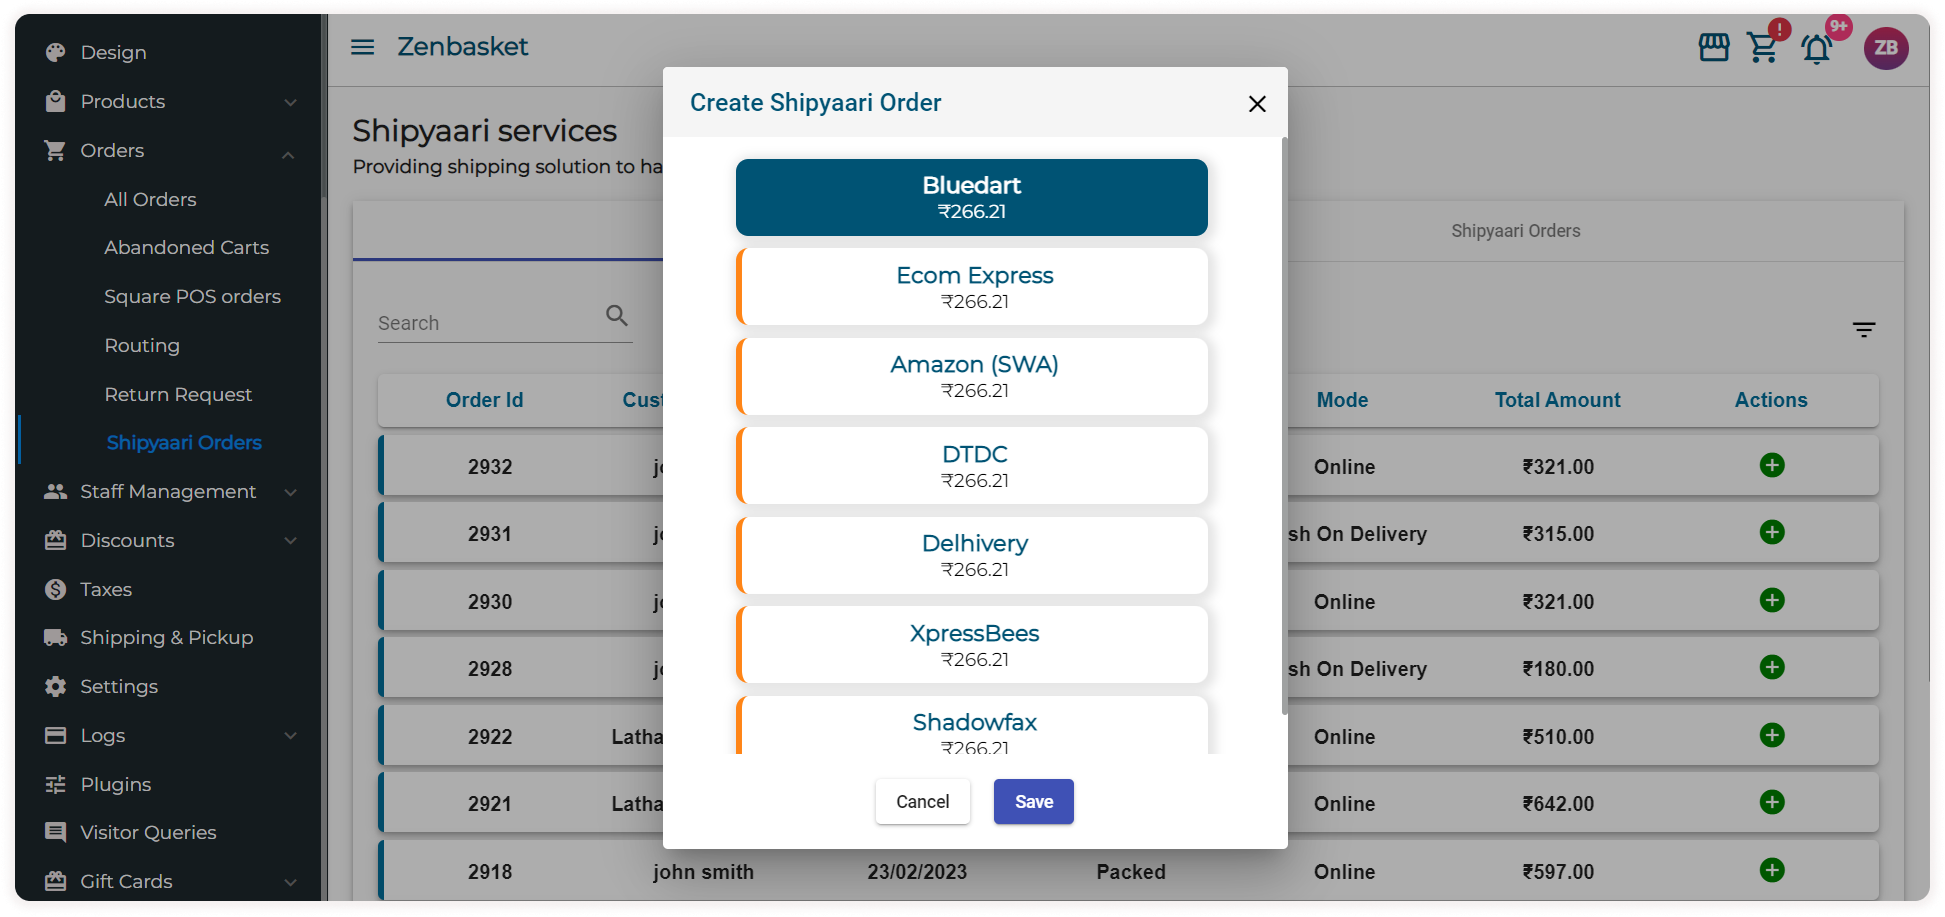
Choose the delivery partner from the list as per your business needs and click Save.
-
The order gets moved to the “Shipyaari Orders” tab.
-
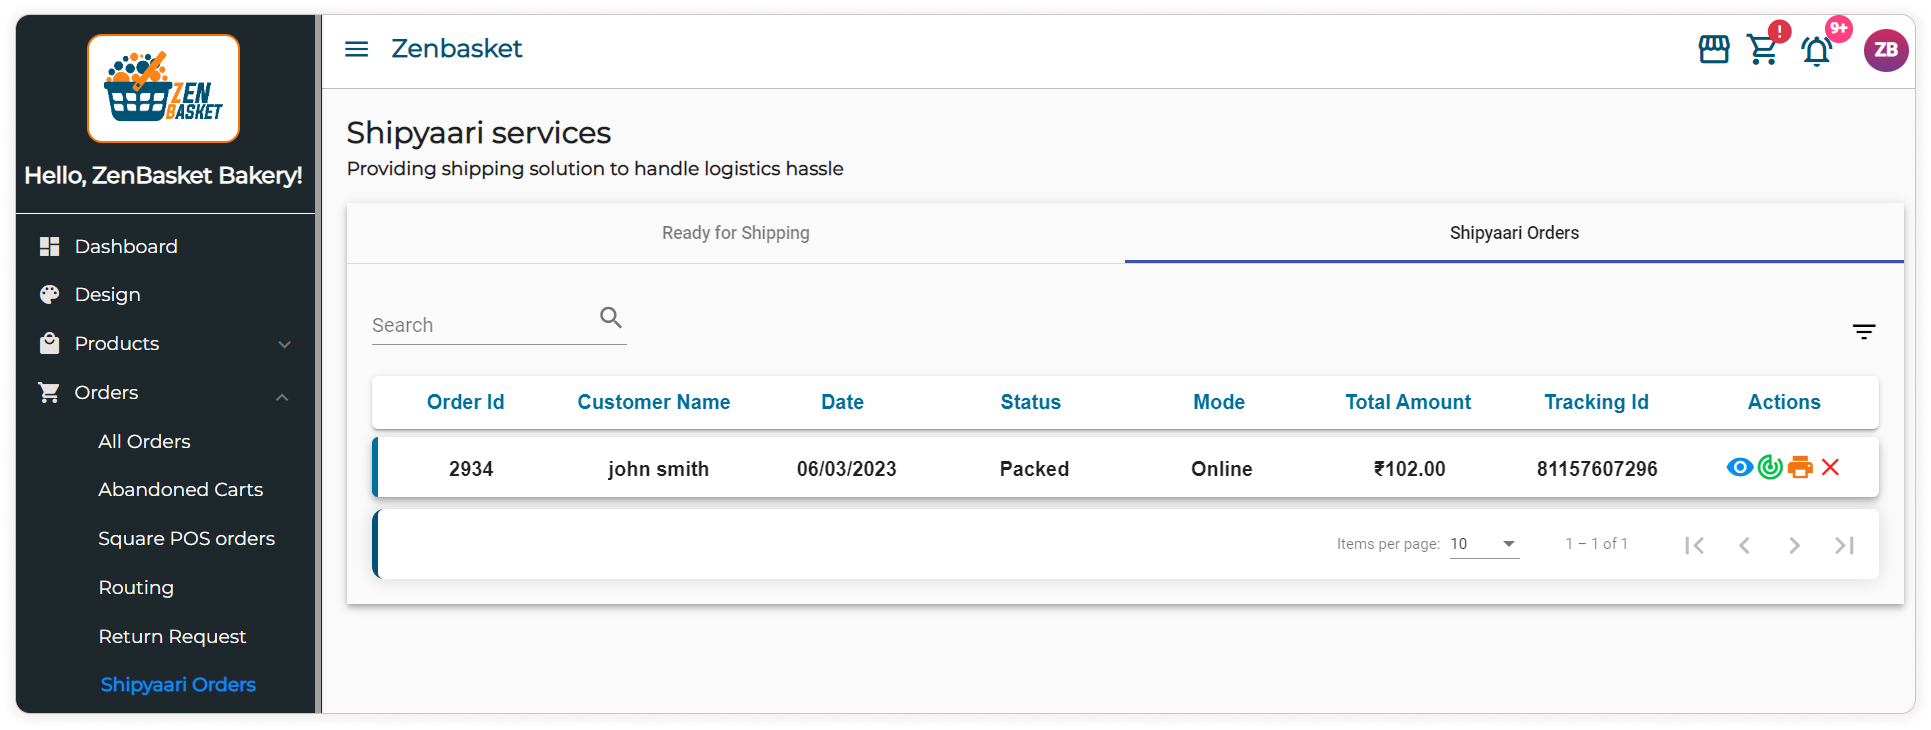
In the “Shipyaari Orders” tab, click on icons under action to carry out processes like Shipment Tracking, Shipment labeling or Canceling Shipment.
-
Click on the View icon to view the current status of the order.
-
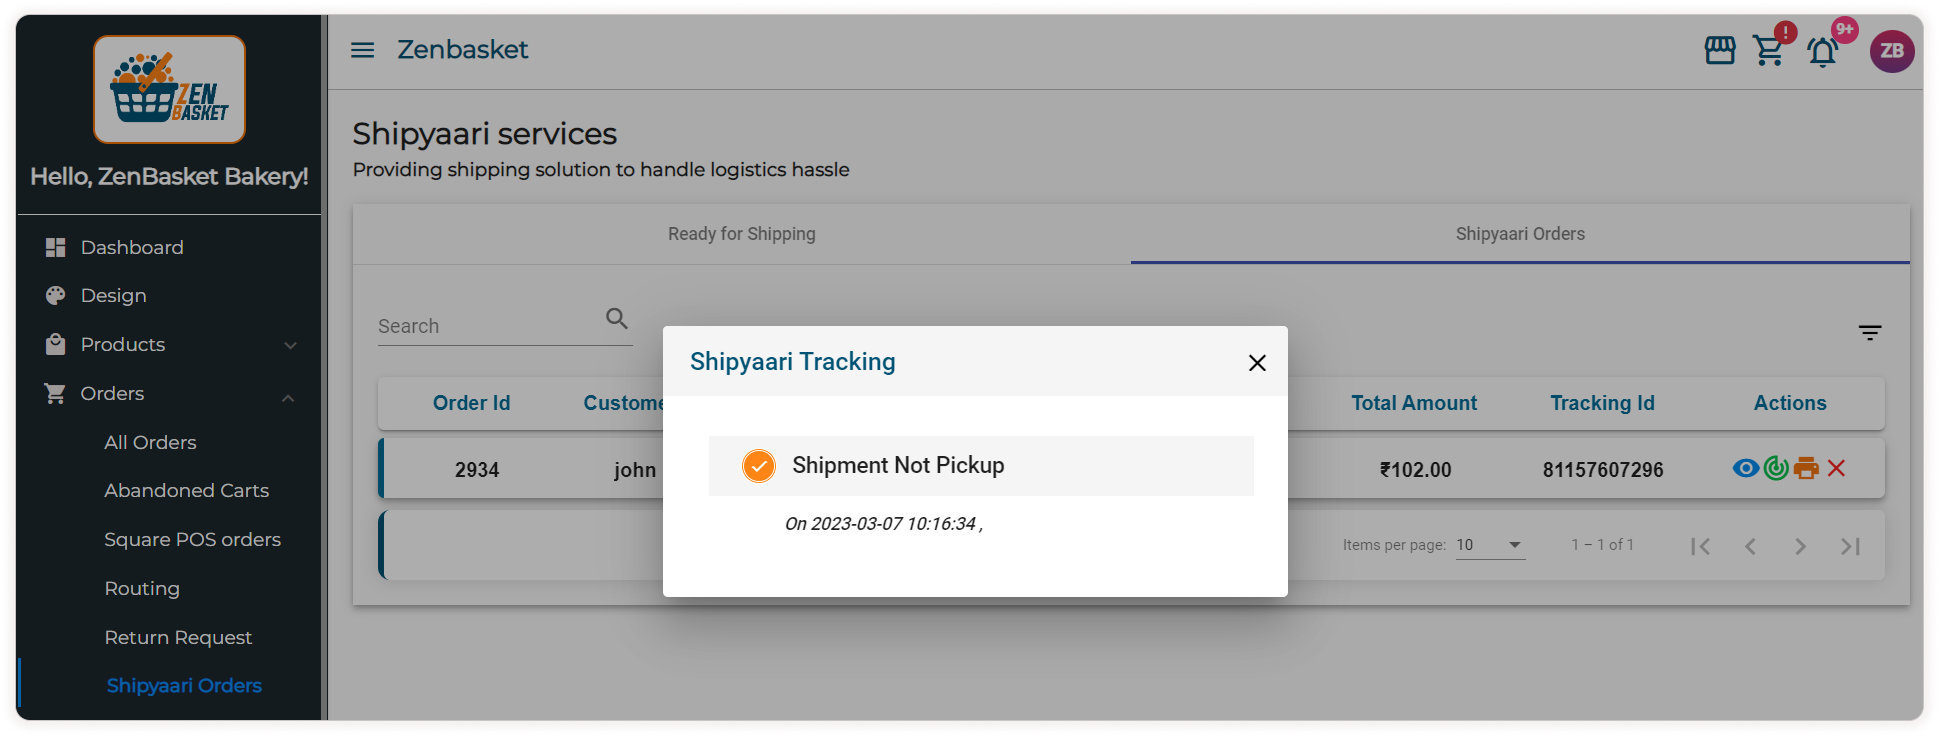
Click on the Tracking icon to track the order.
-
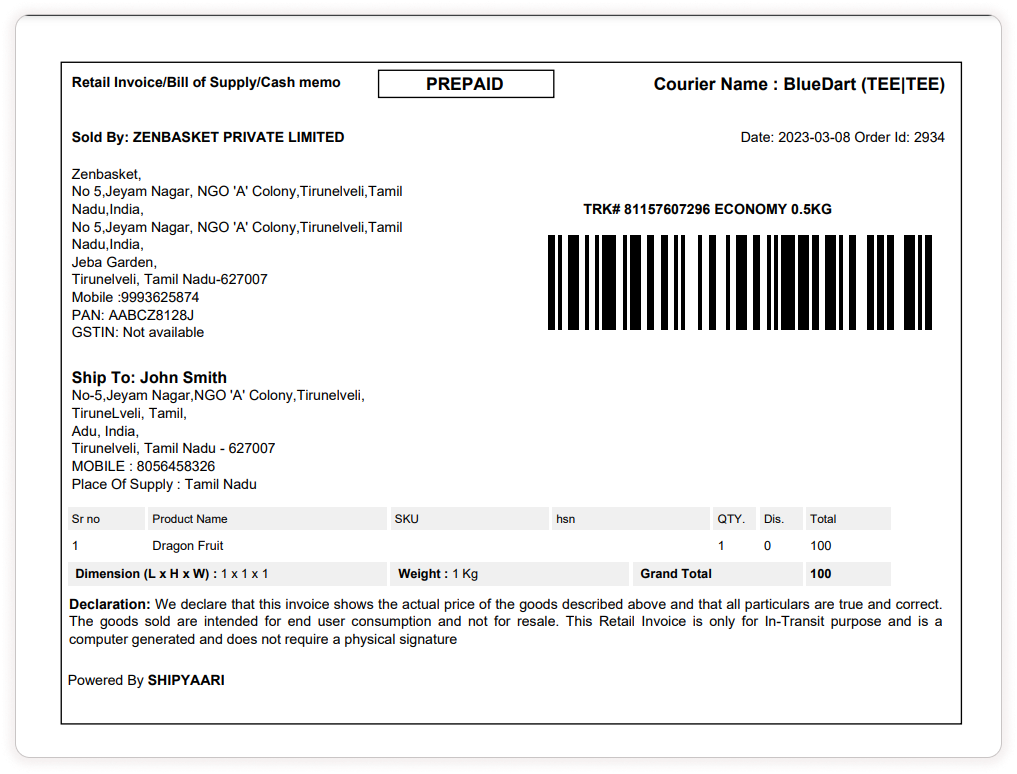
Click on the Print icon to print an invoice that consists of details like Seller Address, Shipping Address, Courier Name, Order Details, Dimensions of the package and subtotal. This can be used for labeling the package.
-
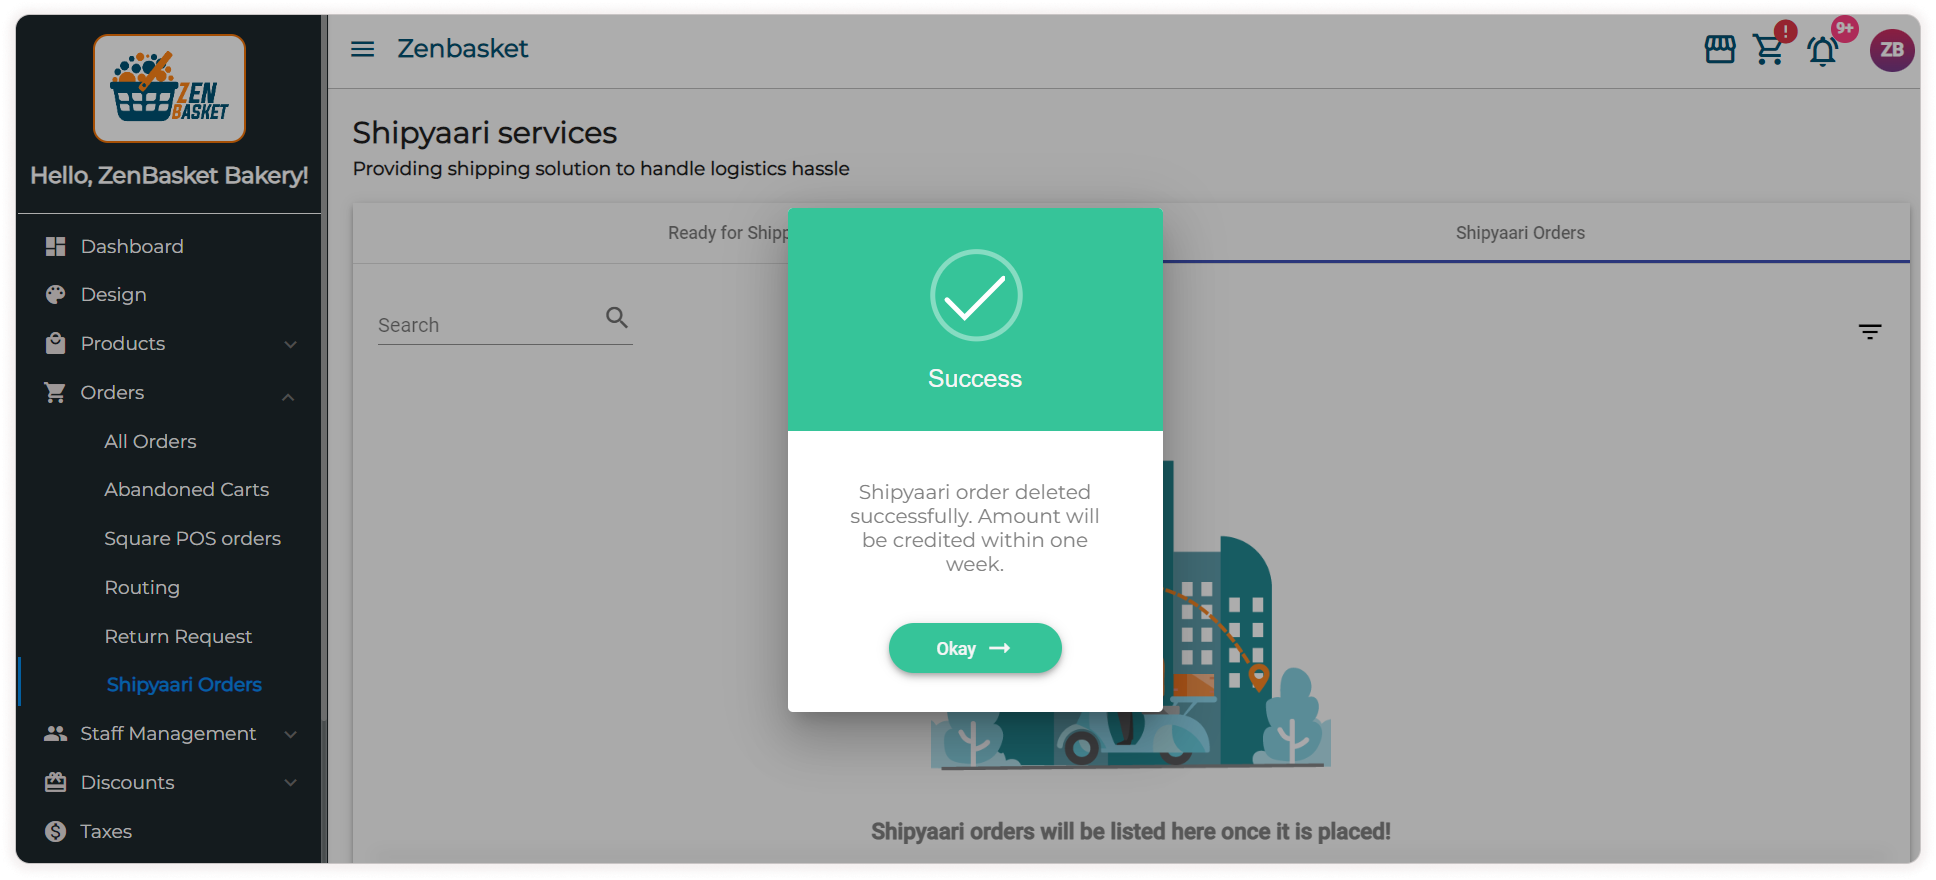
Finally click on the Cancel symbol if you want to cancel the order. Confirm the same in the dialog box.
-
A confirmation message stating successful cancellation will be displayed. The refund will be made within a week.
Video Tutorial
