
WhatsApp Marketing
WhatsApp can serve as a valuable tool for marketing by allowing businesses to send messages regarding new deals, offers, or discounts to potential customers.
How to do WhatsApp Marketing?
-
To make this feature available on your control panel, head to Plugins main menu and move to Plugins List sub menu. Find the WhatsApp Plugin under the Marketing menu and click the Activate button to enable the Whatsapp Plugin. Once activated, you’ll see the Settings icon.

-
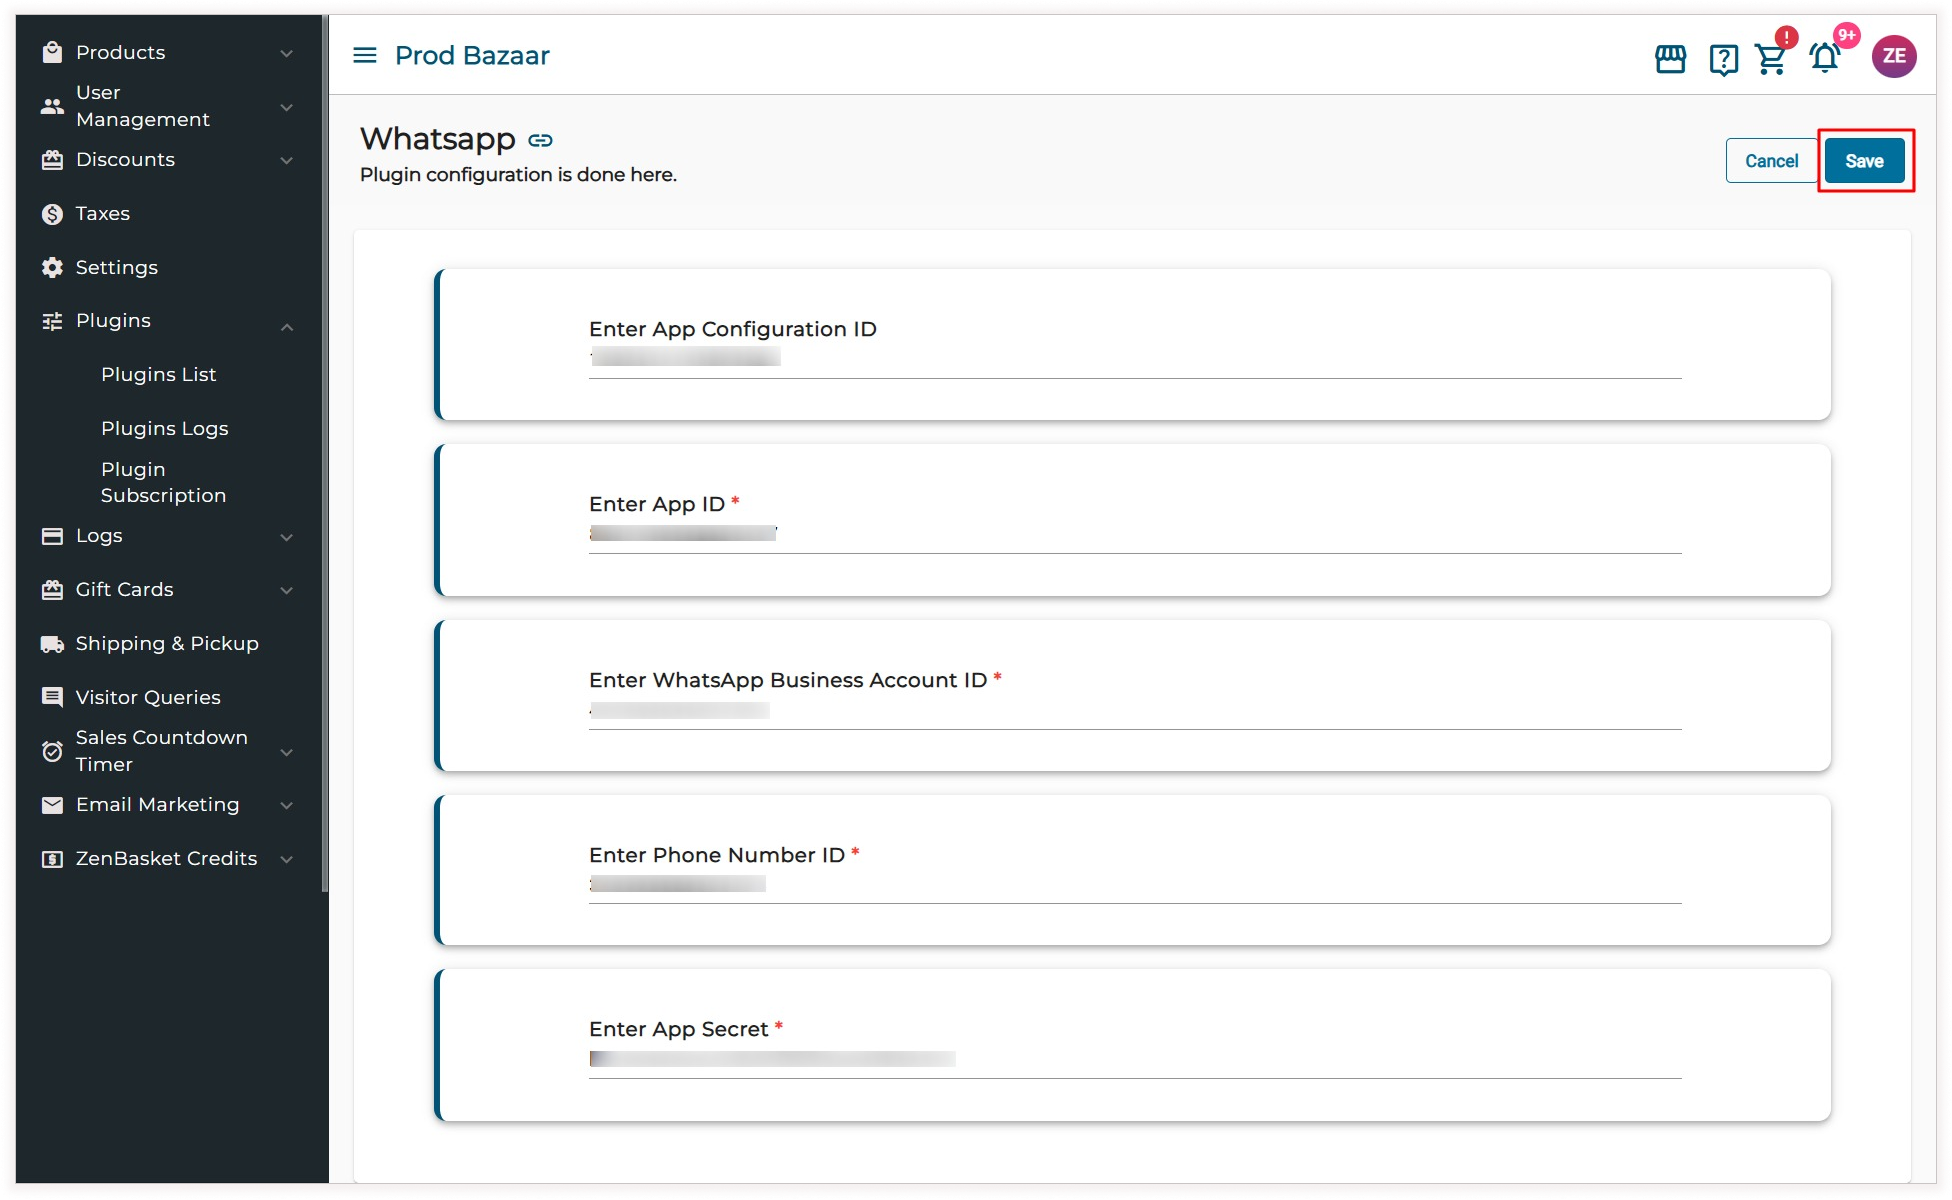
Click on this icon to access the configuration page. Input your access keys, click the Save button, and activate within your store.
Note: If you’ve previously set up an account with Whatsapp, you’ll have secret keys that you will need to use here.
-
Go to the WhatsApp Marketing menu and click on the Template submenu. Once you choose the Connect button, a successful login will be set up.

-
Here, if the account is linked, you will find the Template Name, Category, Status, and Actions displayed.
Note: If the Facebook account is not linked, a new tab will open. Enter your user ID and password to log into the account. The following page will be presented.

-
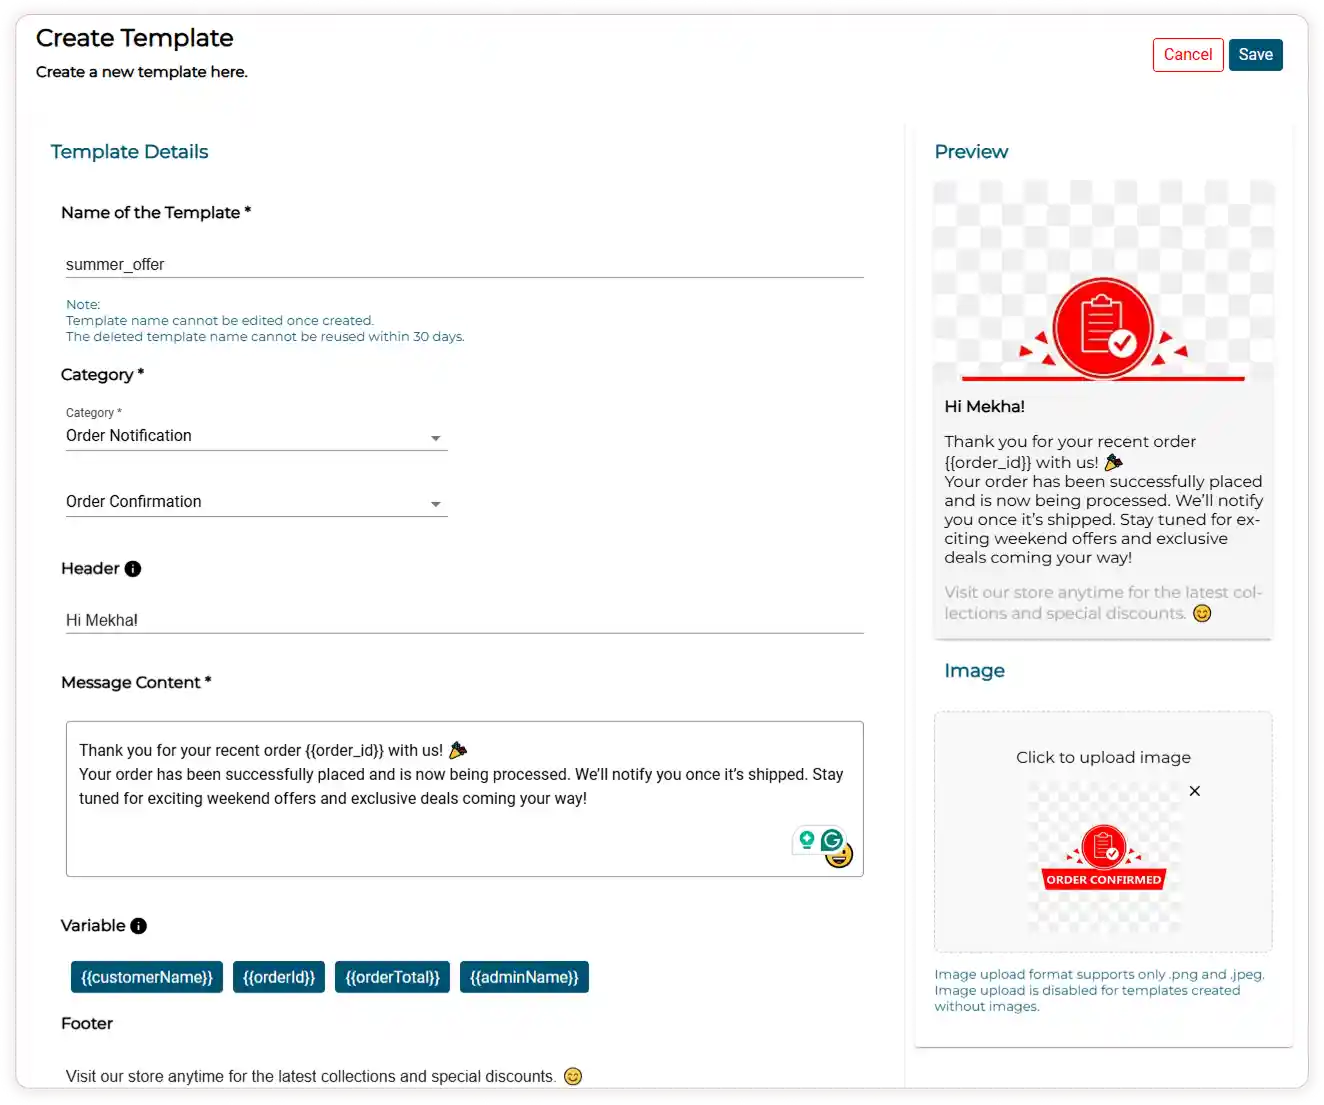
To create a new template, click the Create Template button, then enter the Template Name (Name accepts only lowercase and underscore), Category, and Message Content. The header and footer are optional.
Note: If you choose Order Notification as category, you have to choose the Order templates also
-
You can Upload image that you want to share with your customer and You can check the template of you message
-
Then click Save. The template will be saved successfully.
-
To Edit the Template . click the edit icon
Note: You can only edit the header, message content, variables and footer
-
Click Update to update the edited changes.
-
The template’s status can be either approved or rejected.
-
To delete a message, click the delete icon under the Actions tab.

-
The Send Message icon becomes visible only after the template is approved. Click the Send Message icon to send messages to All or Specific Contacts, then click the Send Message button.

-
Go to the Message Logs submenu to view the sent messages. The message log displays a list such as Template Name, Customer Name, Mobile Number, Category, Send Date, Time, Status, and Actions.
-
You can search for a particular message by entering the Template Name in the Search Bar. You can also filter these messages using filters like Message Sent On, Message Status and Category.