
Digital Products (Adding & Editing)
Digital Products are non-physical items or content that can be electronically delivered using digital methods. In addition to physical products, you have the option to sell digital goods on your ZenBasket store. These products can be ebooks, software, digital art, music, audio, etc.
How do you Enable Digital Products in Your Store?
-
Go to Plugins in the main menu and search for the Digital Products.
-
Purchase the Digital Products and activate it.

-
Click the Settings icon and enable the given fields to display those on the website.
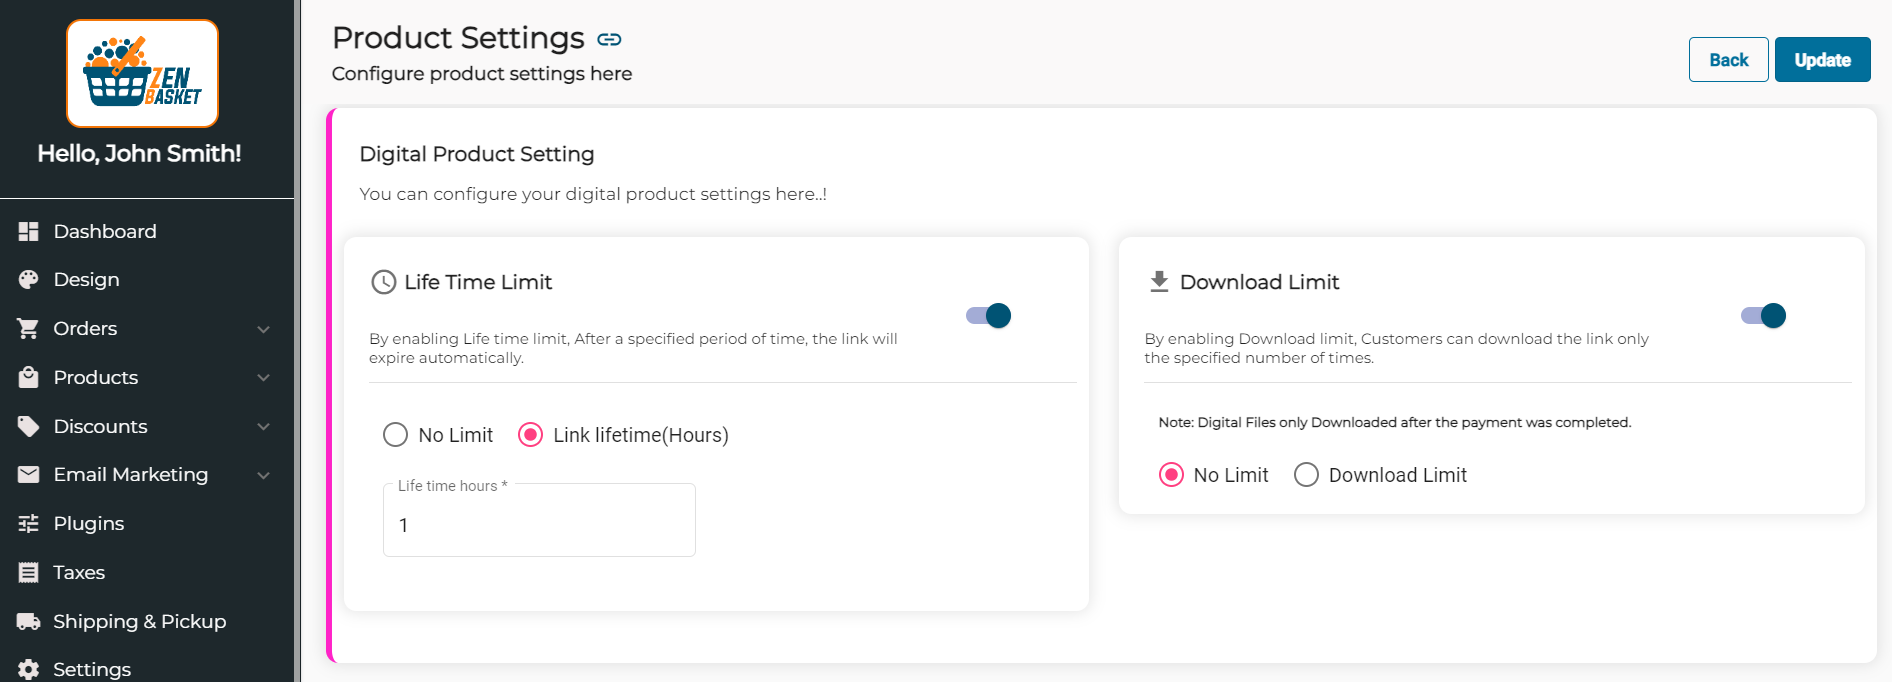
How to Set Life Time Limit and Download Limit for File-Only Digital Products?
There are two ways in which you can prevent customers from sharing download links with others.
-
Set a Life Time Limit — By enabling the lifetime limit, the link will automatically expire after a specified period of time.
-
Set Download Limit — By enabling the download limit, customers can only download the link a specified number of times.
-
To set Life Time Limit and Download Limit for digital products:
-
Go to Settings main menu and choose Product Settings.

-
On the Product Settings page, under Digital Product Setting , enable the Life Time Limit toggle and select No Limit or set a Link lifetime.
-
To establish a Download Limit, activate the toggle. You can select either No Limit or specify a Download Limit.
-
Click the Update button to save these settings.
-
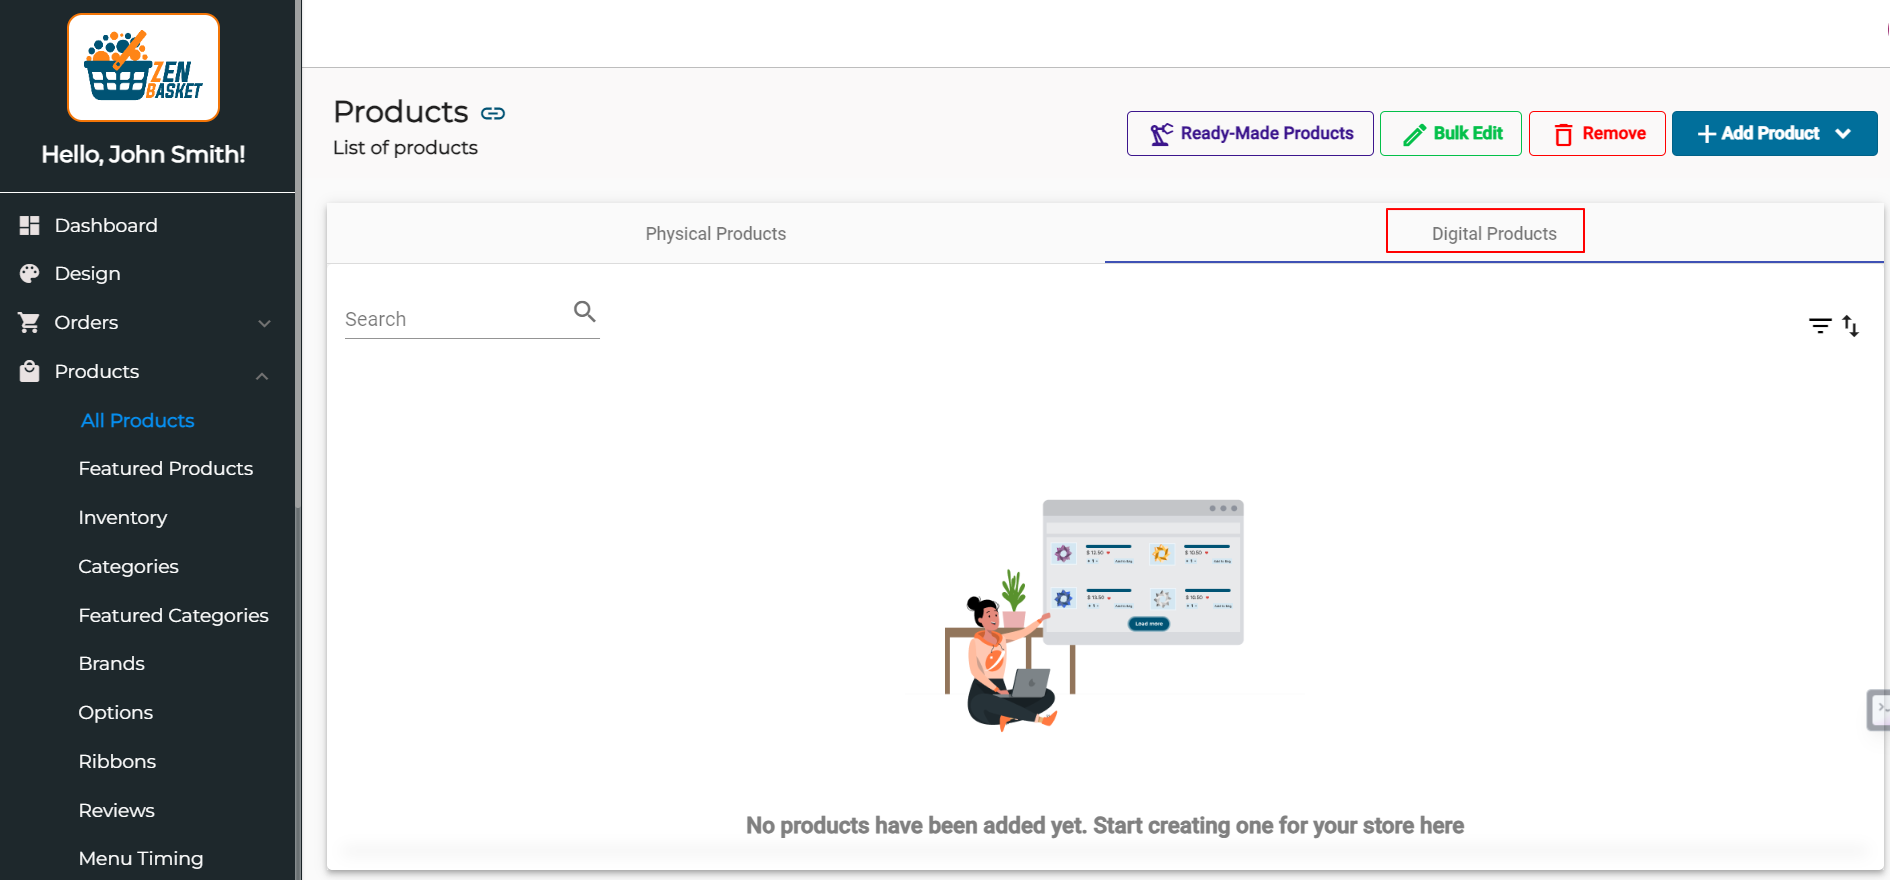
After completing all of these, go to All Products page. A new tab for Digital Products will be there alongside the existing Physical Products.
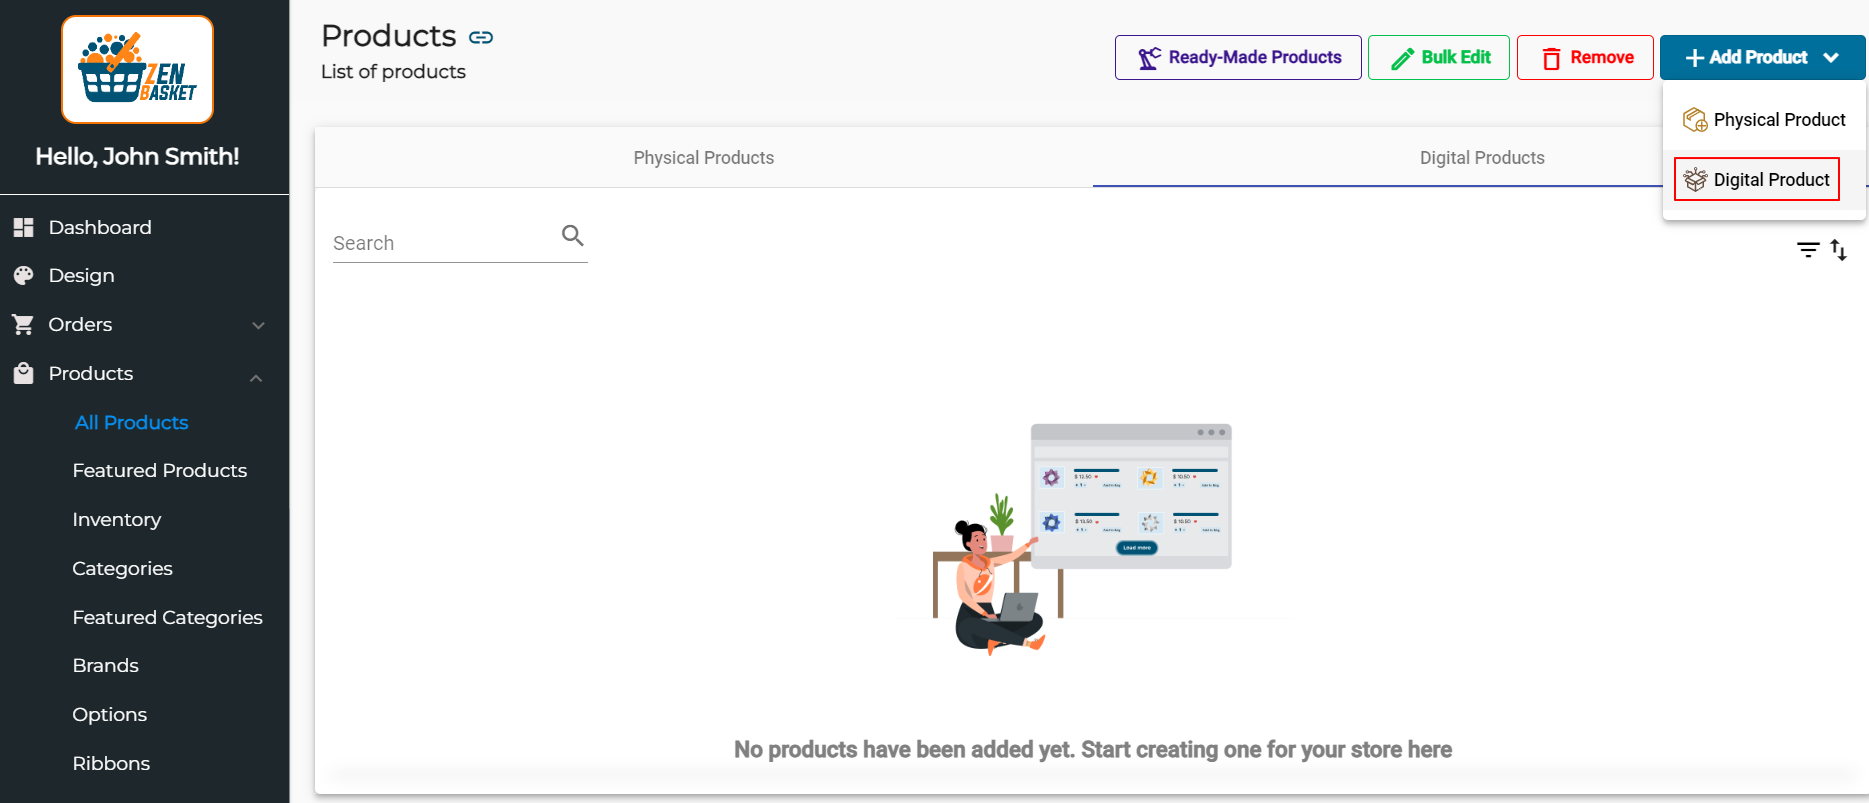
How to Add Digital Products to Your Store?
-
Click on the +Add Products button on the left. Then choose Digital Products from the dropdown menu.
-
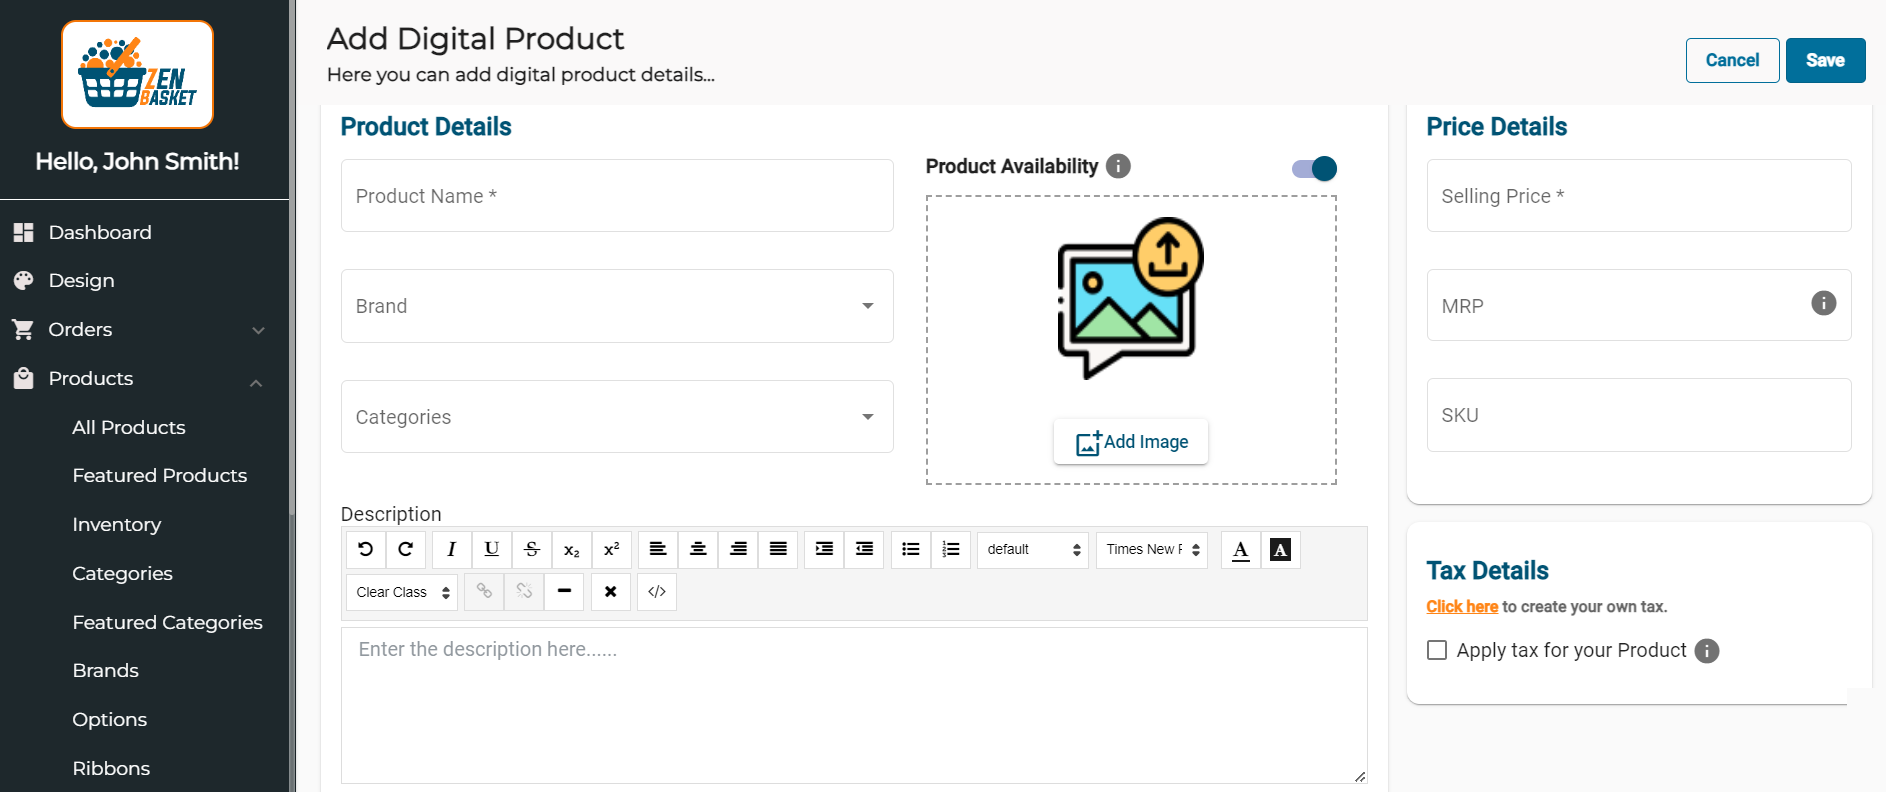
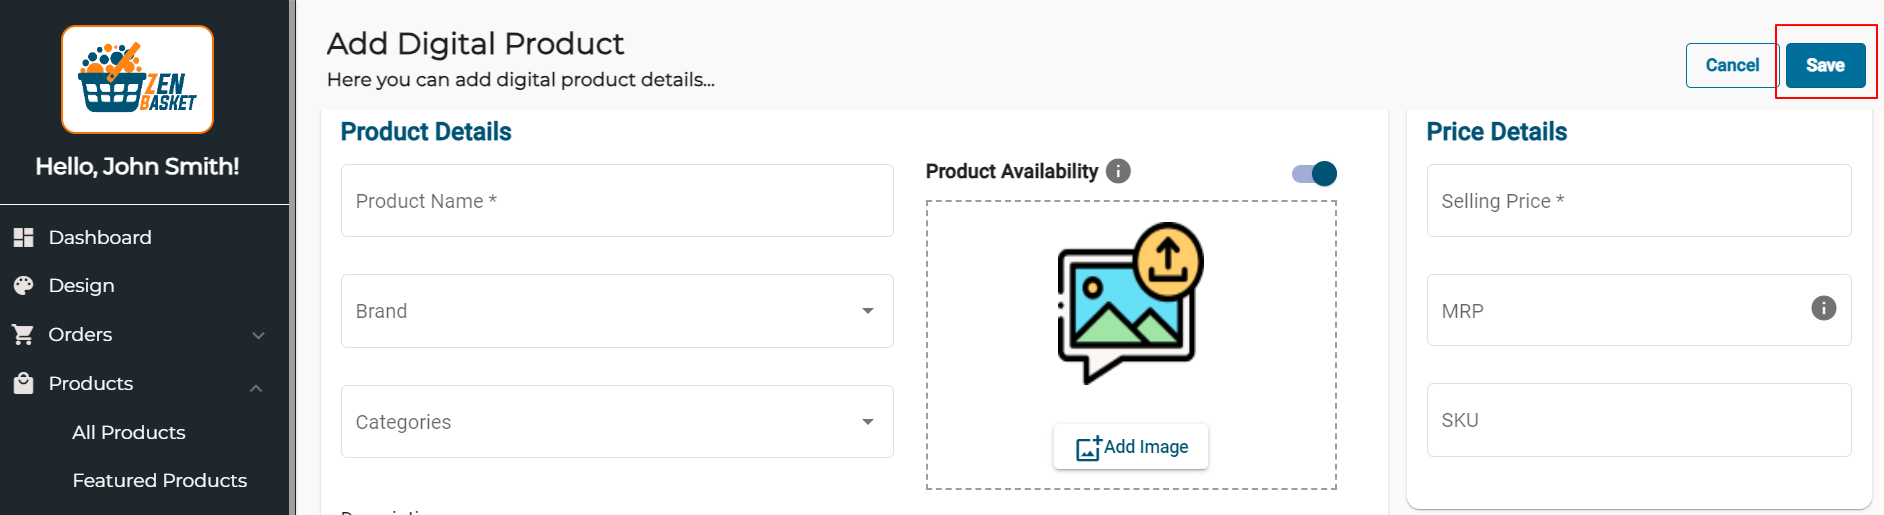
On clicking Digital Products, the Add Digital Product page will appear.
-
Under Product Details, enter the Product Name.
-
Select a Brand from the list to link the product to.
-
Check a box from the Category options.
-
To add an image for your product, click the +Add Image button. Then, click the Browse Files button in the dialog box.
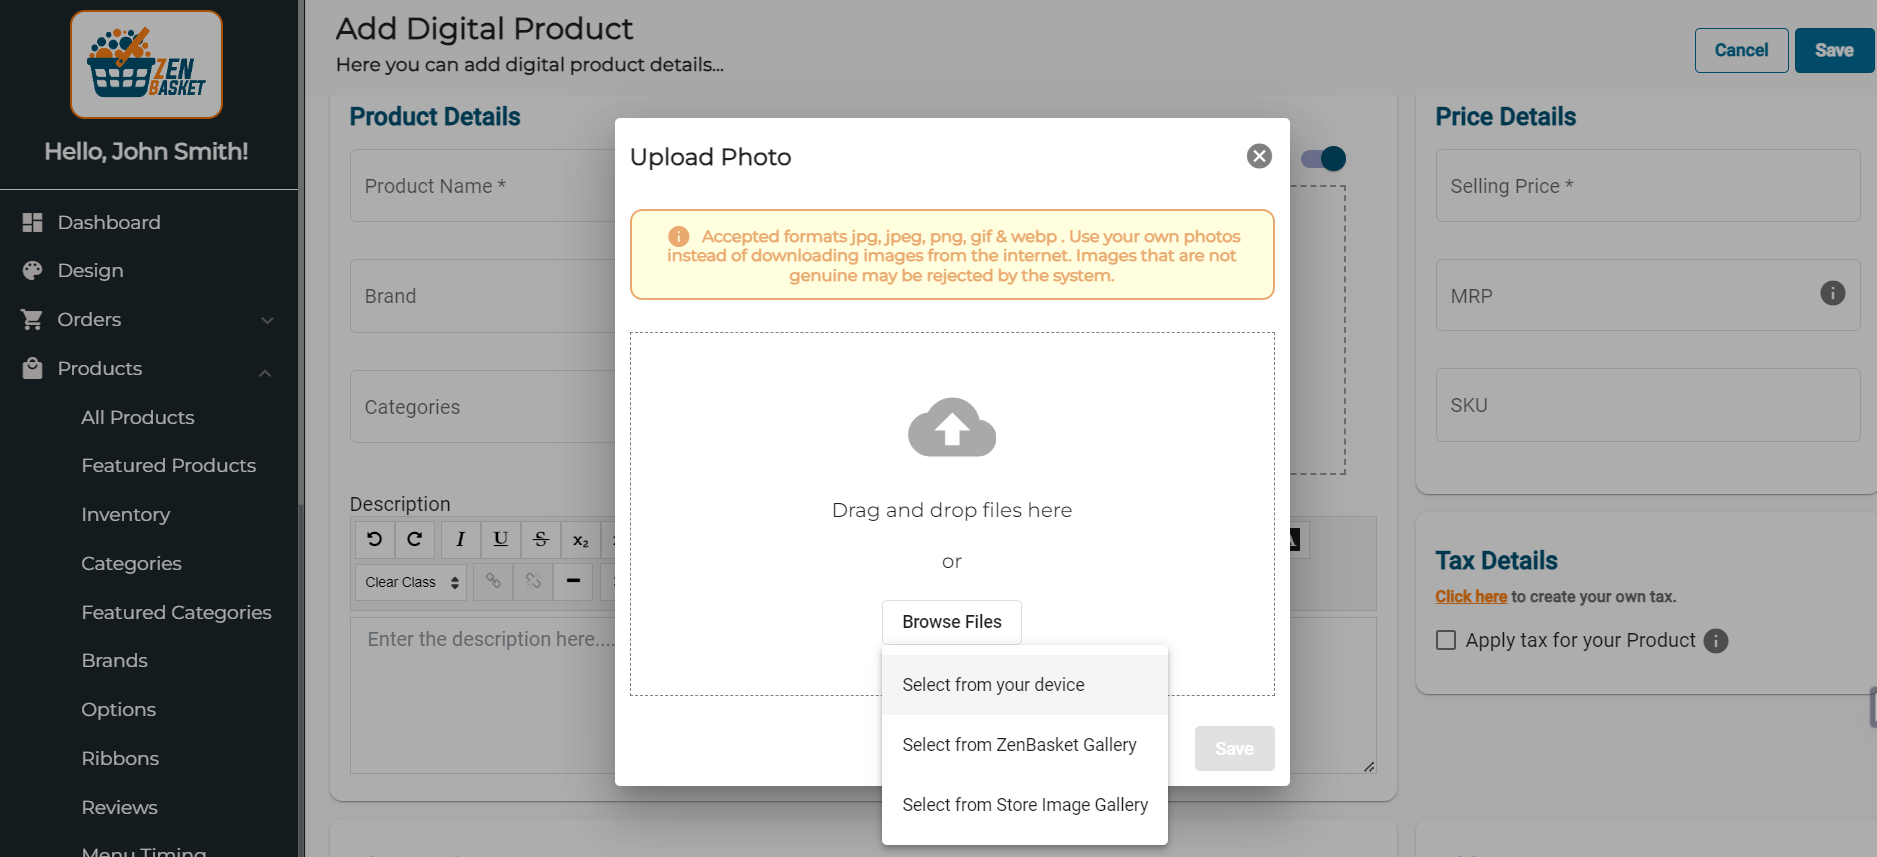
-
You can upload it in three different ways. Select a picture from your device, choose an image from the ZenBasket gallery or pick a picture from your Store image gallery.
Note: Accepted formats: jpg, jpeg, png, gif and webp.
-
After uploading the image, click on the Save button.
-
The Product Availability toggle will be enabled by default, ensuring the product is visible on your storefront. You can also schedule a time to display the product on the storefront
Digital products are typically uploaded as either a file, a key or a combination of both a file and a key.
-
To upload products as files, just click the Browse Files button under File Details and upload your desired file from your device. Click the Upload button to save the file.
-
Under License Keys, select the checkbox for specifying license keys for digital products accompanied by access codes or keys.
-
Enter the provided Access Code into the designated input field.
-
If you have multiple access codes to add, click the Add button after entering each access code.
Note: Each access code can only be used once, ensuring unique ownership for customers and requiring new codes for subsequent purchases of the same product.
-
In the Price Details section, enter information such as the selling price, MRP and SKU.
-
Choose the desired locations from the list to specify product availability.
-
If the location you’re interested in isn’t listed, you can effortlessly add a new location. Just click on the provided link labeled Click here.
-
To include a ribbon on your product, click the Add Ribbon button.
-
Alternatively, you can generate a custom ribbon by clicking on the Click here link that directs you to the ribbons page.
-
If you want to add product tags, simply enter tags separated by commas.
-
Check the box under the Tax Details section if the product is subject to applicable taxes.
Note: You can Click here to navigate to the taxes page, where you can create your own tax.

-
Click on the Save button to successfully add the product to your store.
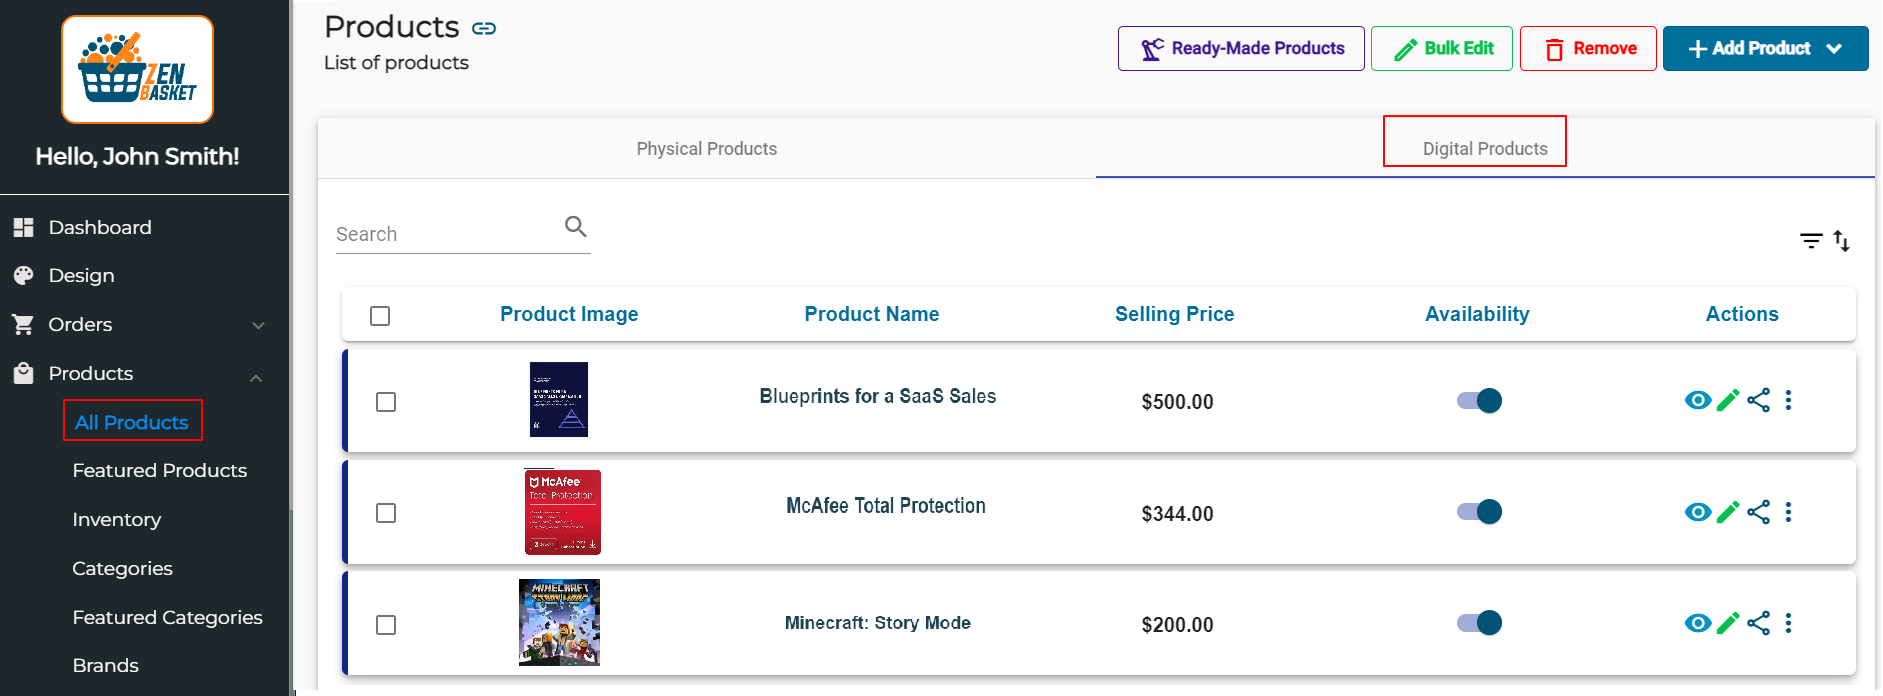
How to Edit Digital Products in Your Store?
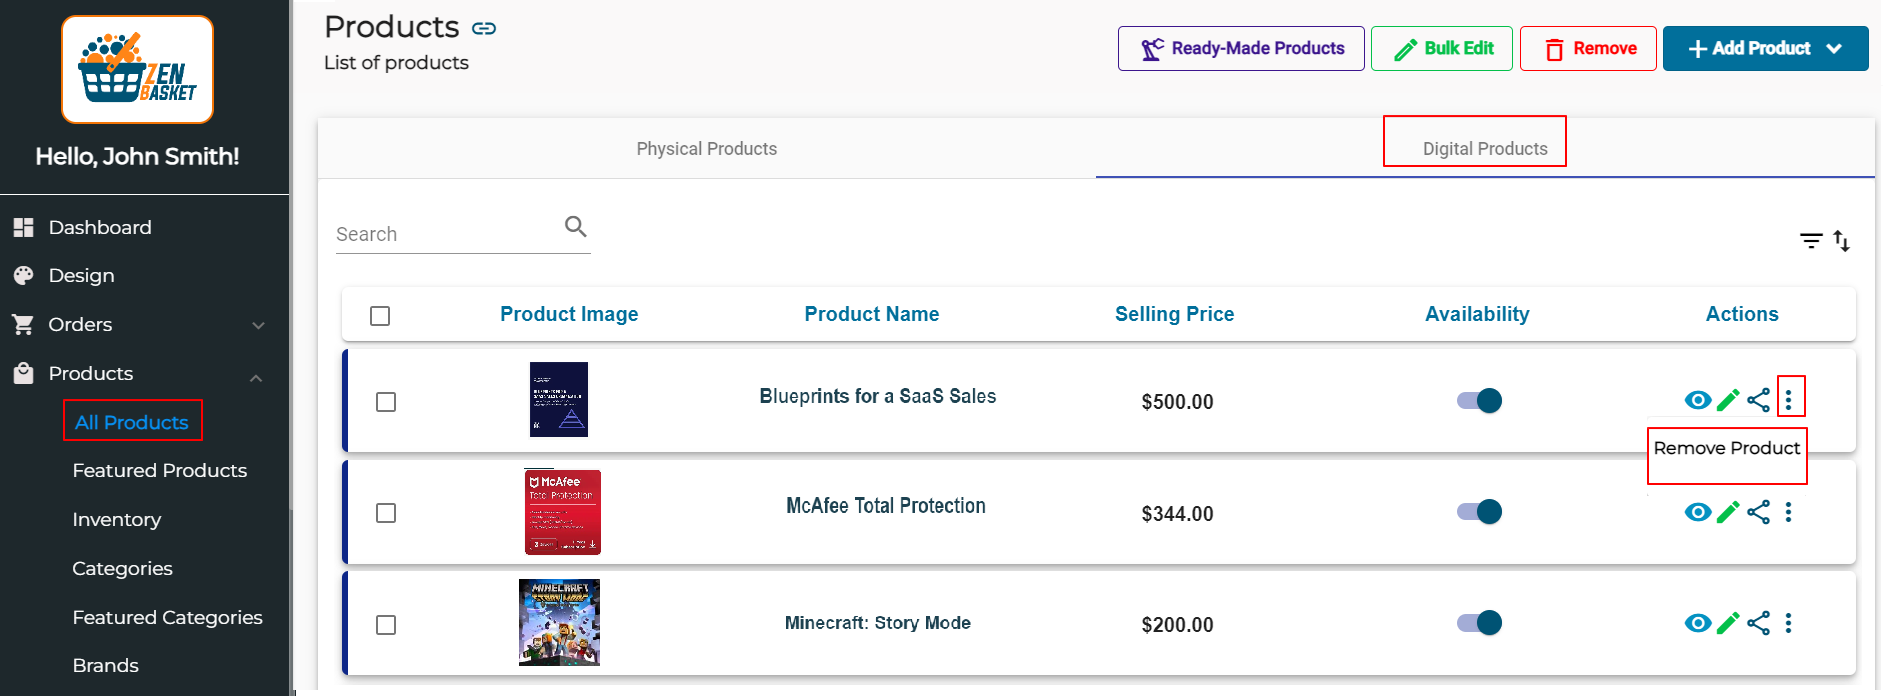
Once you’ve successfully added the digital products, you’ll notice that your products are now listed within the Digital Products tab.
-
To make edits to a specific product, click on the View icon associated with that product.
-
You will be directed to the product page.
-
Make the required changes to the product details.
-
Once you have made the desired adjustments, click on the Update button.
-
Your changes will be saved and applied to the product.

Quick Edit
To quickly edit the product,
-
Click on the Quick Edit icon associated with that product.
-
You’ll be able to make quick modifications to certain details, including Product Name, Category, Selling Price and MRP.
-
Once you have completed the edits, click on the Update button to save the changes you have made.

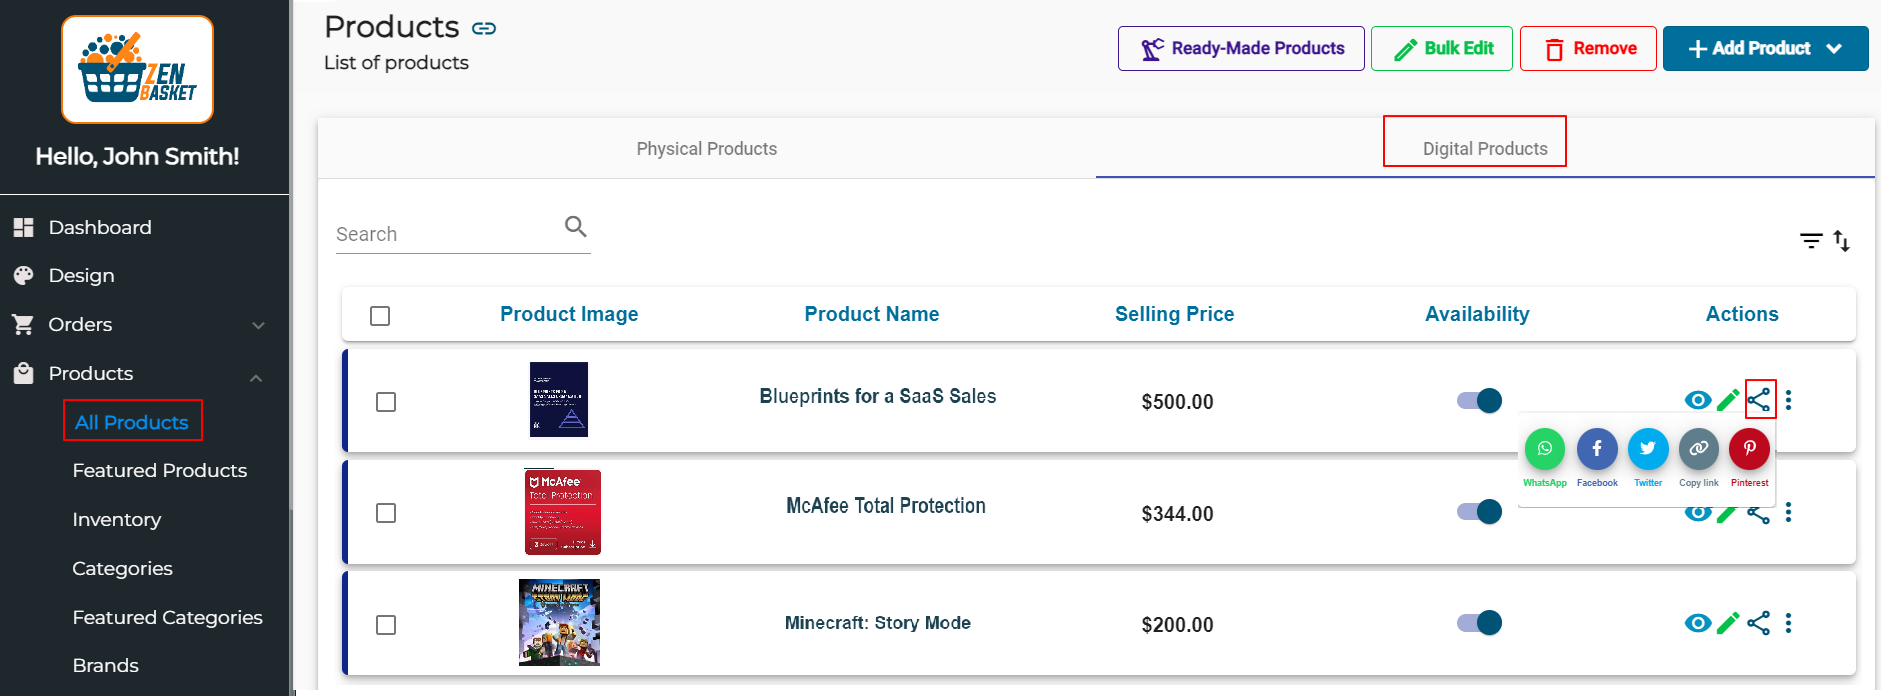
To share your product on different social media platforms, click on the Share icon.
To remove or add related products to a specific product, click on the More Action icon associated with that product.
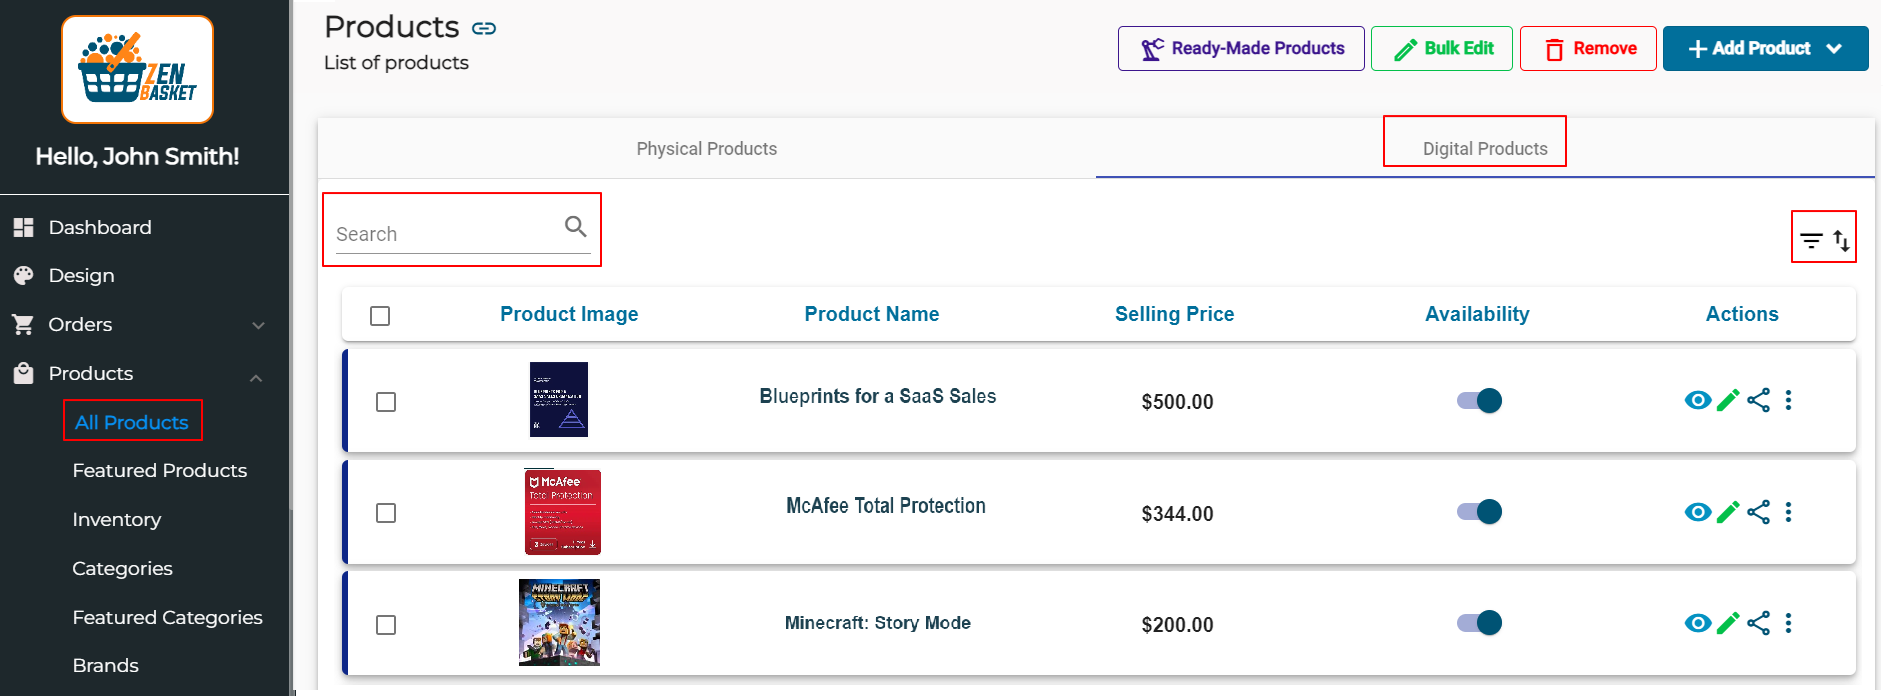
Sort Products
The products can be sorted based on the product’s name in alphabetical order or in reverse alphabetical order. Sort the products based on the earliest or most recently created. You can also sort them based on recently updated first or recently updated last.
Filter Products
You have the ability to filter products by categories and availability.
Search
You can easily search for a specific product by using the search option.
Video Tutorial