Facebook Integration
The Facebook integration plugin seamlessly integrates your online store with Facebook, enabling product showcasing and sales.
Below are the Steps to Integrate Facebook with Your Store:
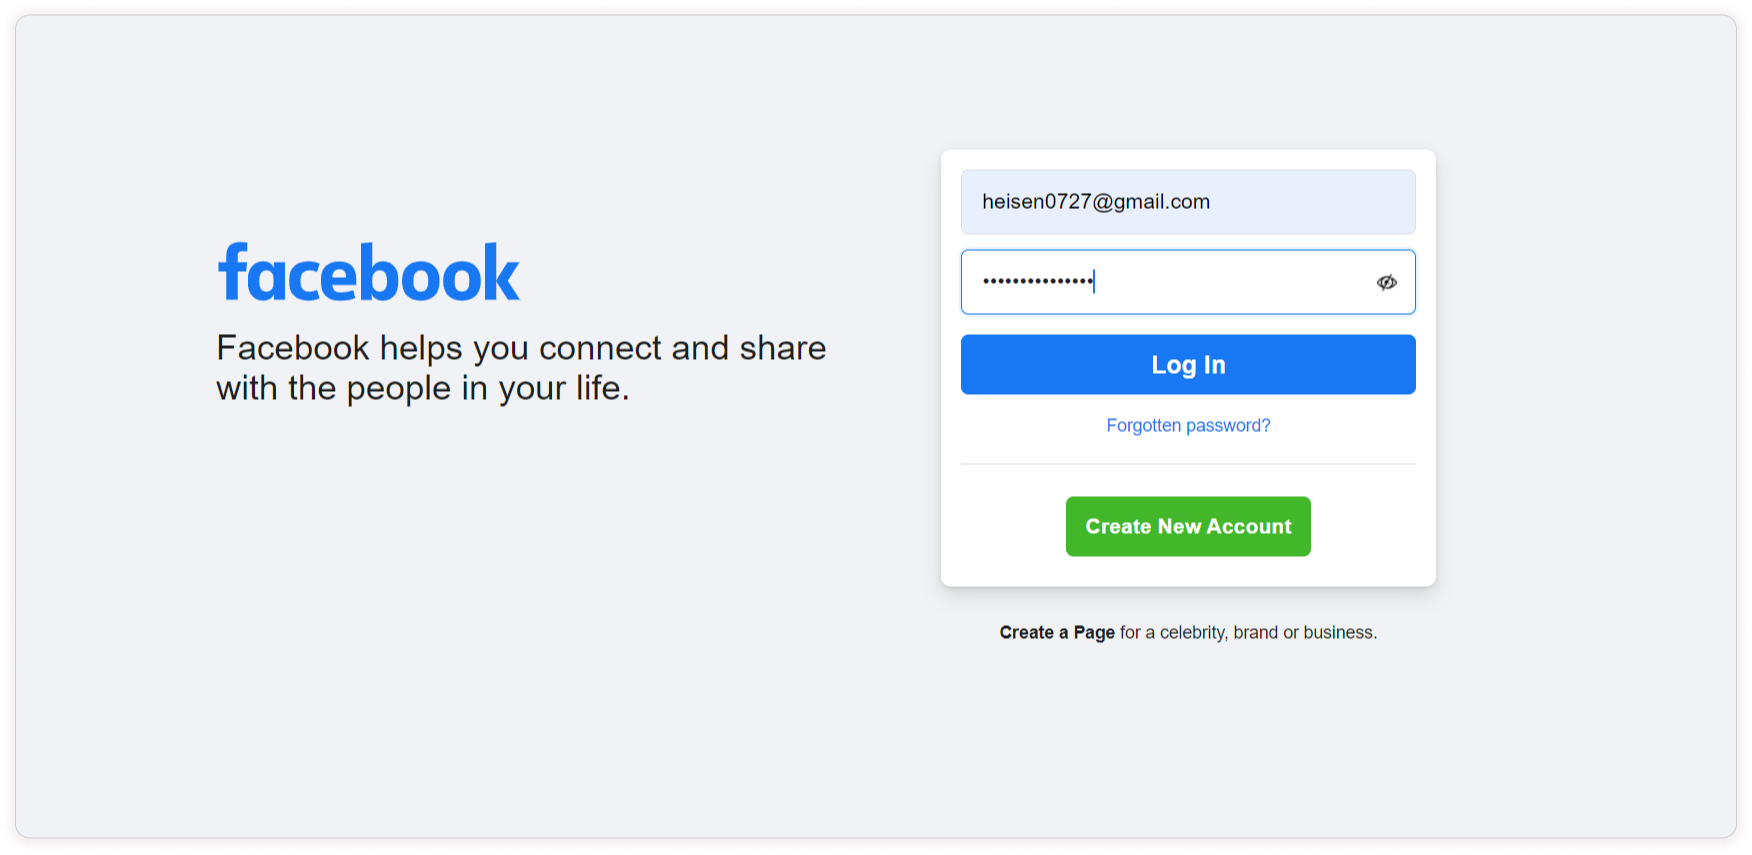
Step 1: If you already have a Facebook account, log in using your existing account, else you should sign up for a new account and then log in using those credentials.
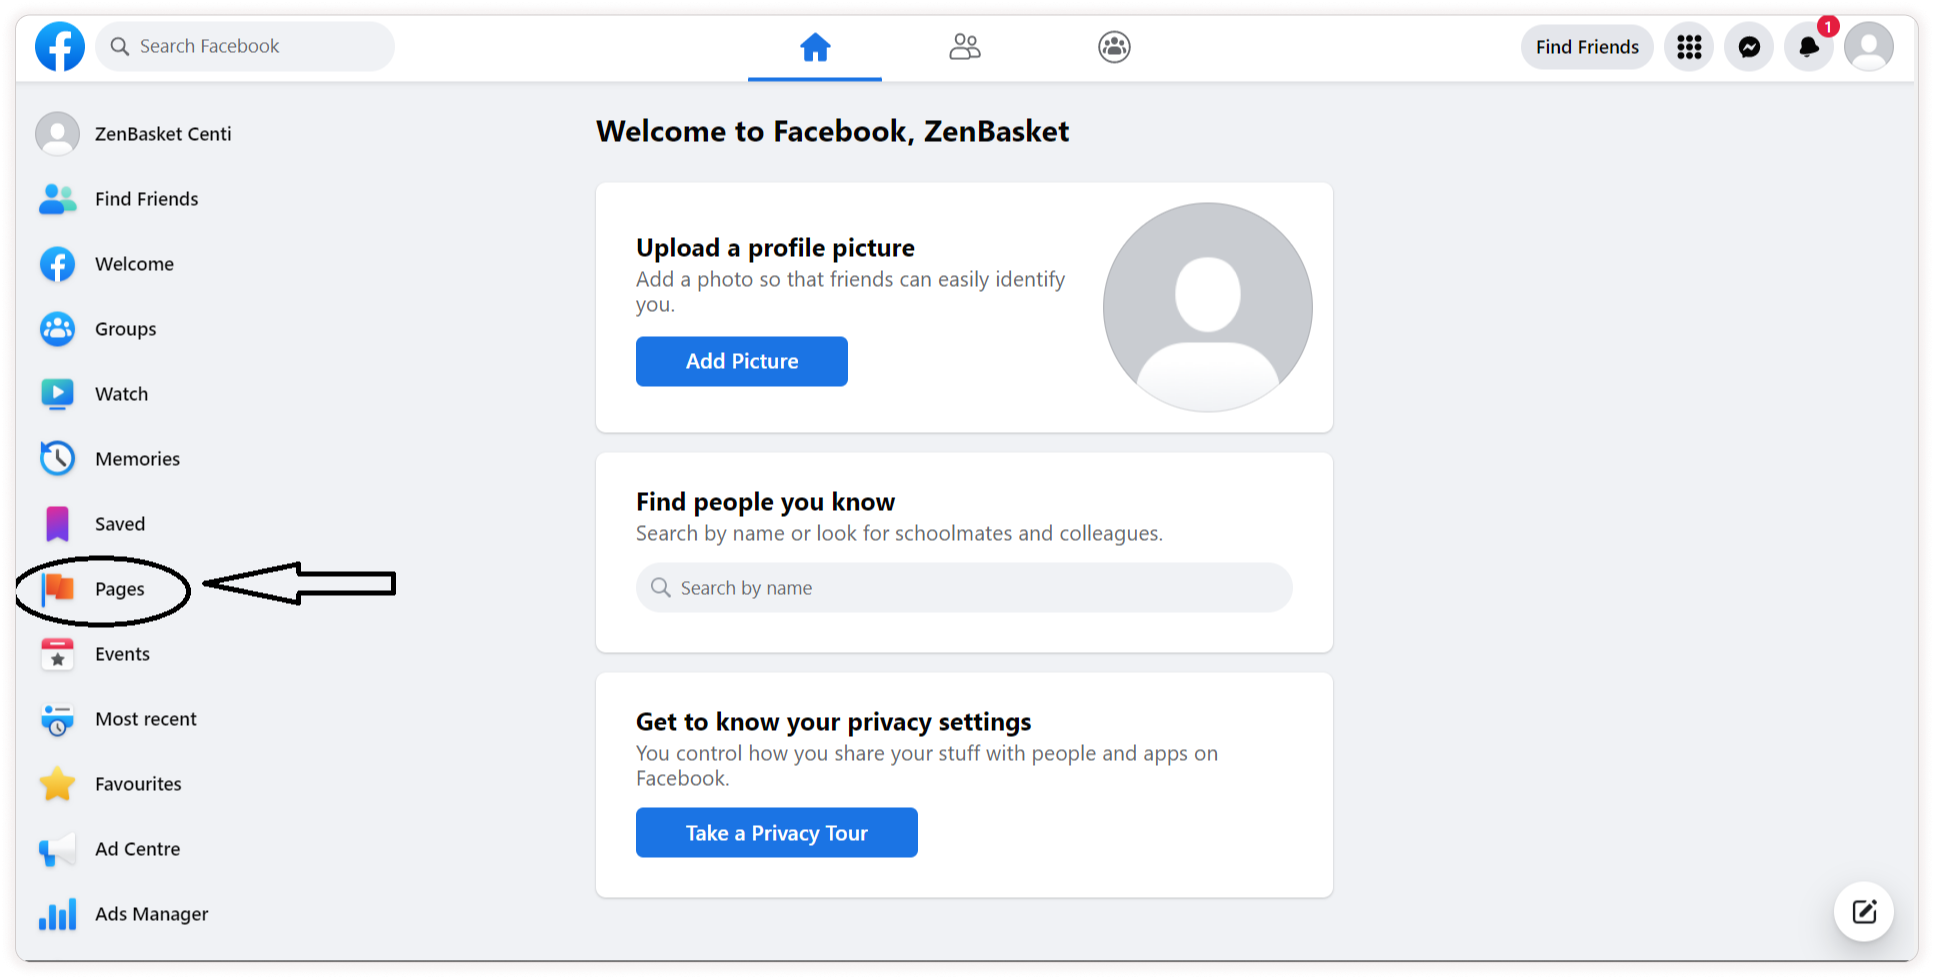
Step 2: Then click Pages to create a new page or select an existing page.
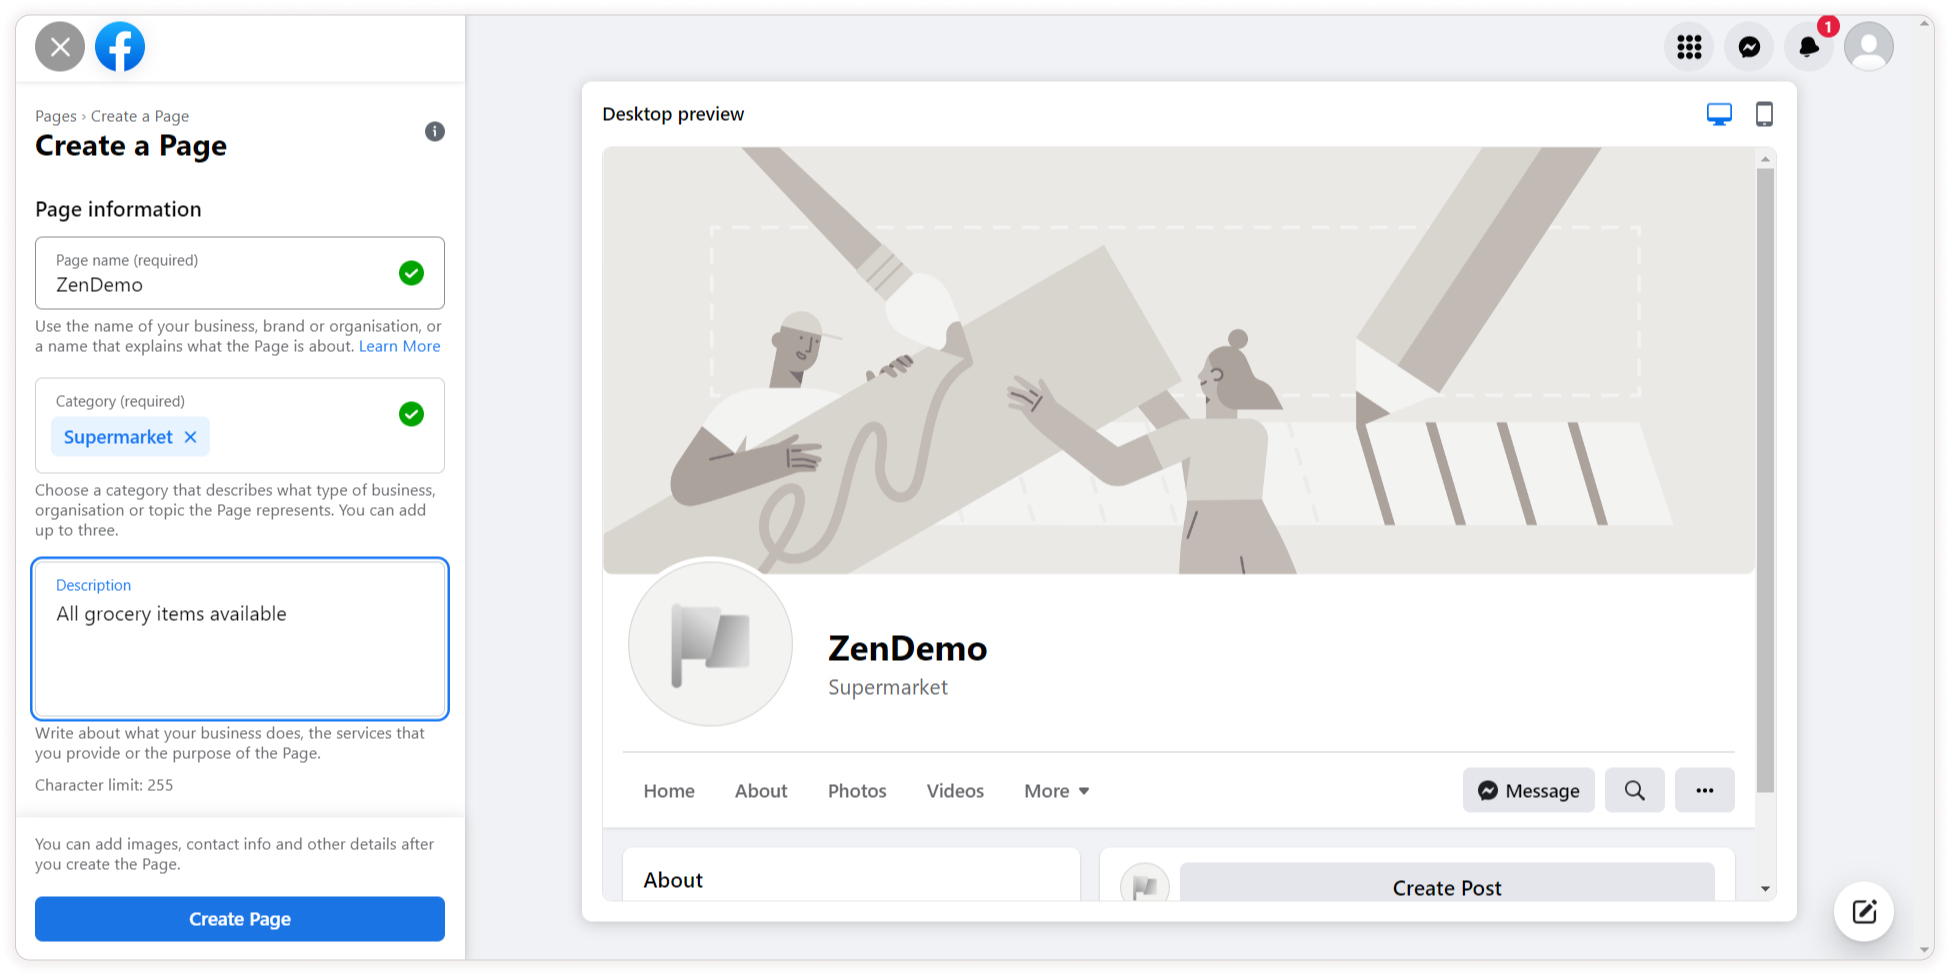
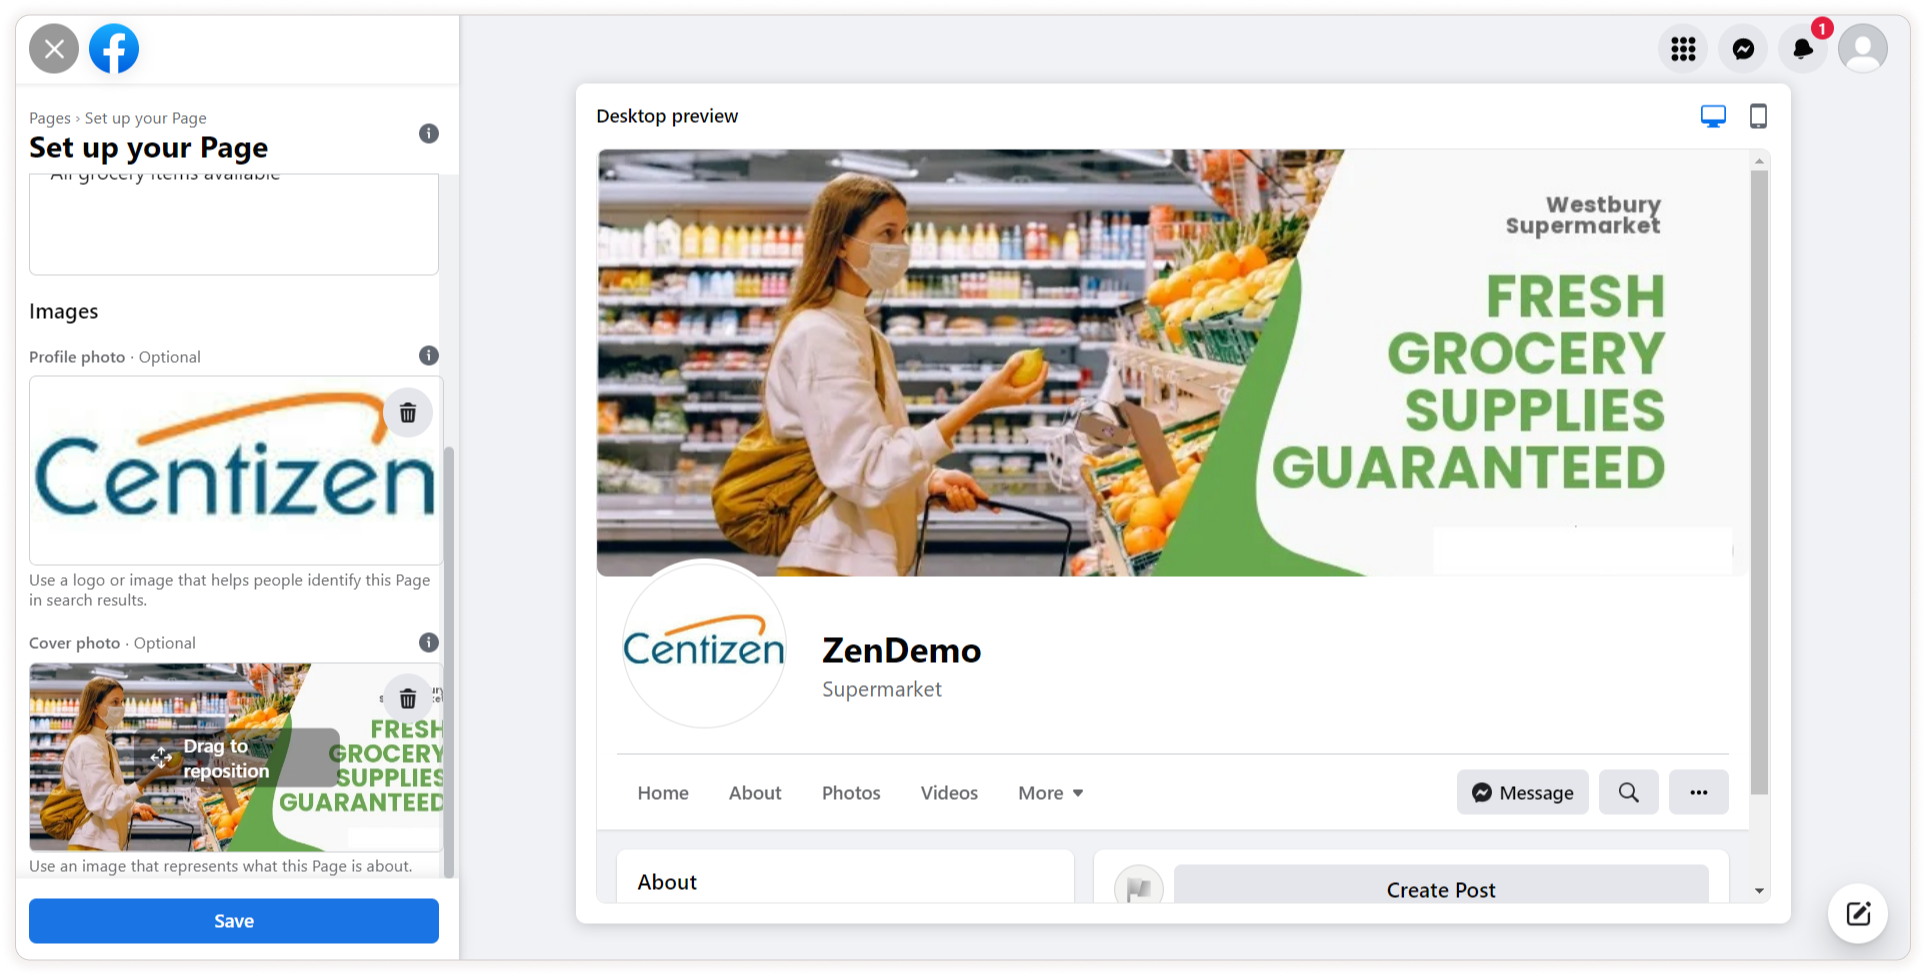
Step 3: Fill in the following credentials (page name, page category and description) and then click Create Page.
Step 4: If you want to add a profile and cover photo add it and then click Save.
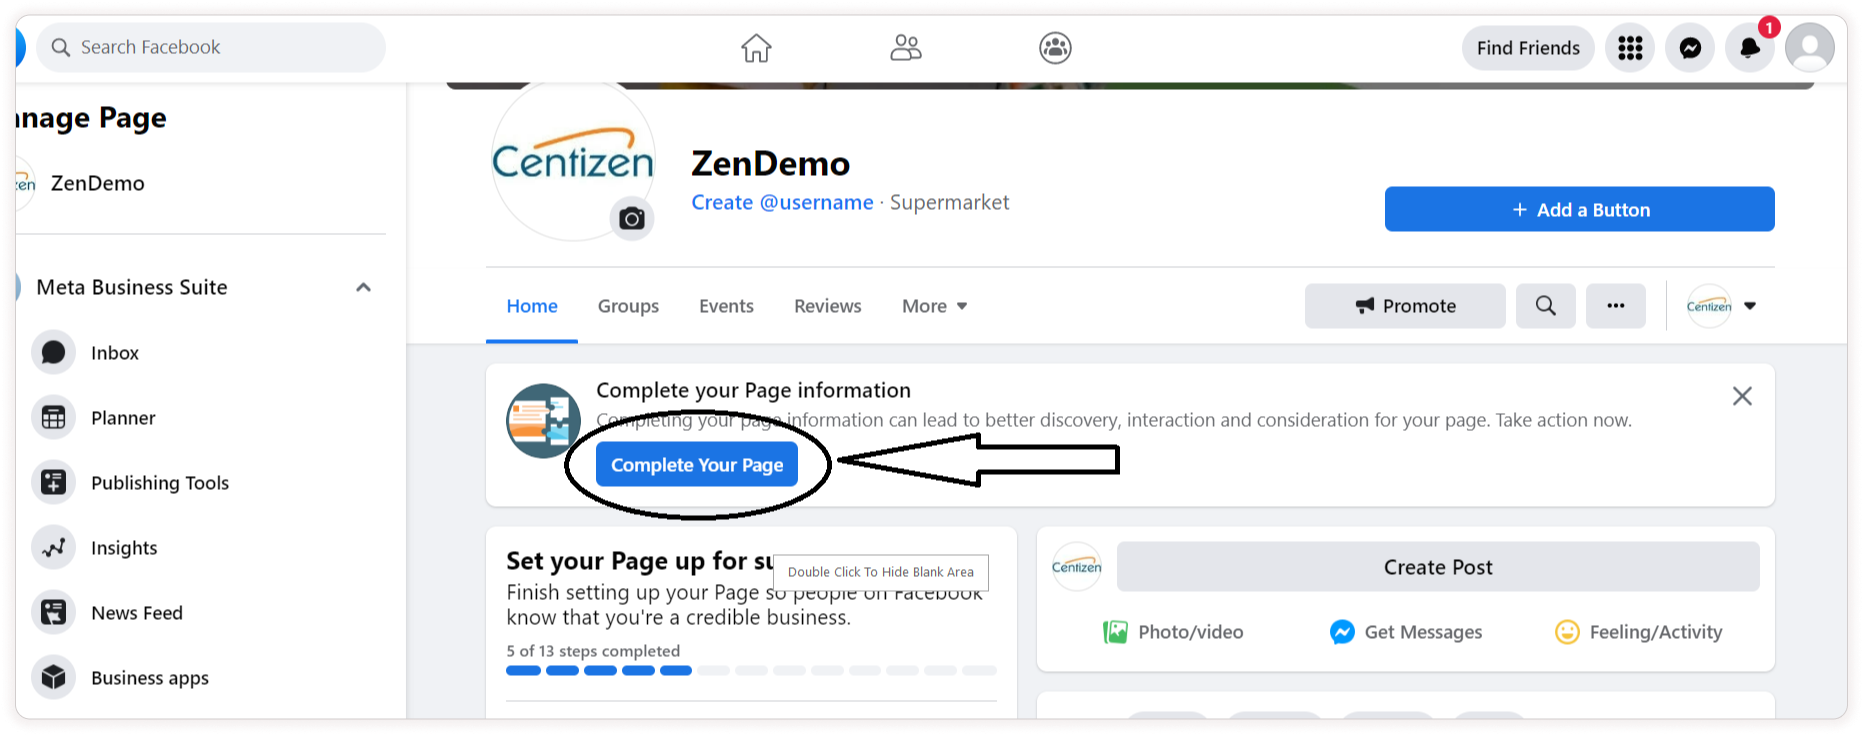
Step 5: Click on the Complete Your Page button and give all the necessary details to set up your page.
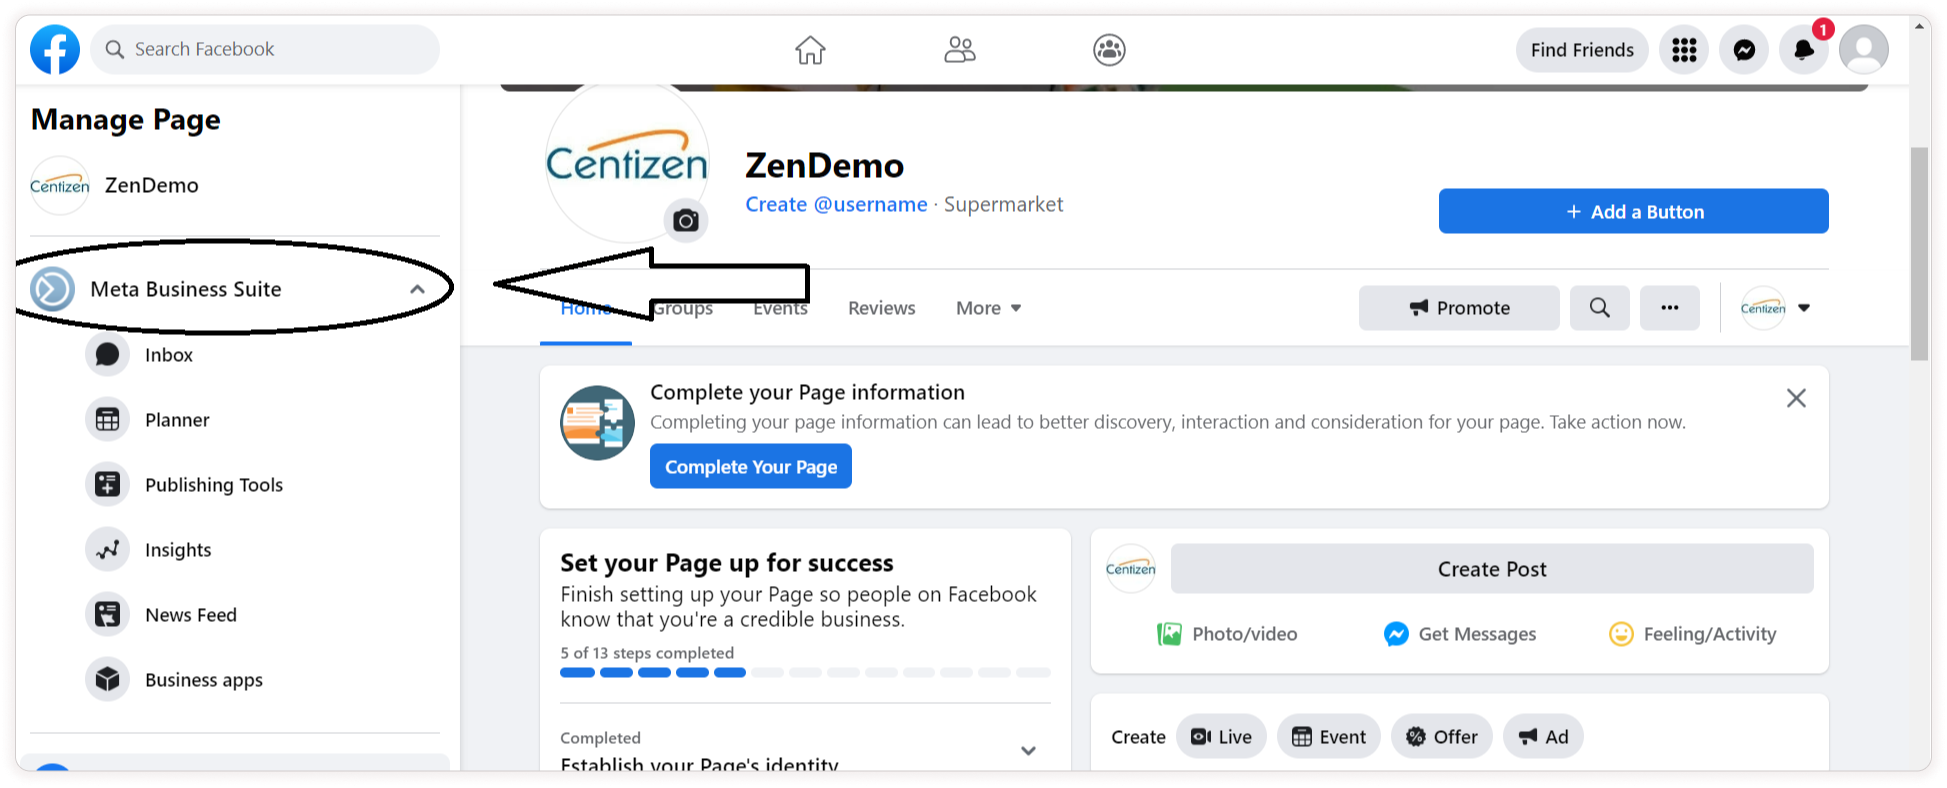
Step 6: Click the Meta Business Suite it will redirect you to https://business.facebook.com/.
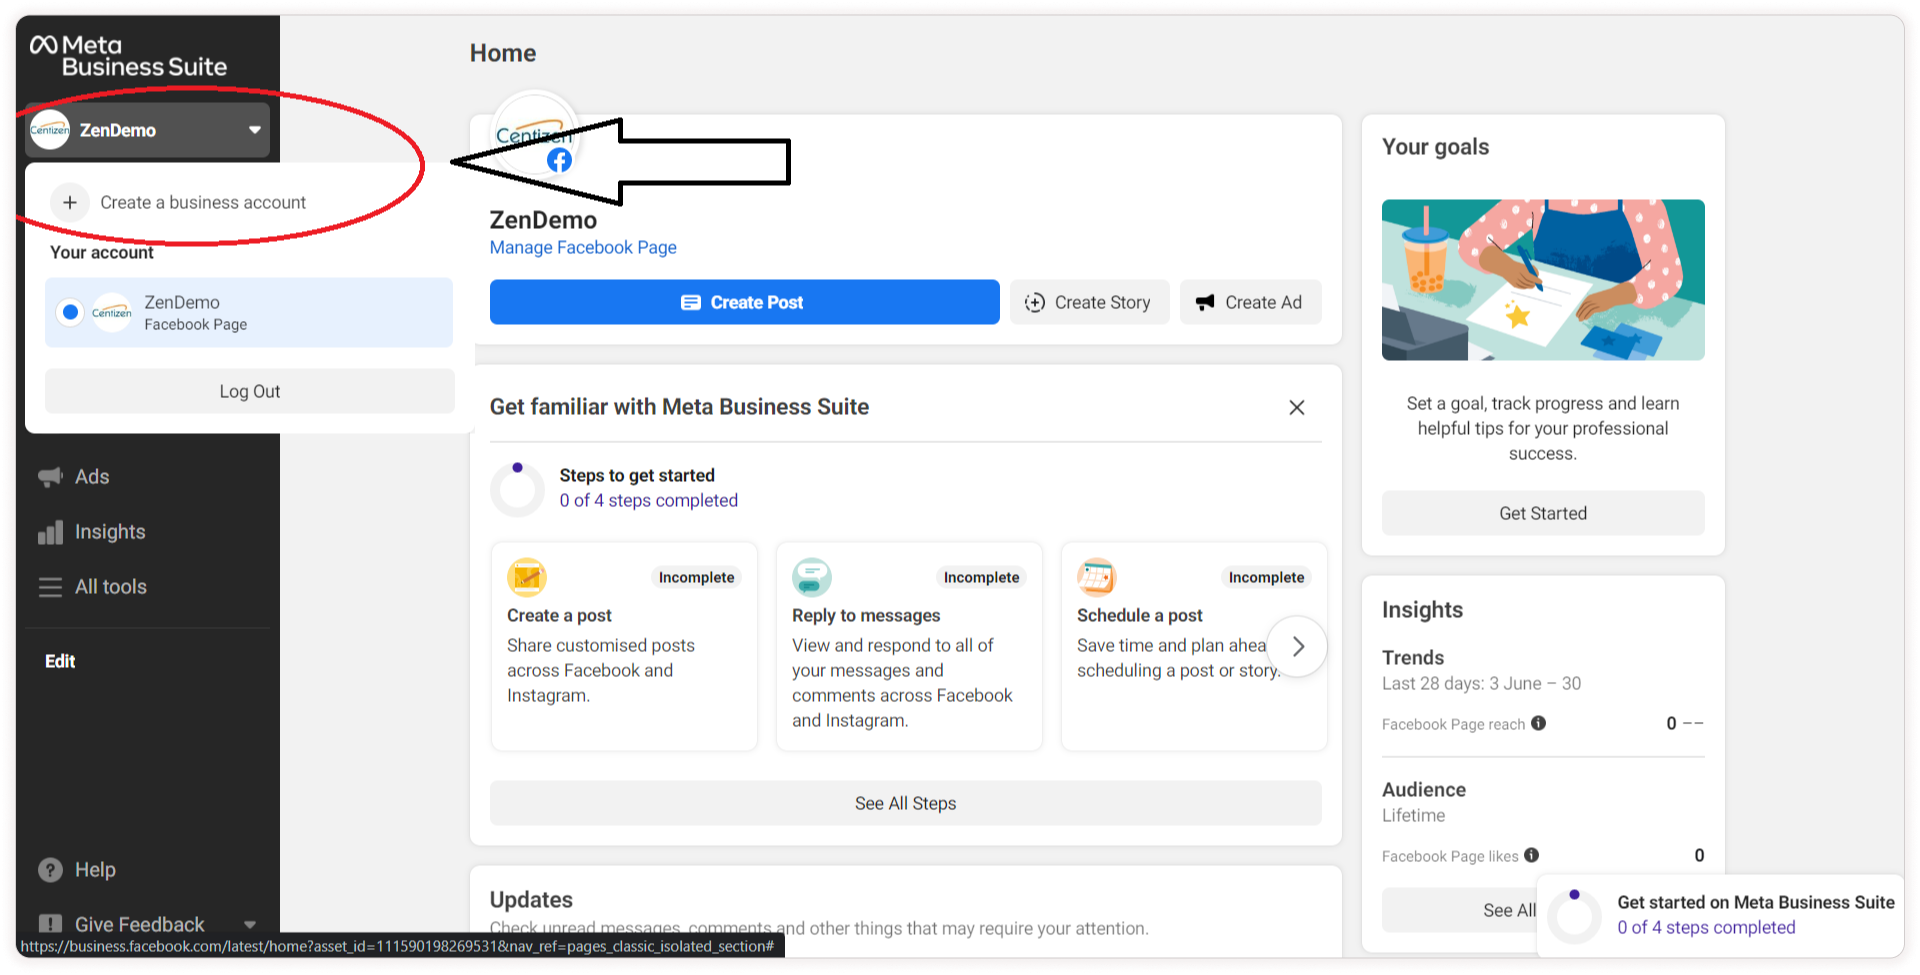
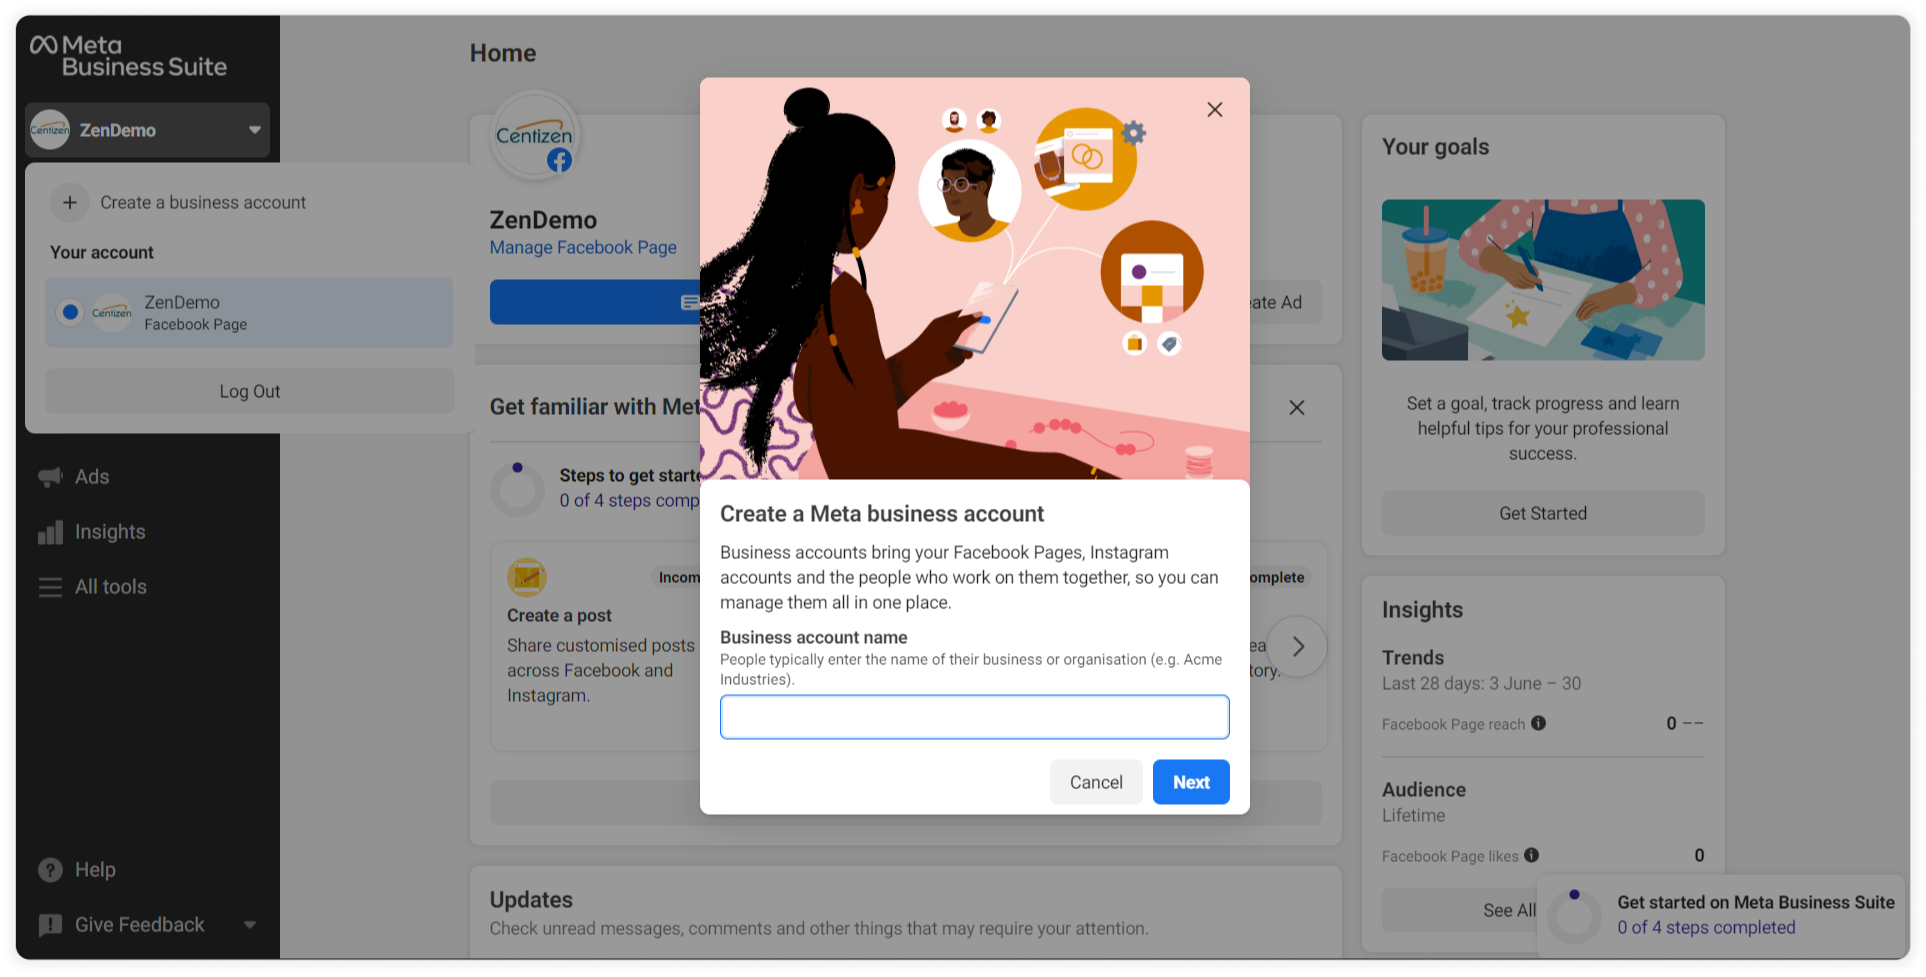
Step 7: Click the dropdown and select Create a business account.
Step 8: Give a name for your business account and click Next.
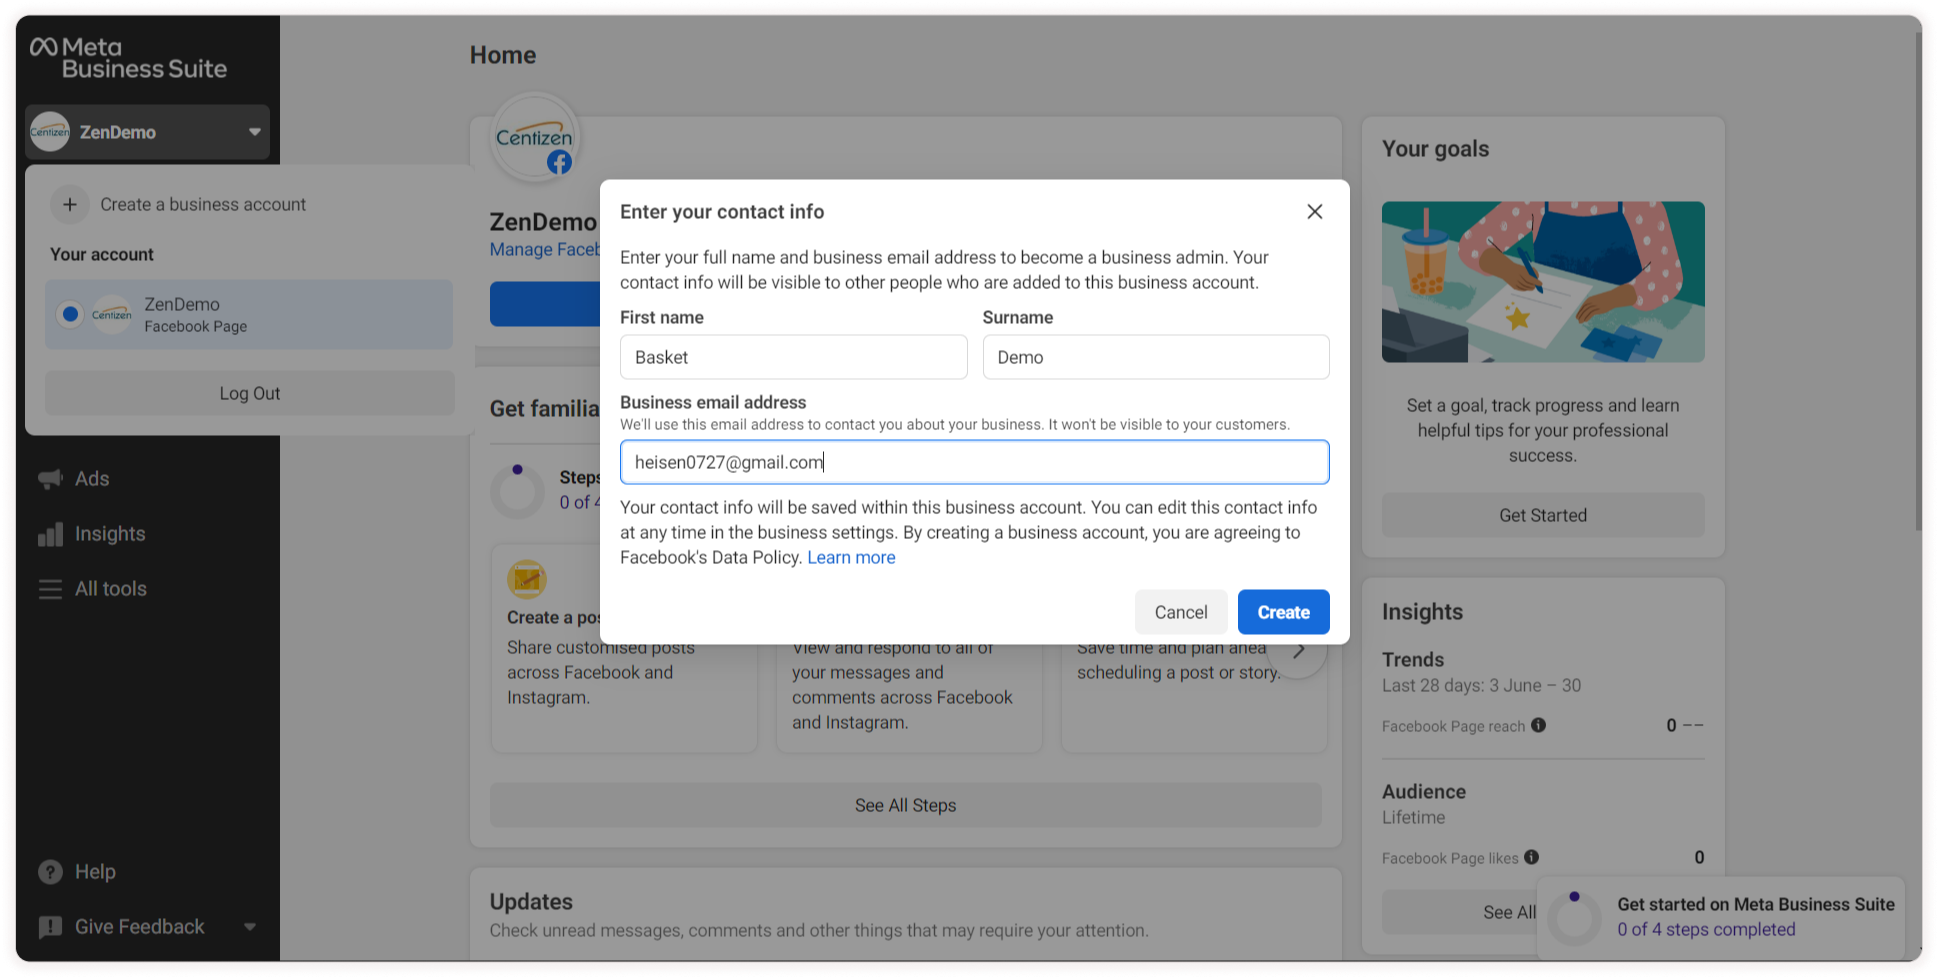
Step 9: Then fill in the contact Info(First Name, Surname, Business Email Address) and click Create.
Note: If you create a new FB account you need to wait for 1hour to create a business account.
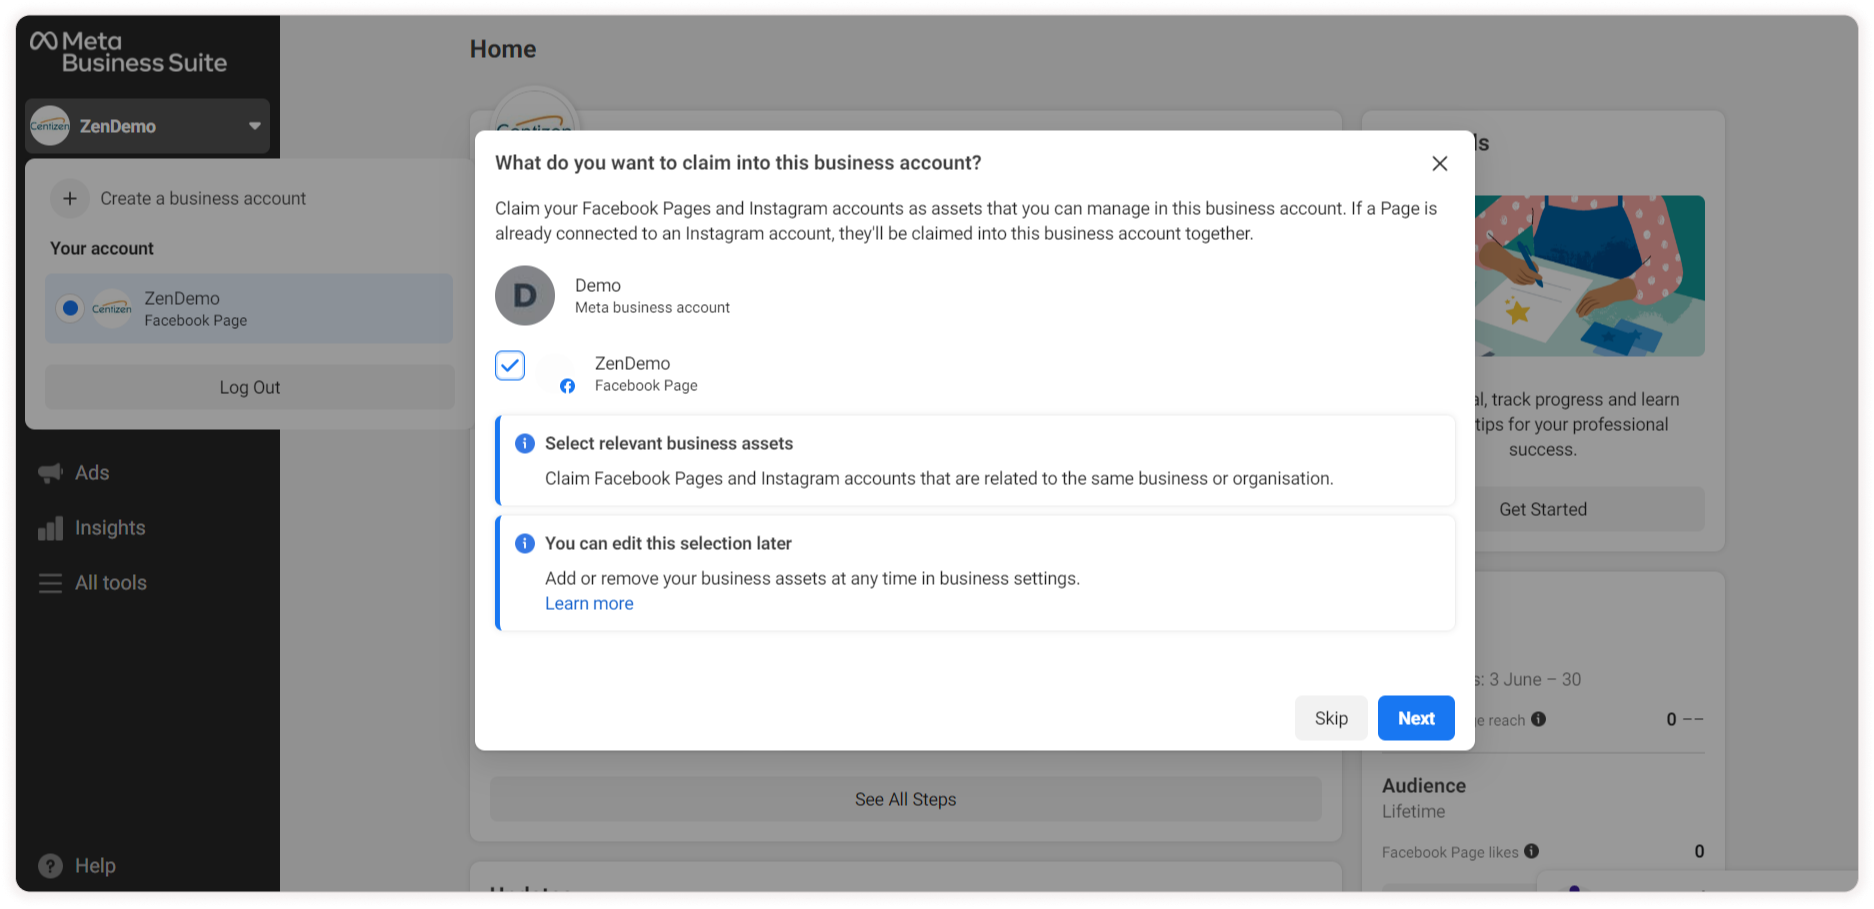
Step 10: Then select your page and click Next.
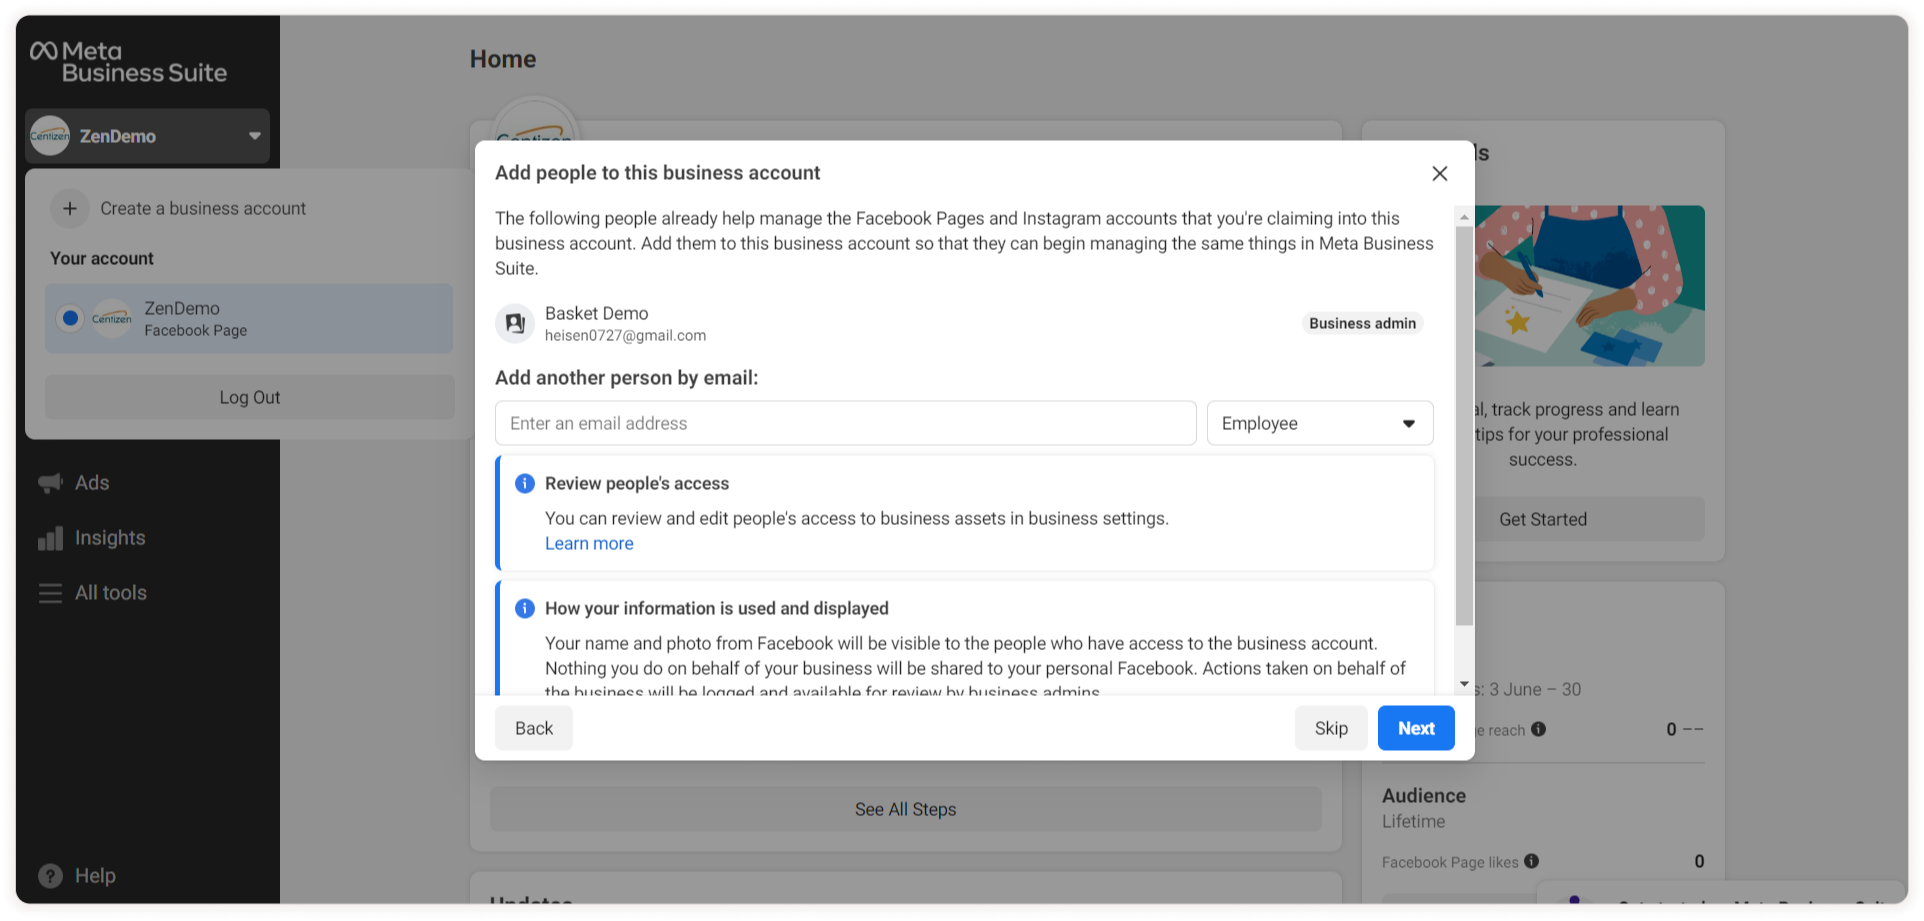
If you want to add another person give his/her email and click Next otherwise skip
Step 11: Then click Confirm to merge your page with your business account.
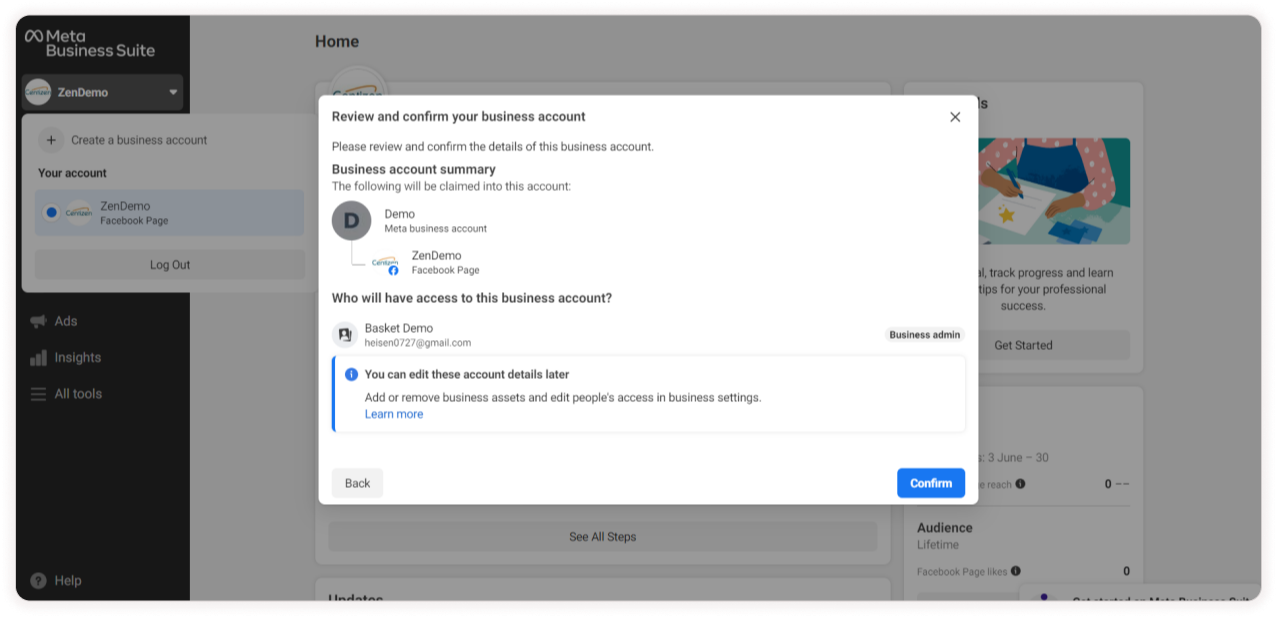
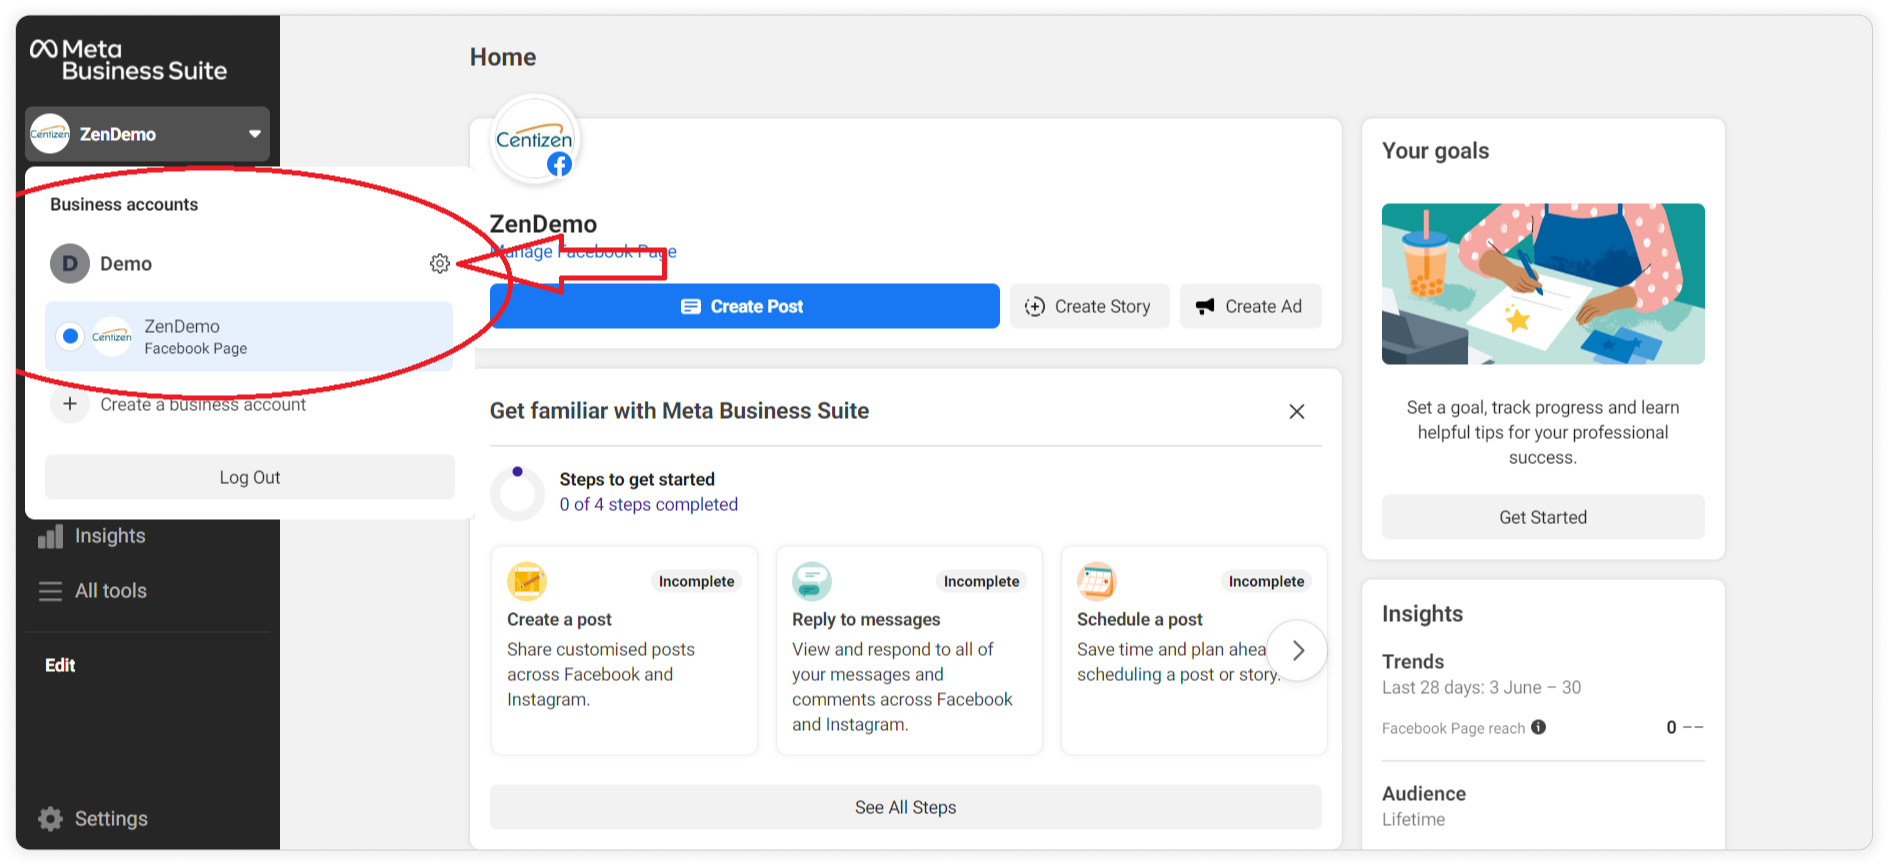
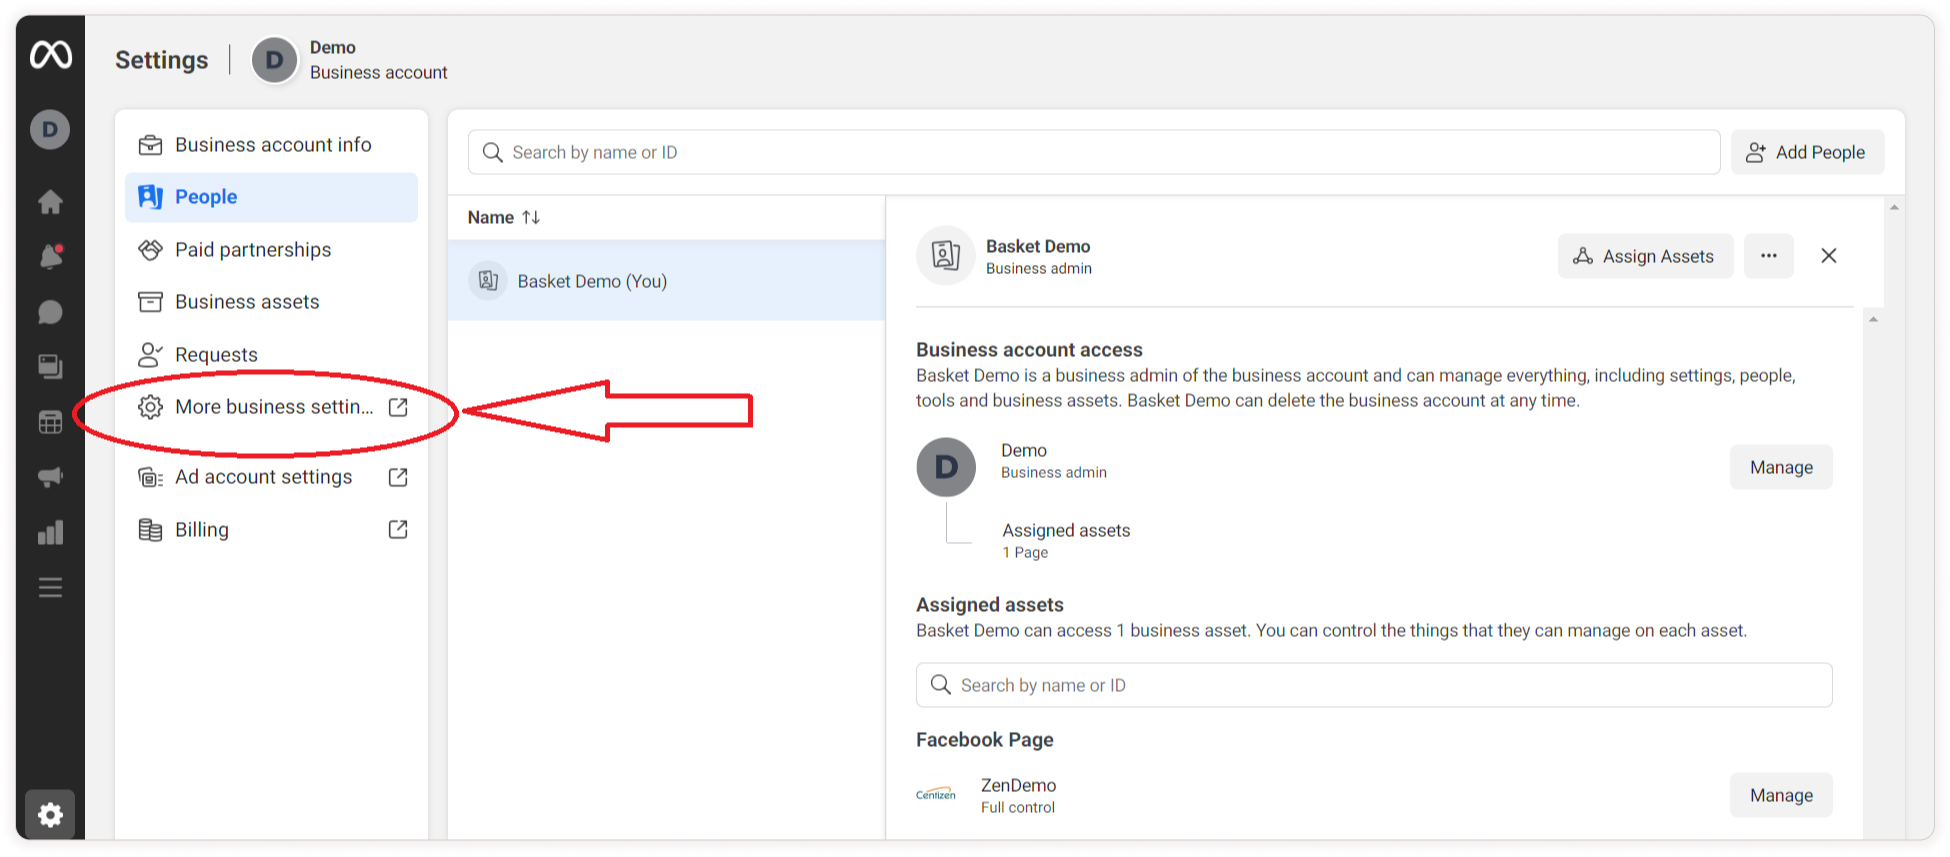
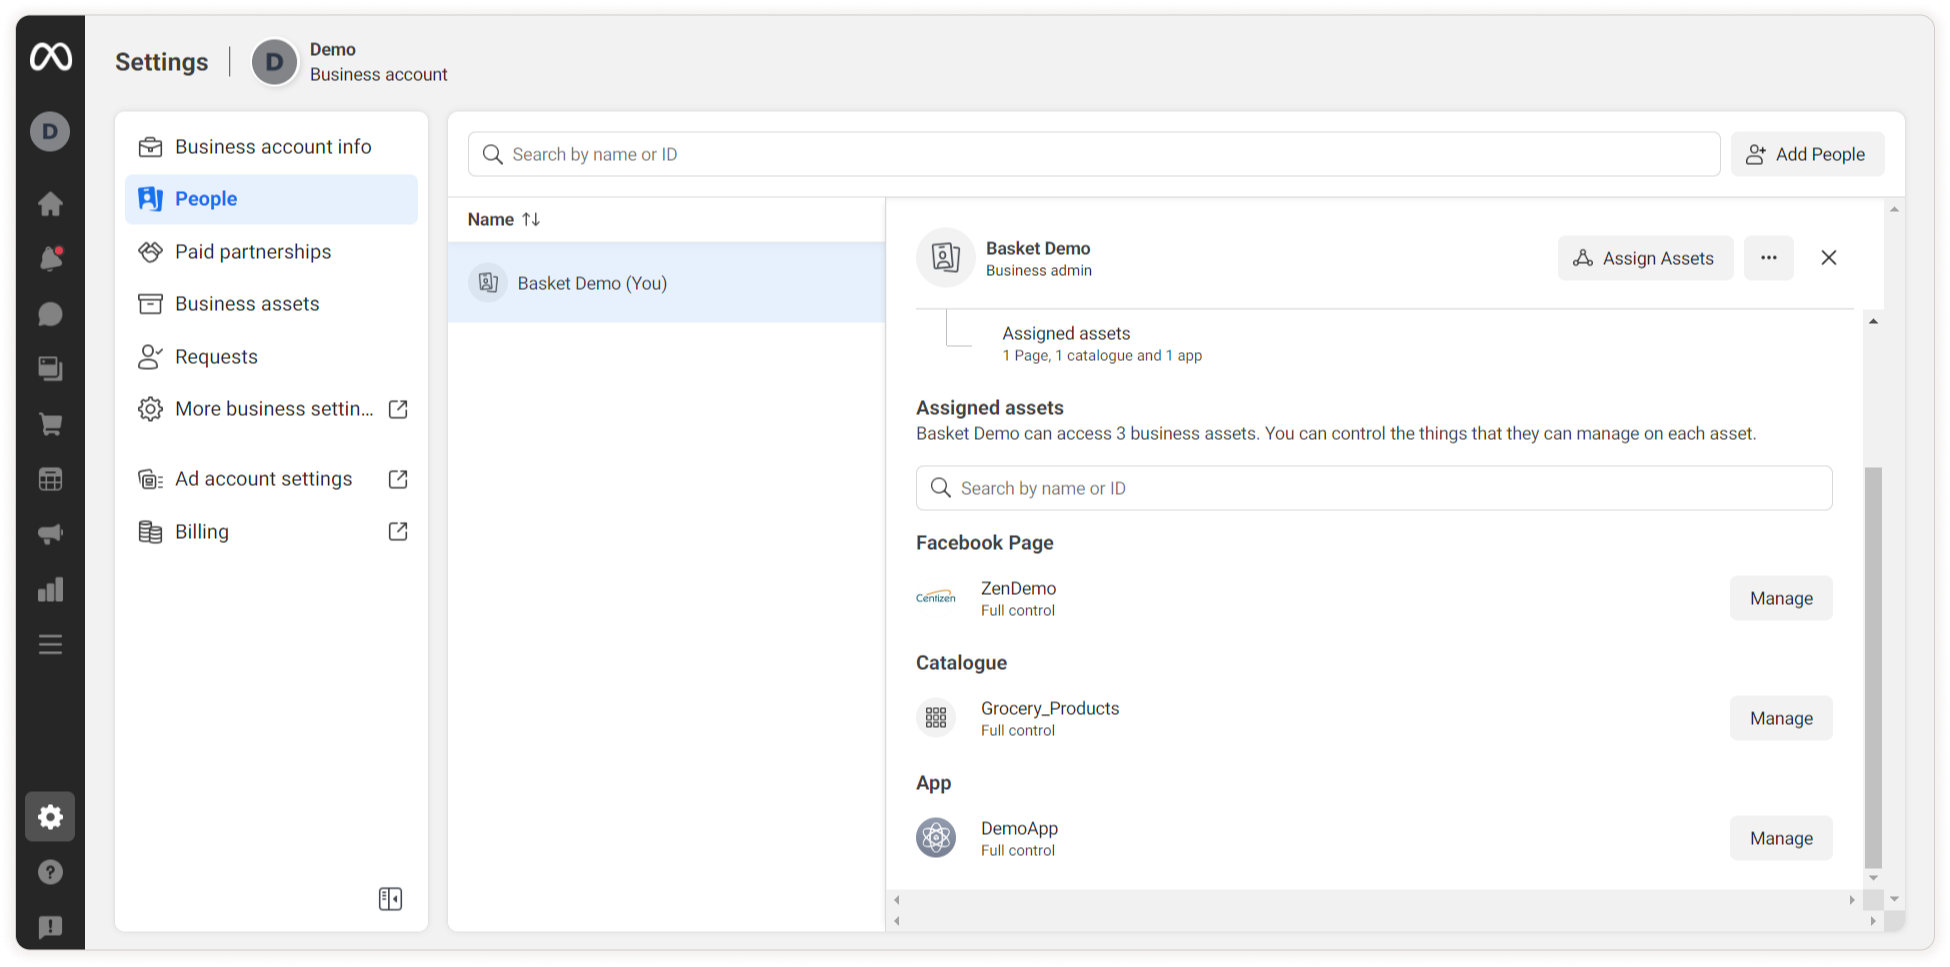
Now you can see your page is connected with the business account you have created. And if you want to make any changes to your business account click the settings button it will redirect you to the business setting page.
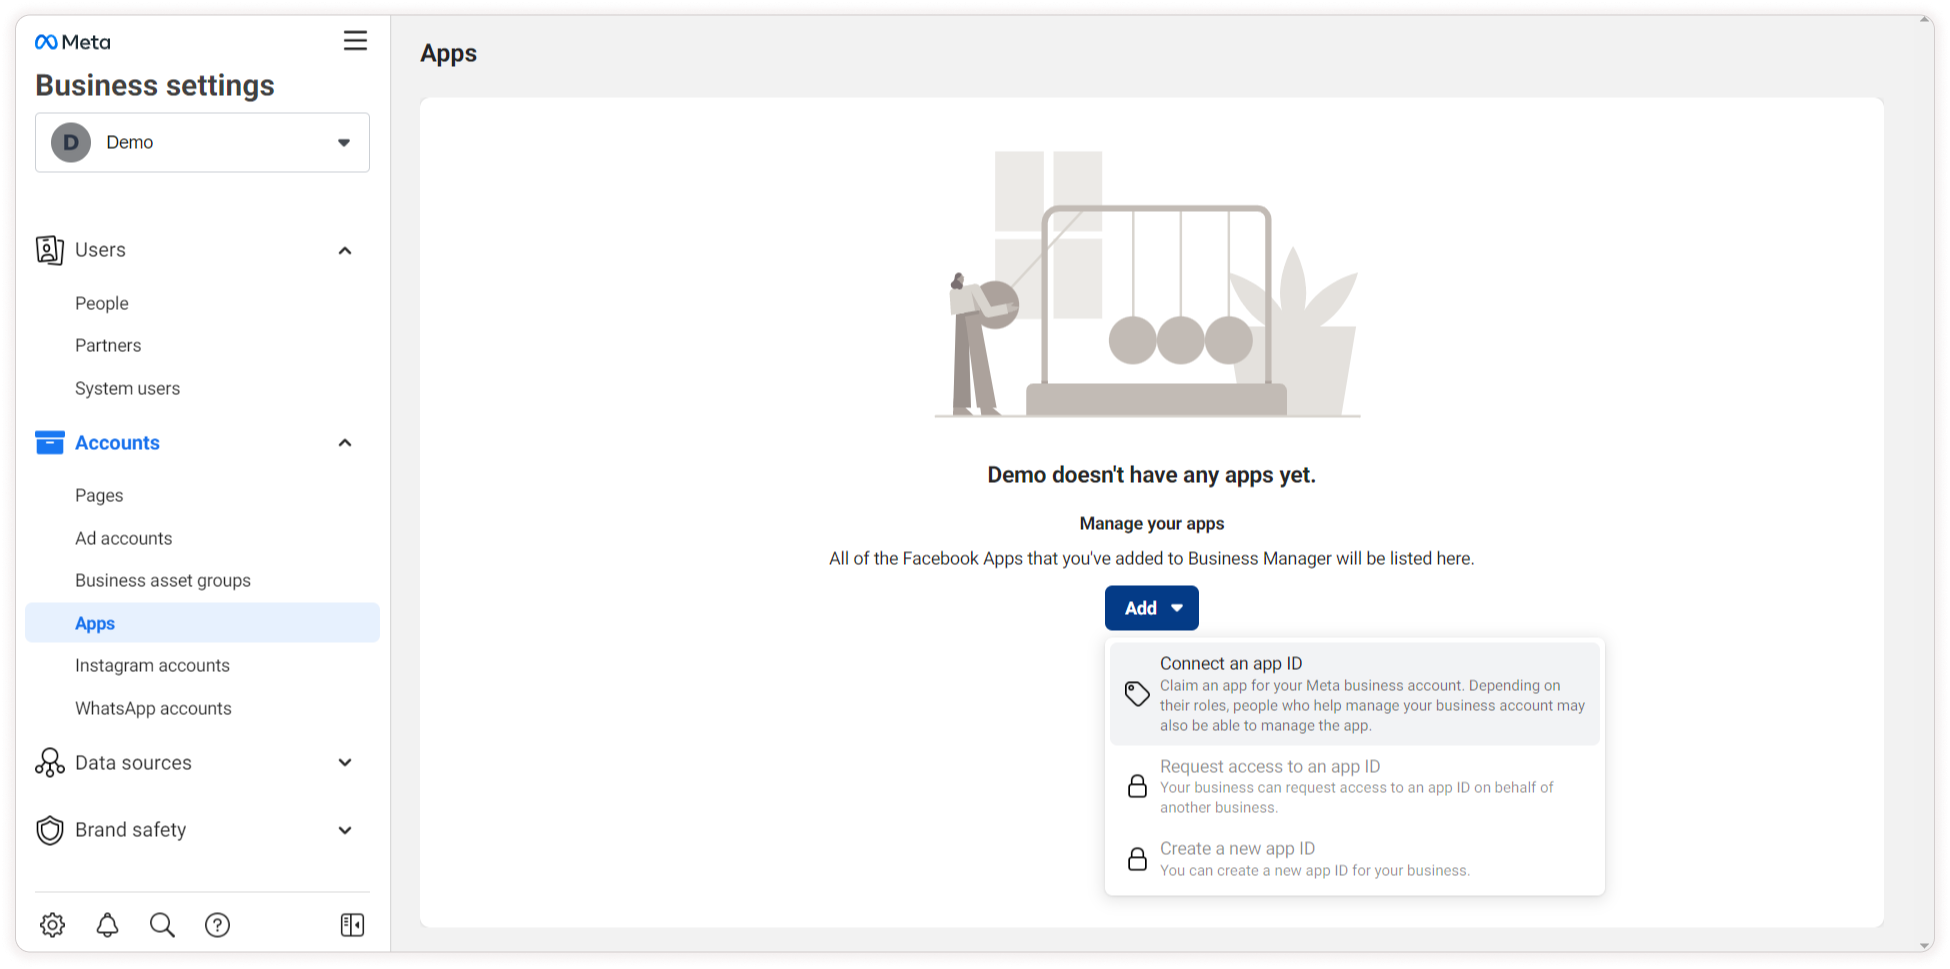
Click more business settings to know what are all the pages and apps connected to your business account
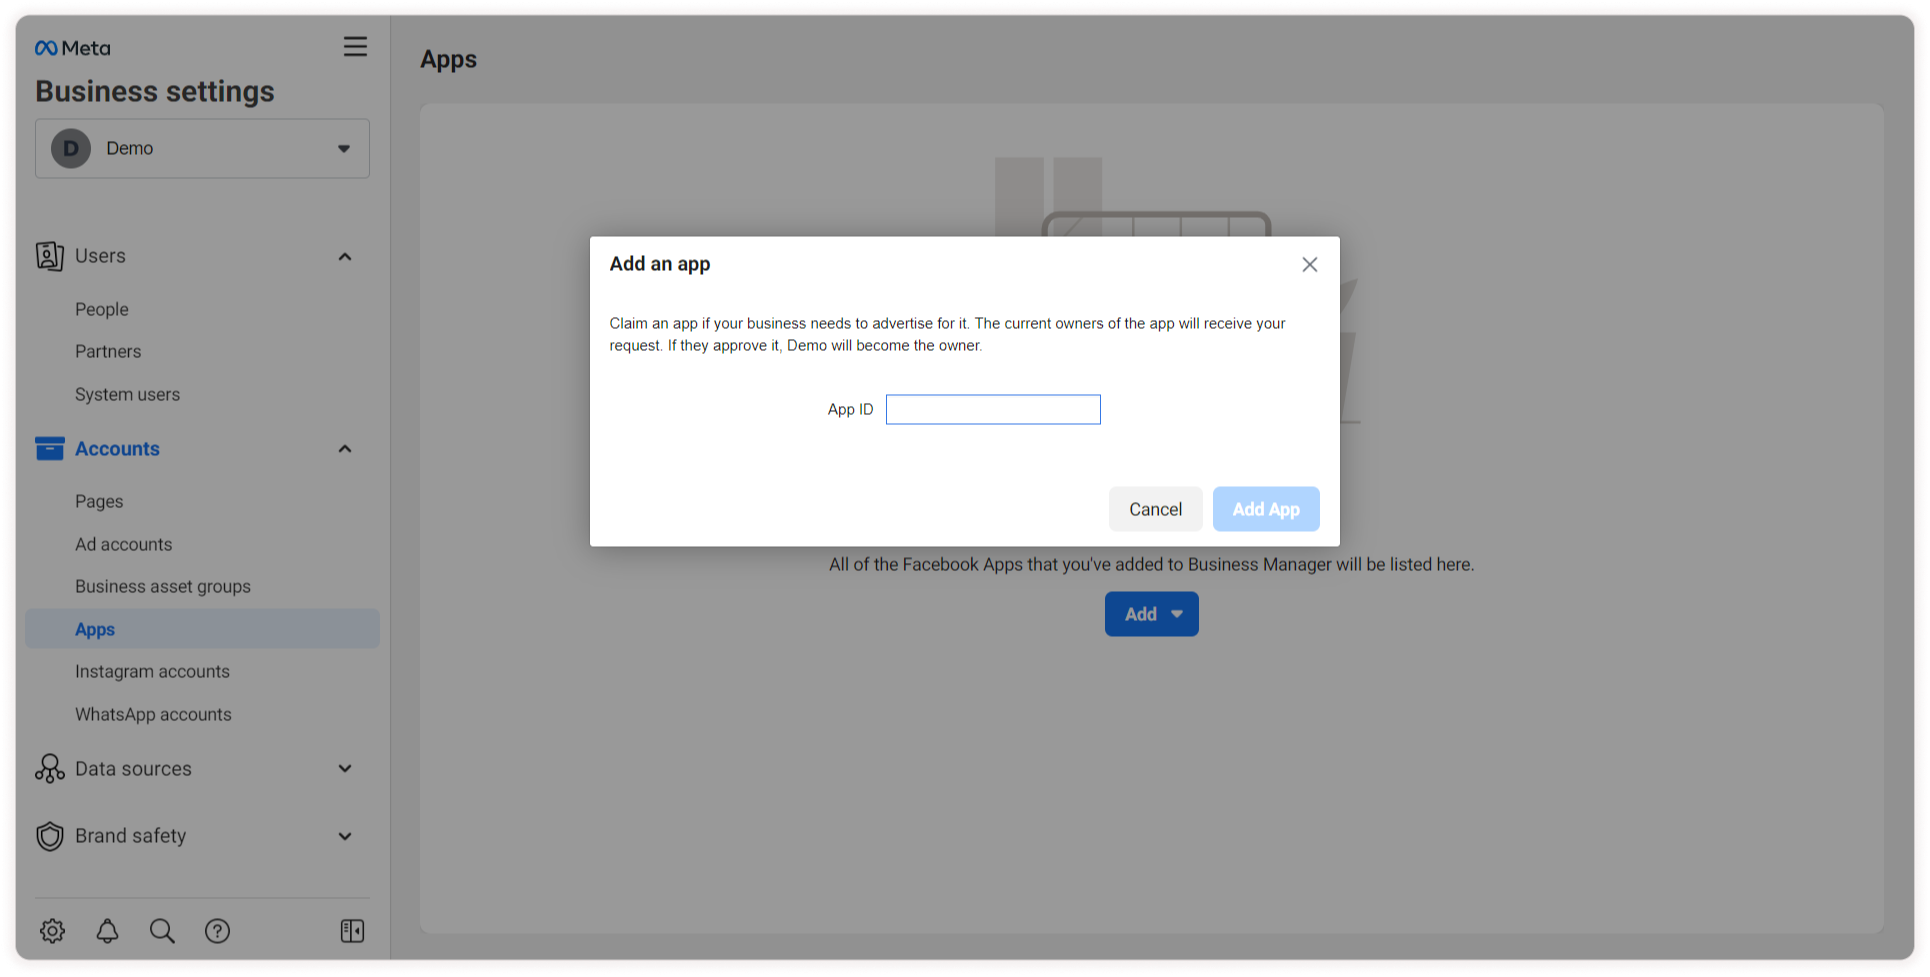
On the left panel, choose the Accounts menu and then the Apps sub-menu. Click on the Add drop-down and select Connect an app ID.
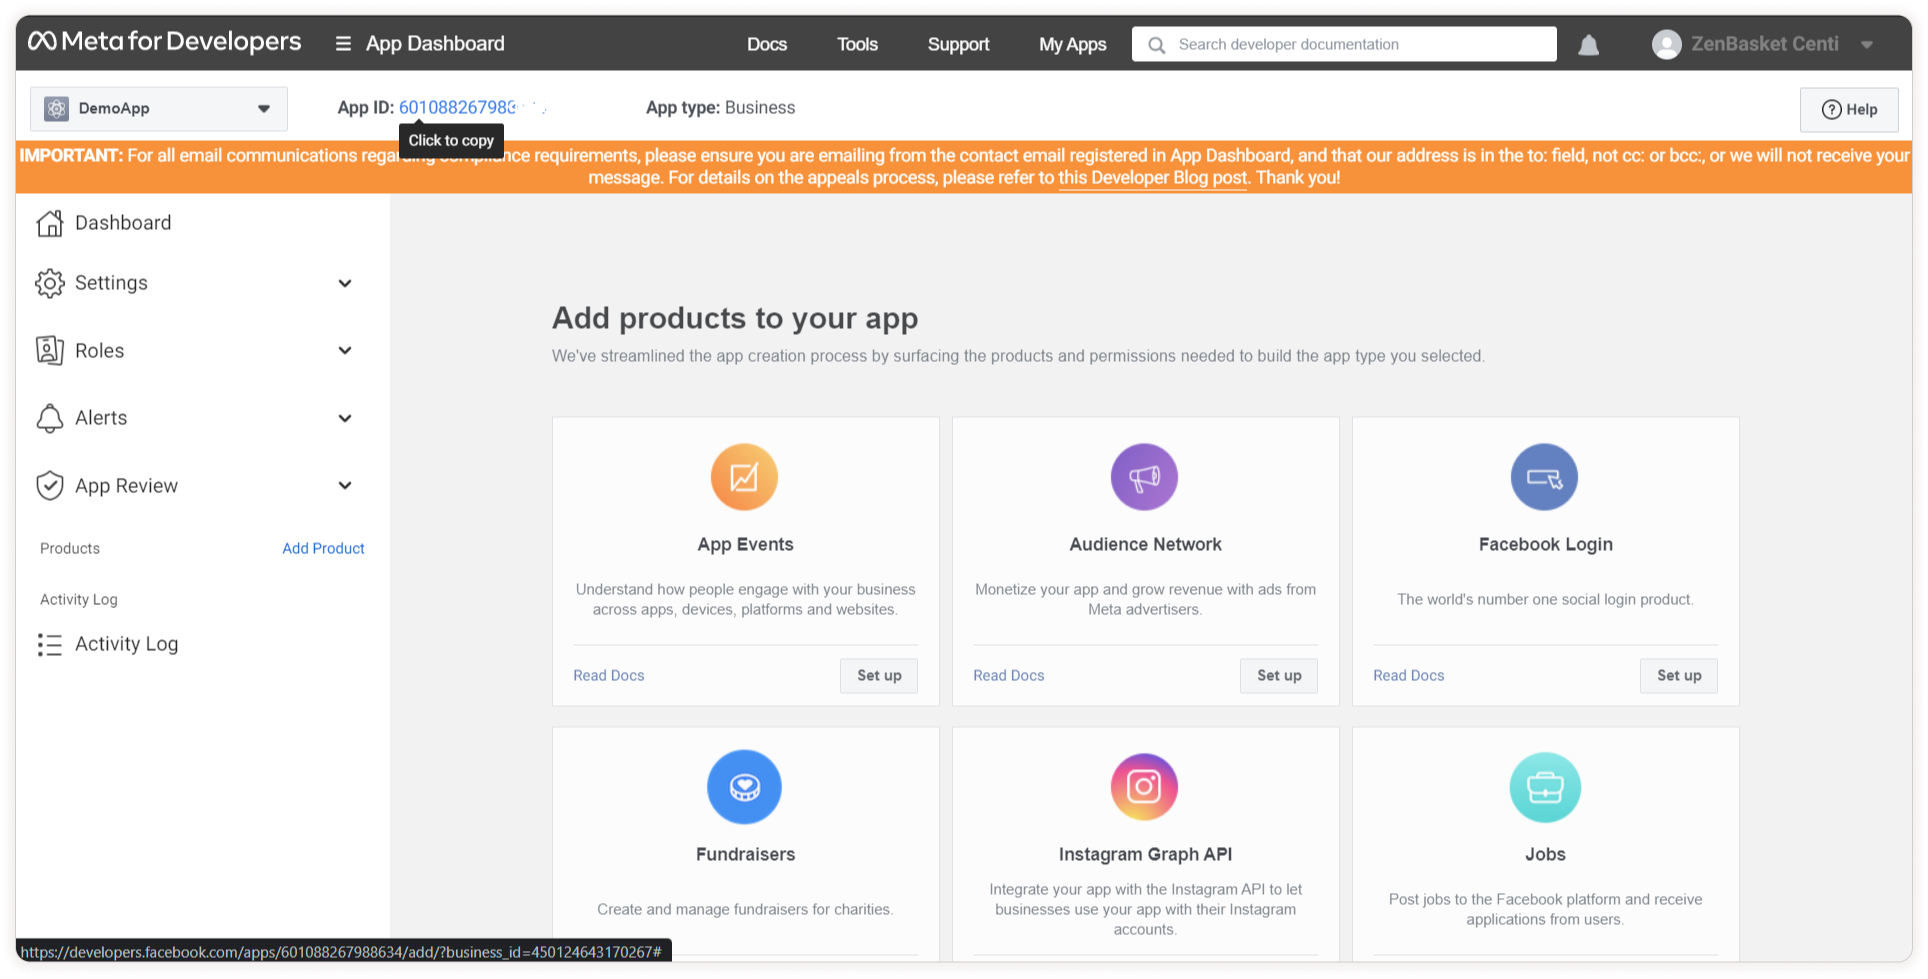
Step 12: Now you need to connect the app with AppId. For that, go to https://developers.facebook.com/.
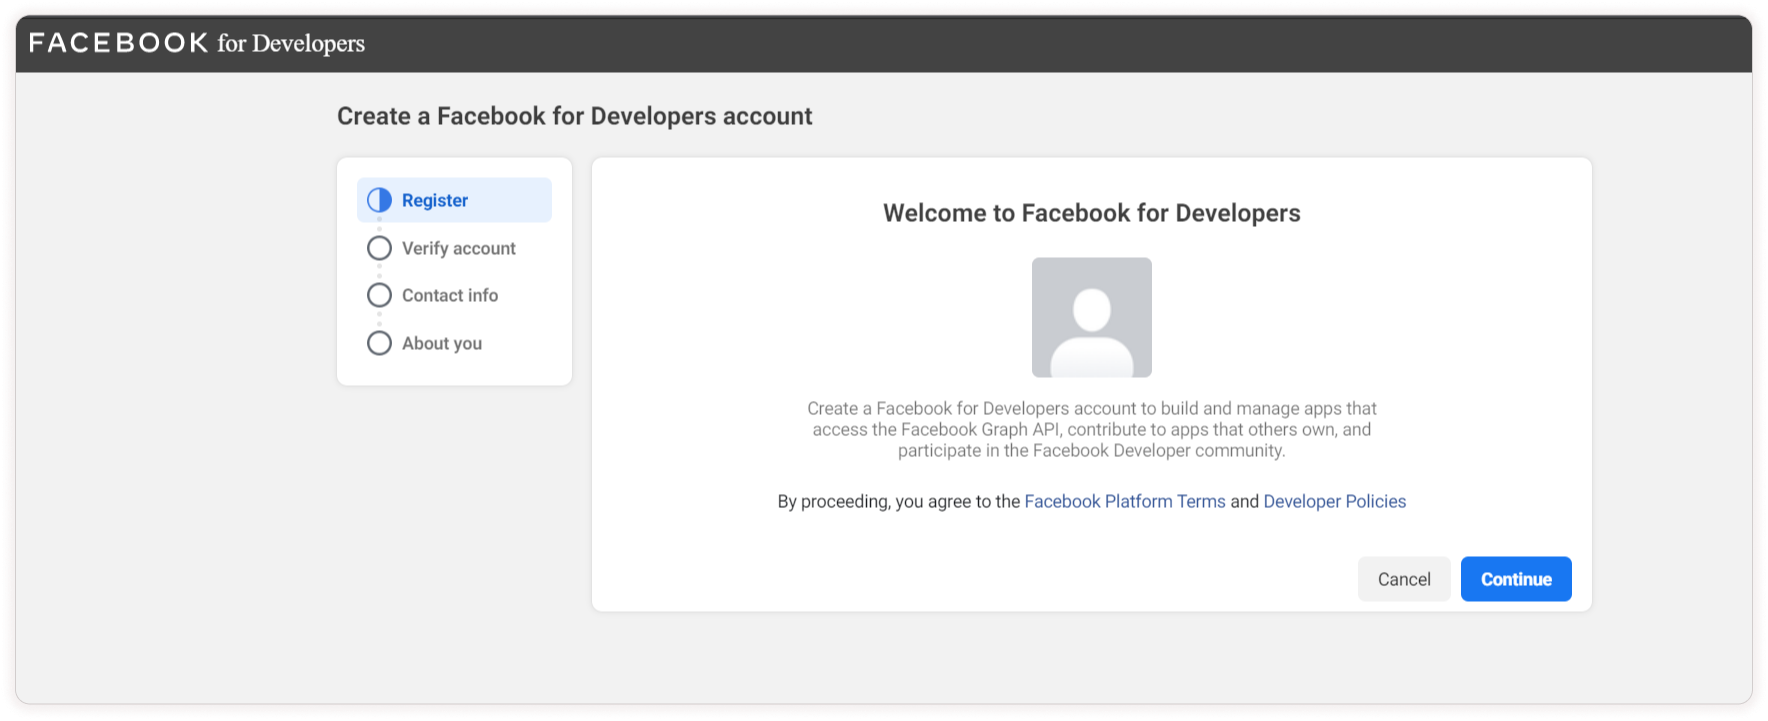
Click Get Started to create a Facebook developer account.
Step 13: Click Continue.
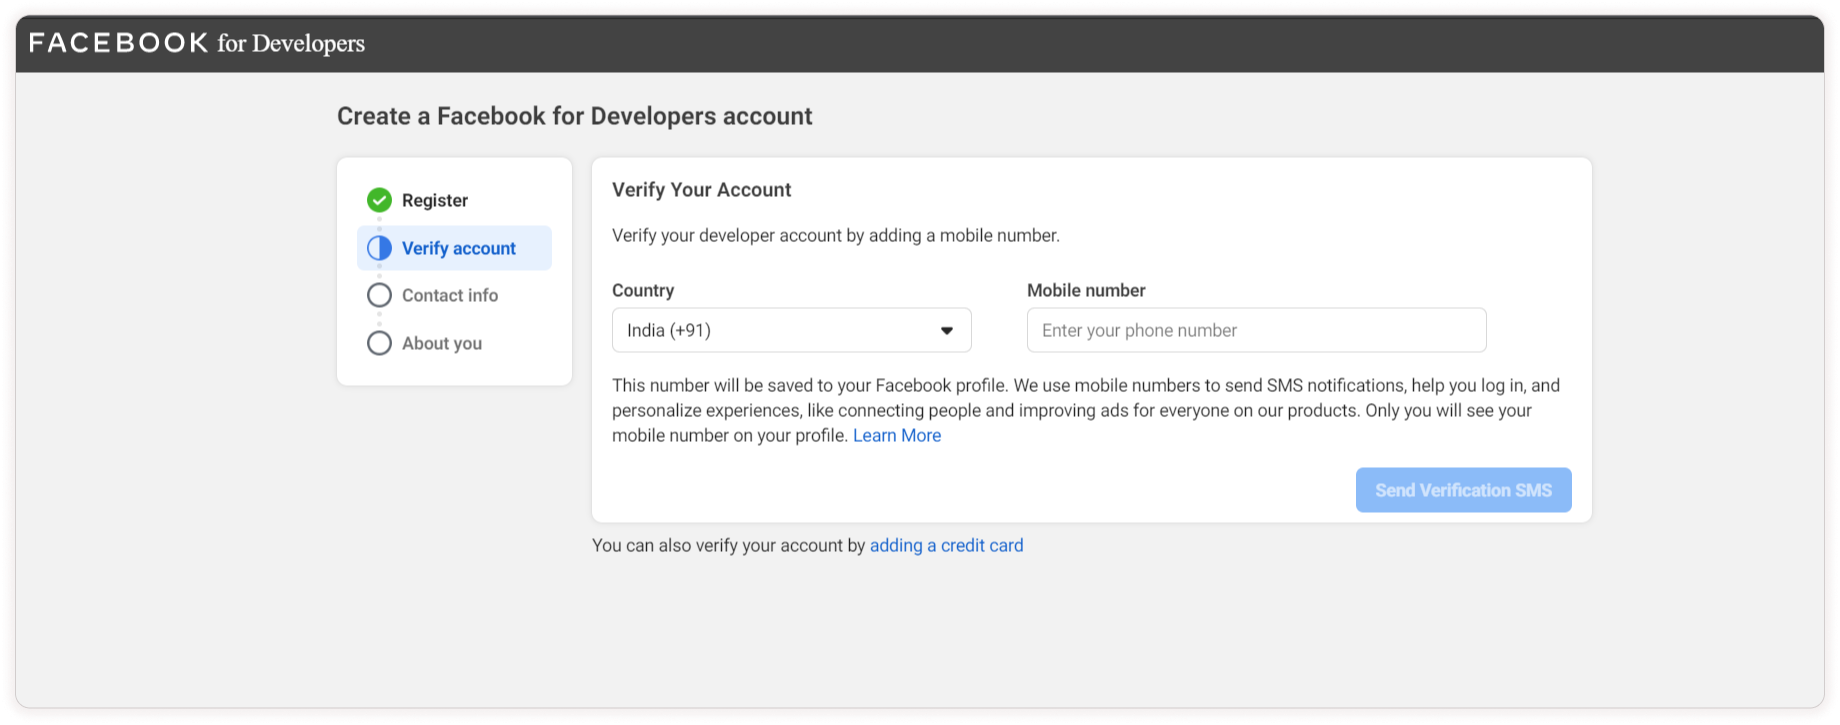
Then enter and verify your mobile number to verify your account
Step 14: Check Agree and confirm your mail
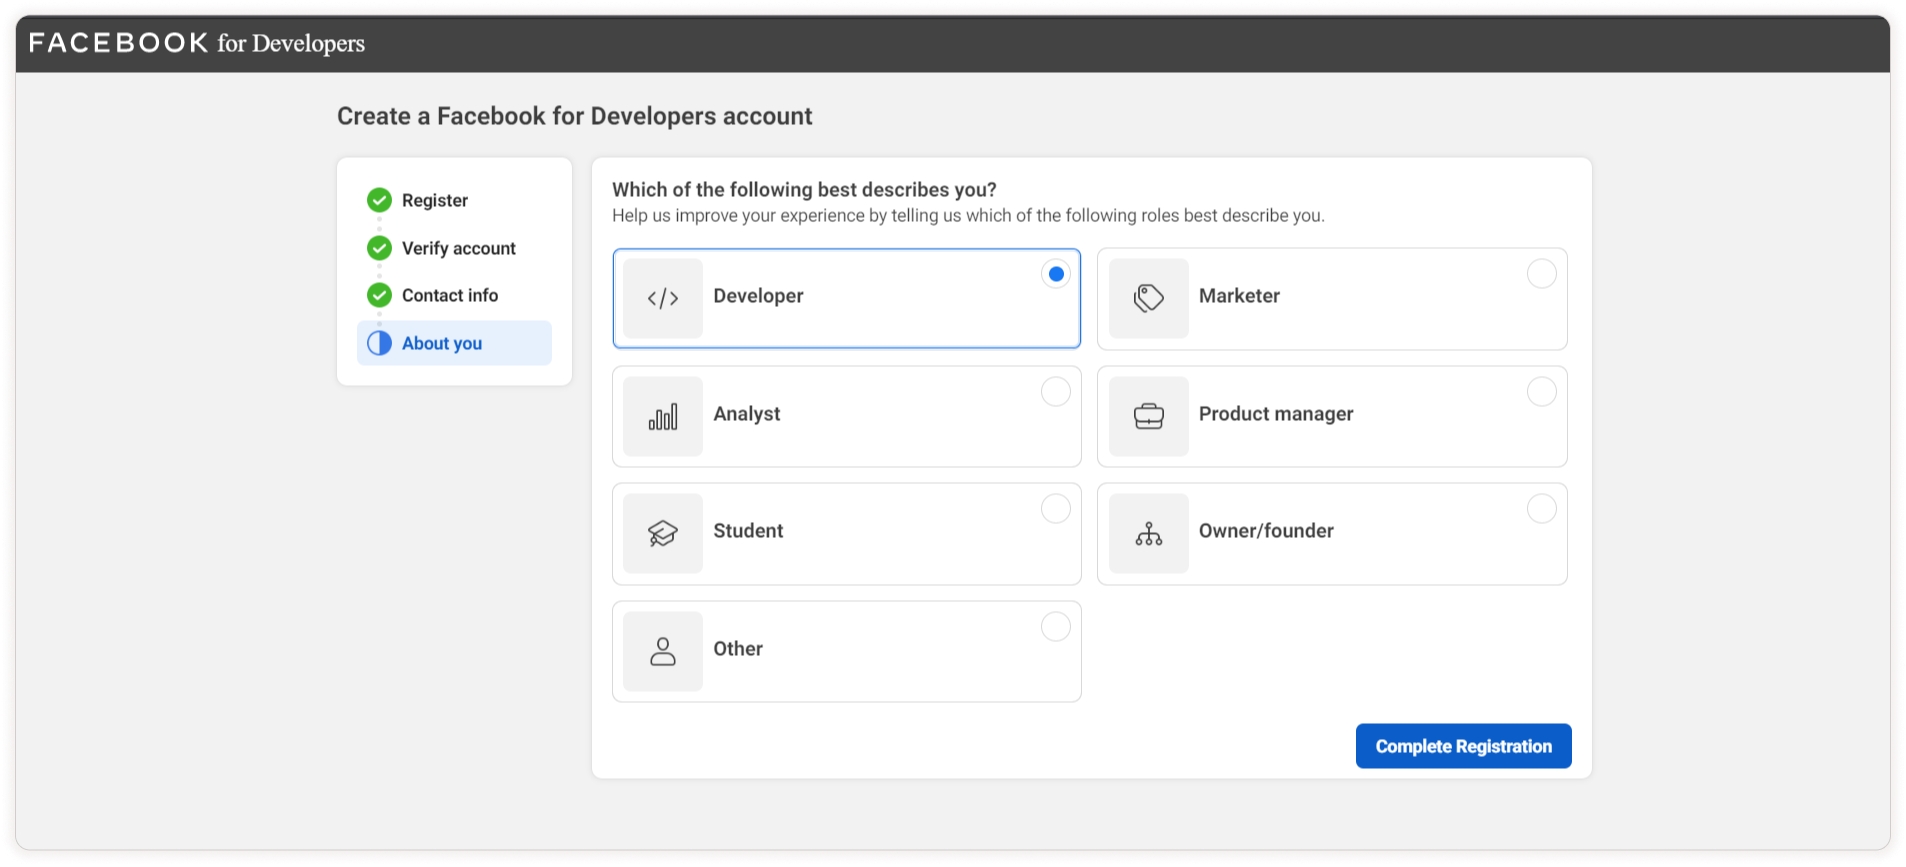
Step 15: Select your role and click Complete registration.
Step 16: Click Create App.

Step 17: Select Type and click Next.

Step 18: Choose the app name and select your business account and then click Create app.

The App ID is displayed on the top left. Then copy that and paste it into your business account settings to connect your app to your business account(STEP 12).
Click Connect an app ID.

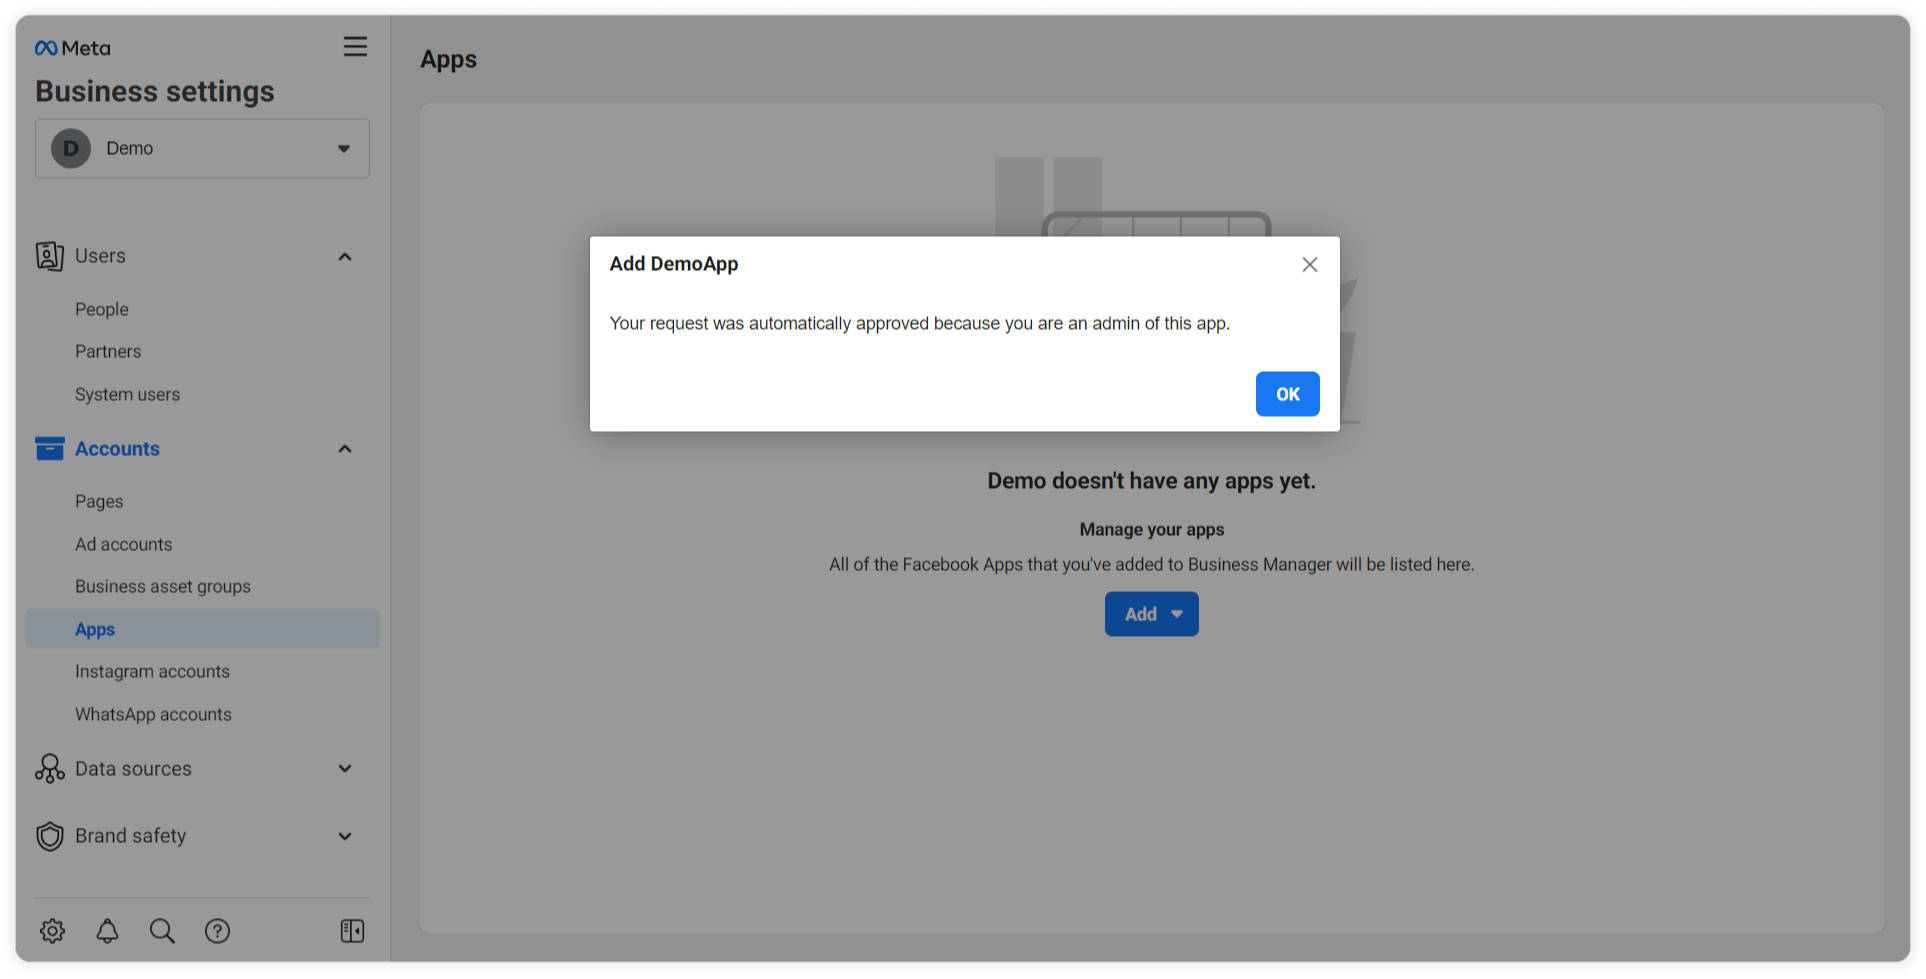
Step 18: Give your App ID in the dialog box and click Add App.
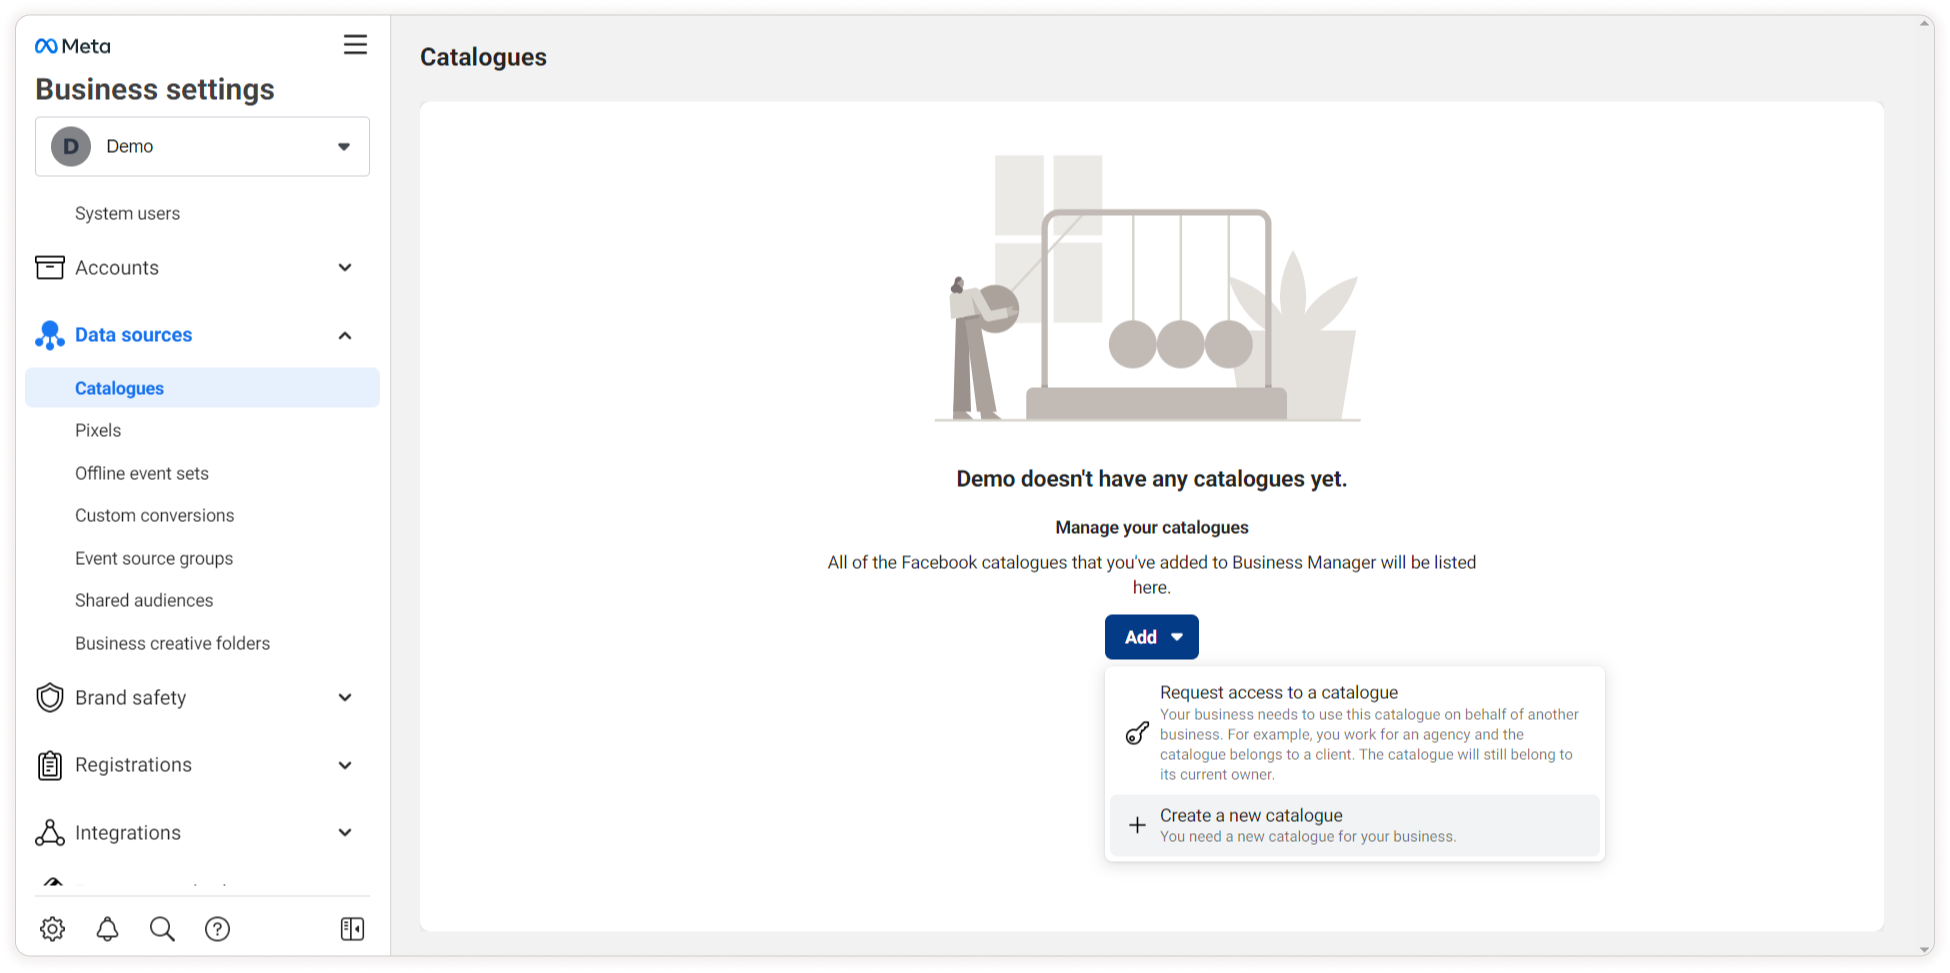
The final step is to create a catalogue and connect it to your page.
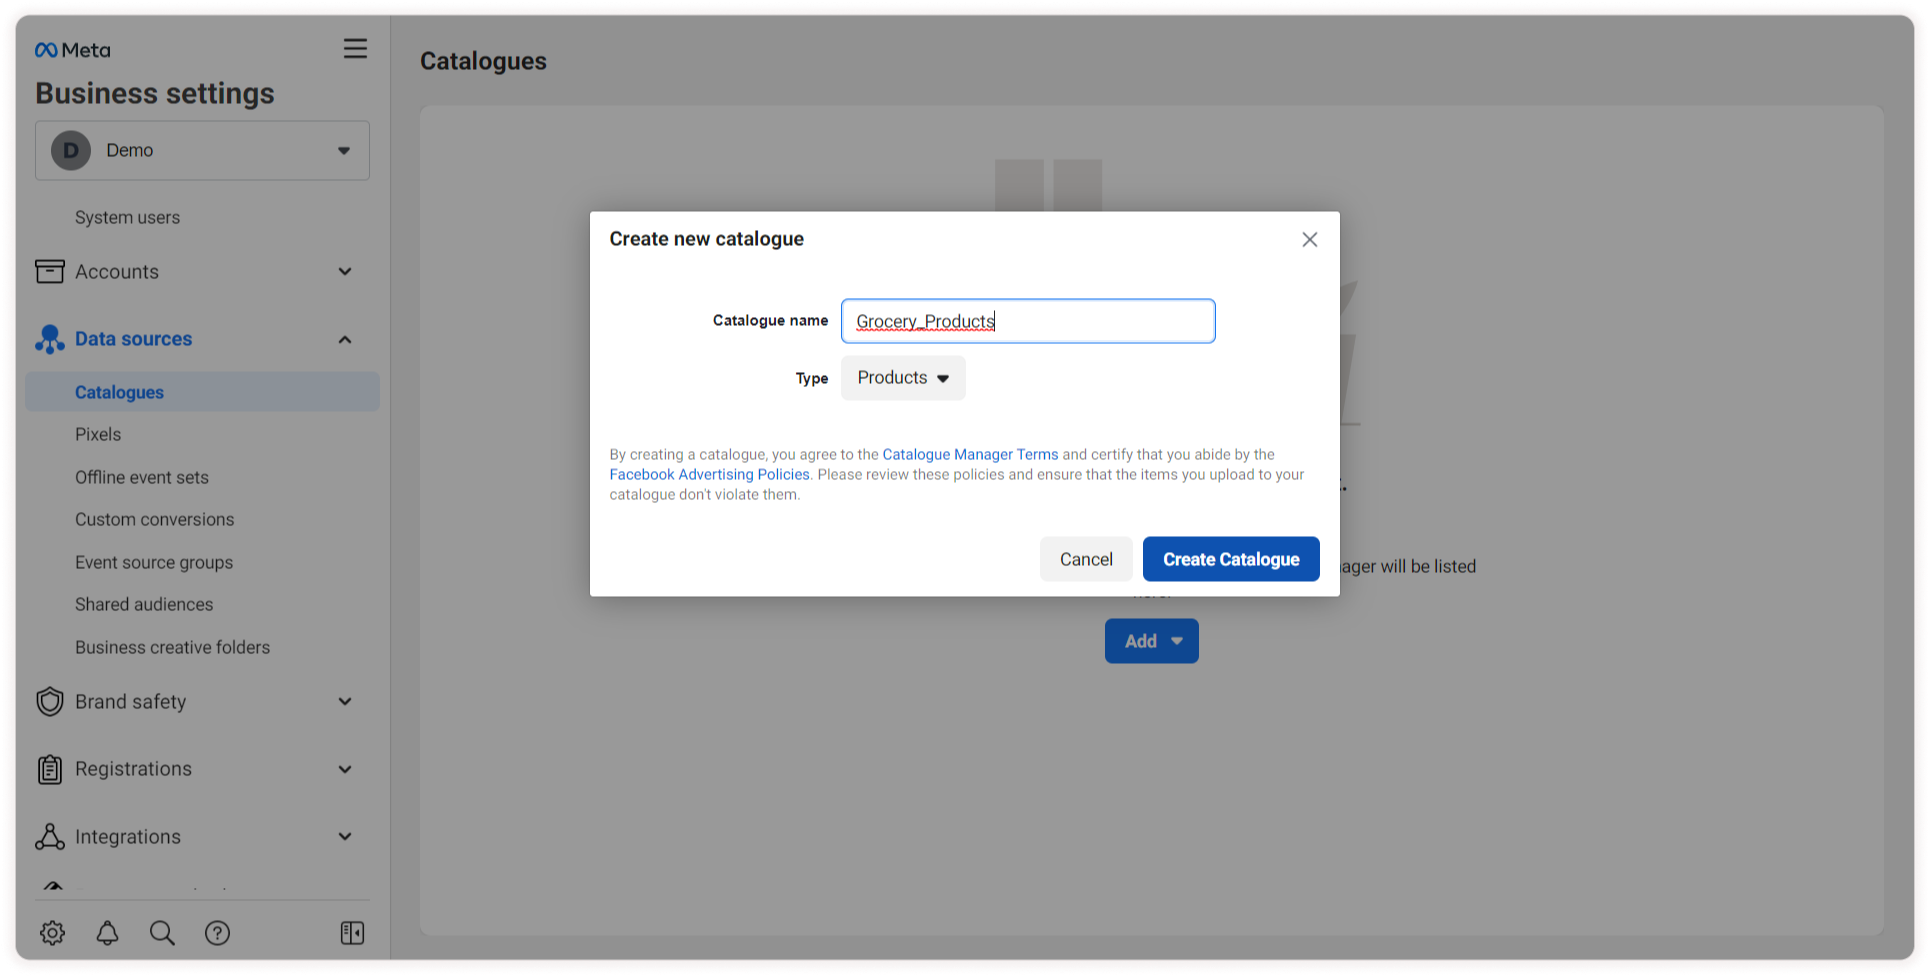
Step 19: In More business account settings go to Data Sources and click Catalogues then click Add and Choose Create a new catalogue.
Step 20: Choose catalogue type and catalogue name (Grocery_Products) then click Create catalogue.
Step 21: Select your business account and assign permission by clicking on Assign.

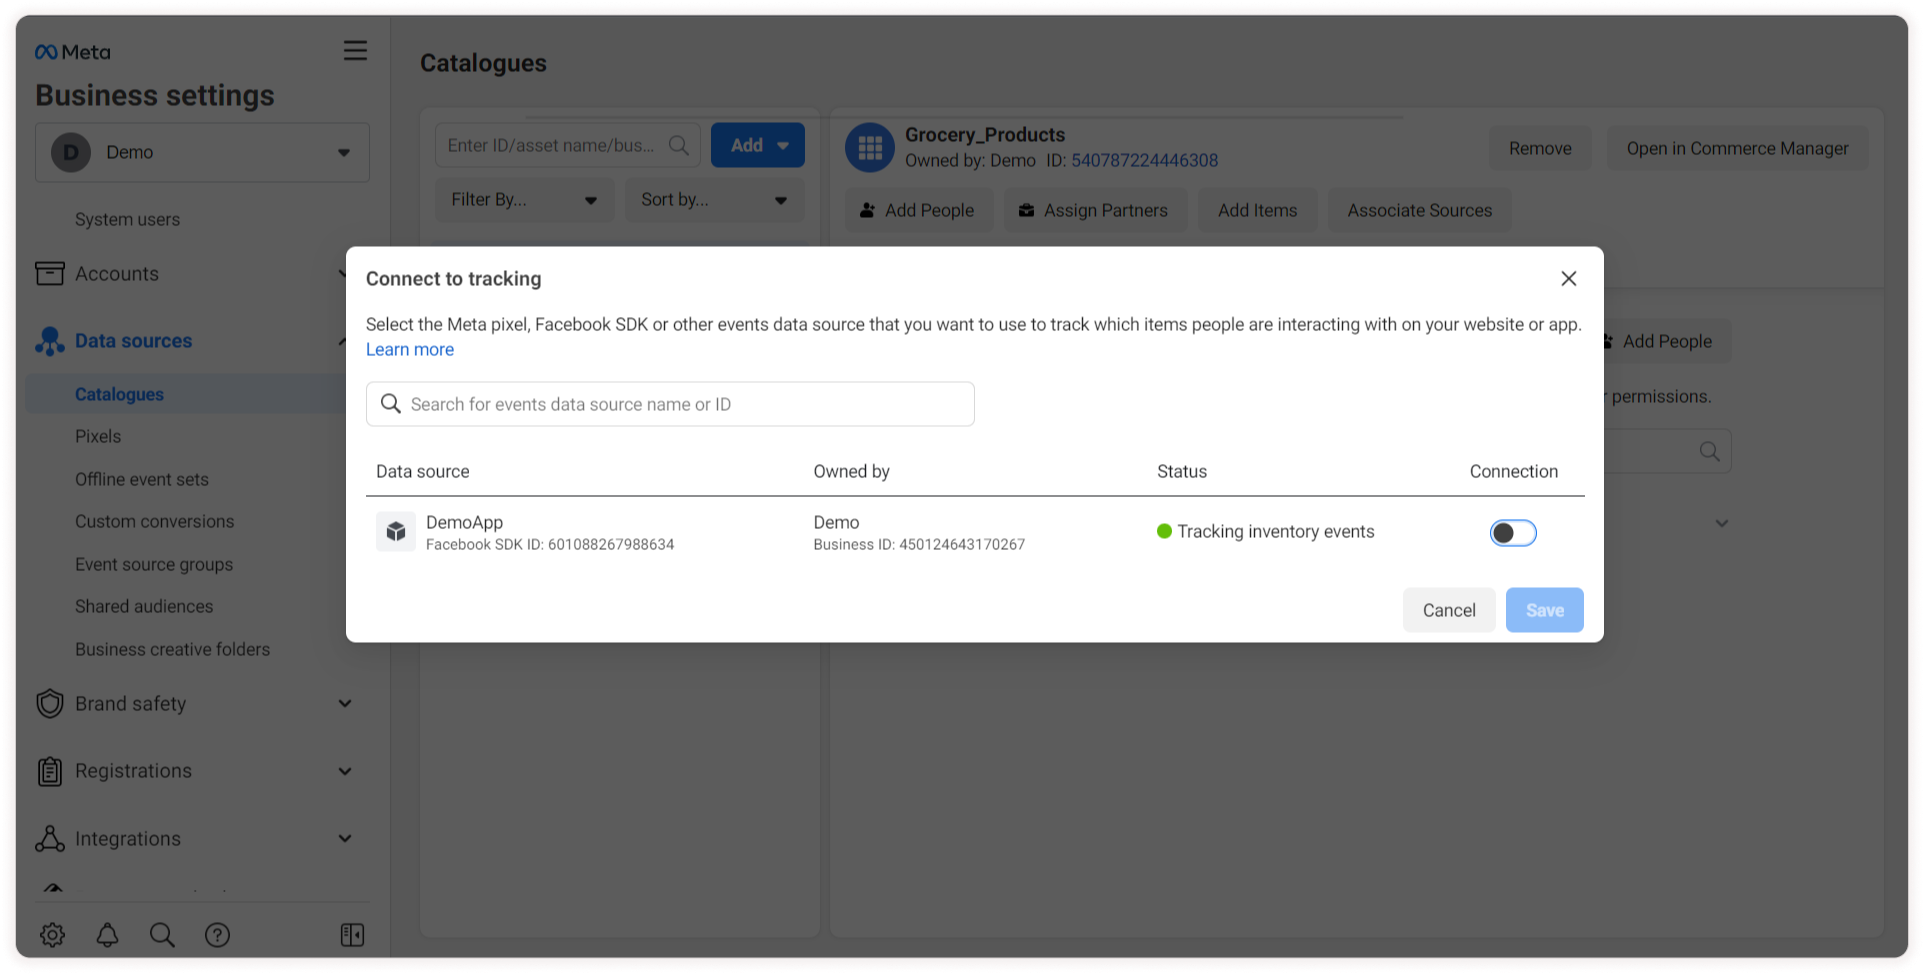
Step 22: If you want to track inventory, enable the Tracking inventory events toggle and save.
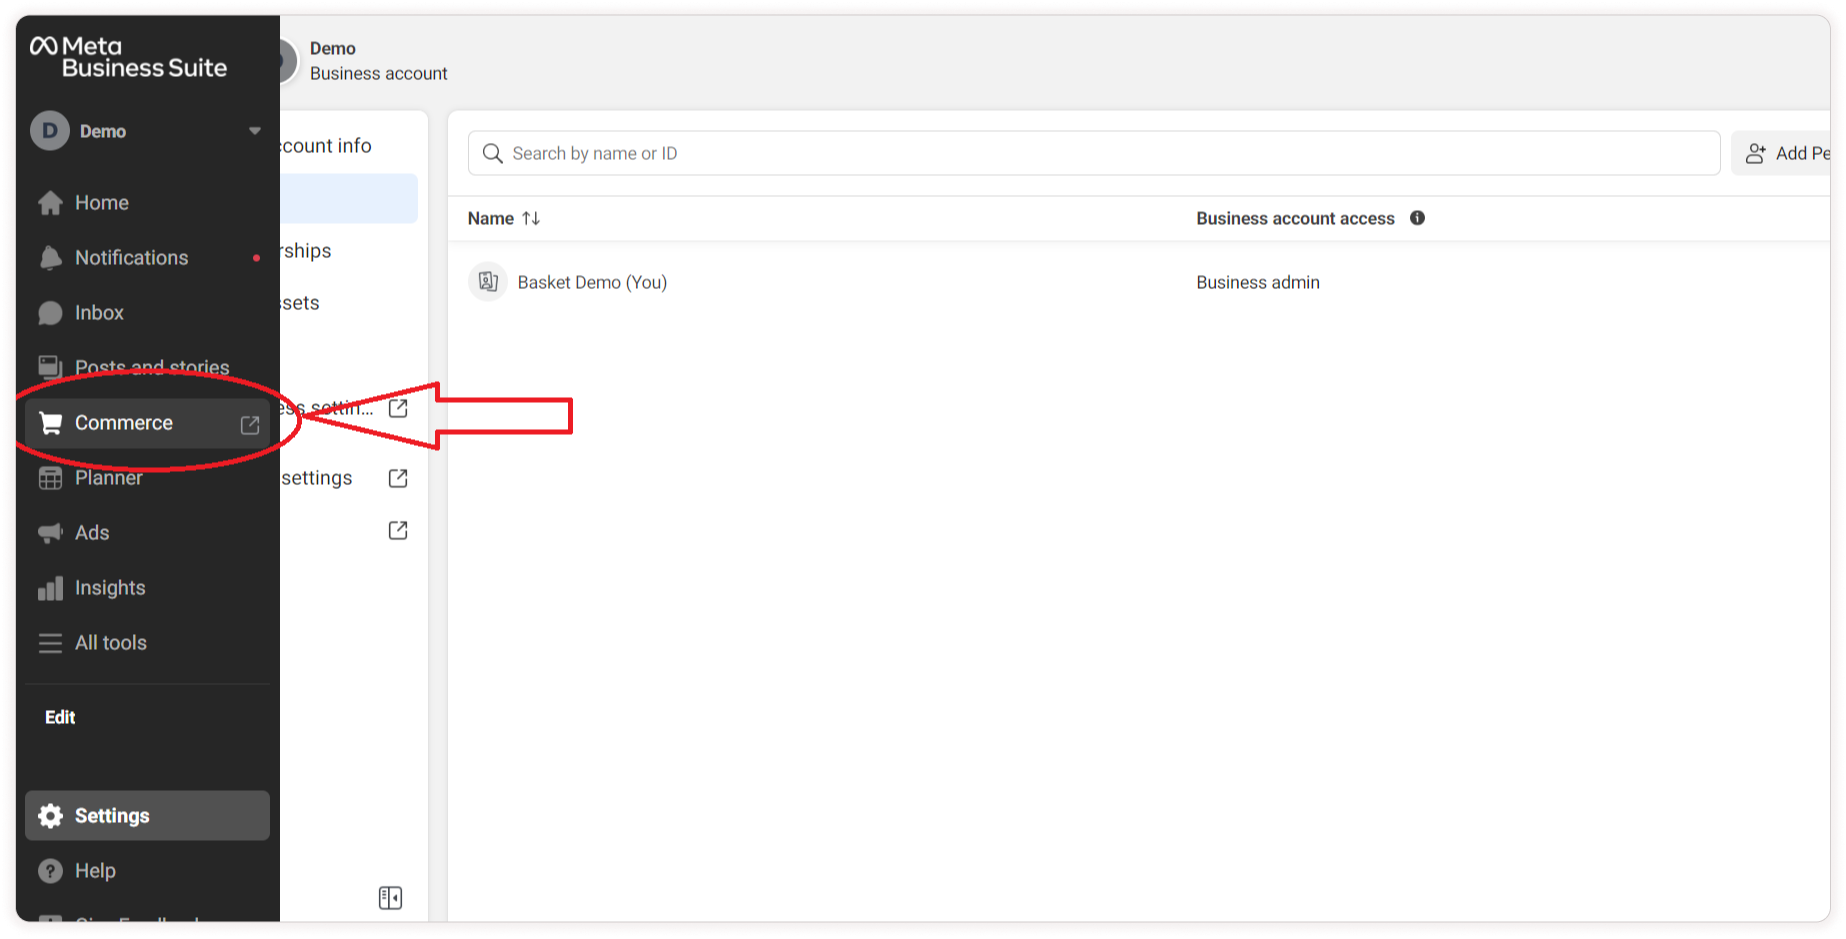
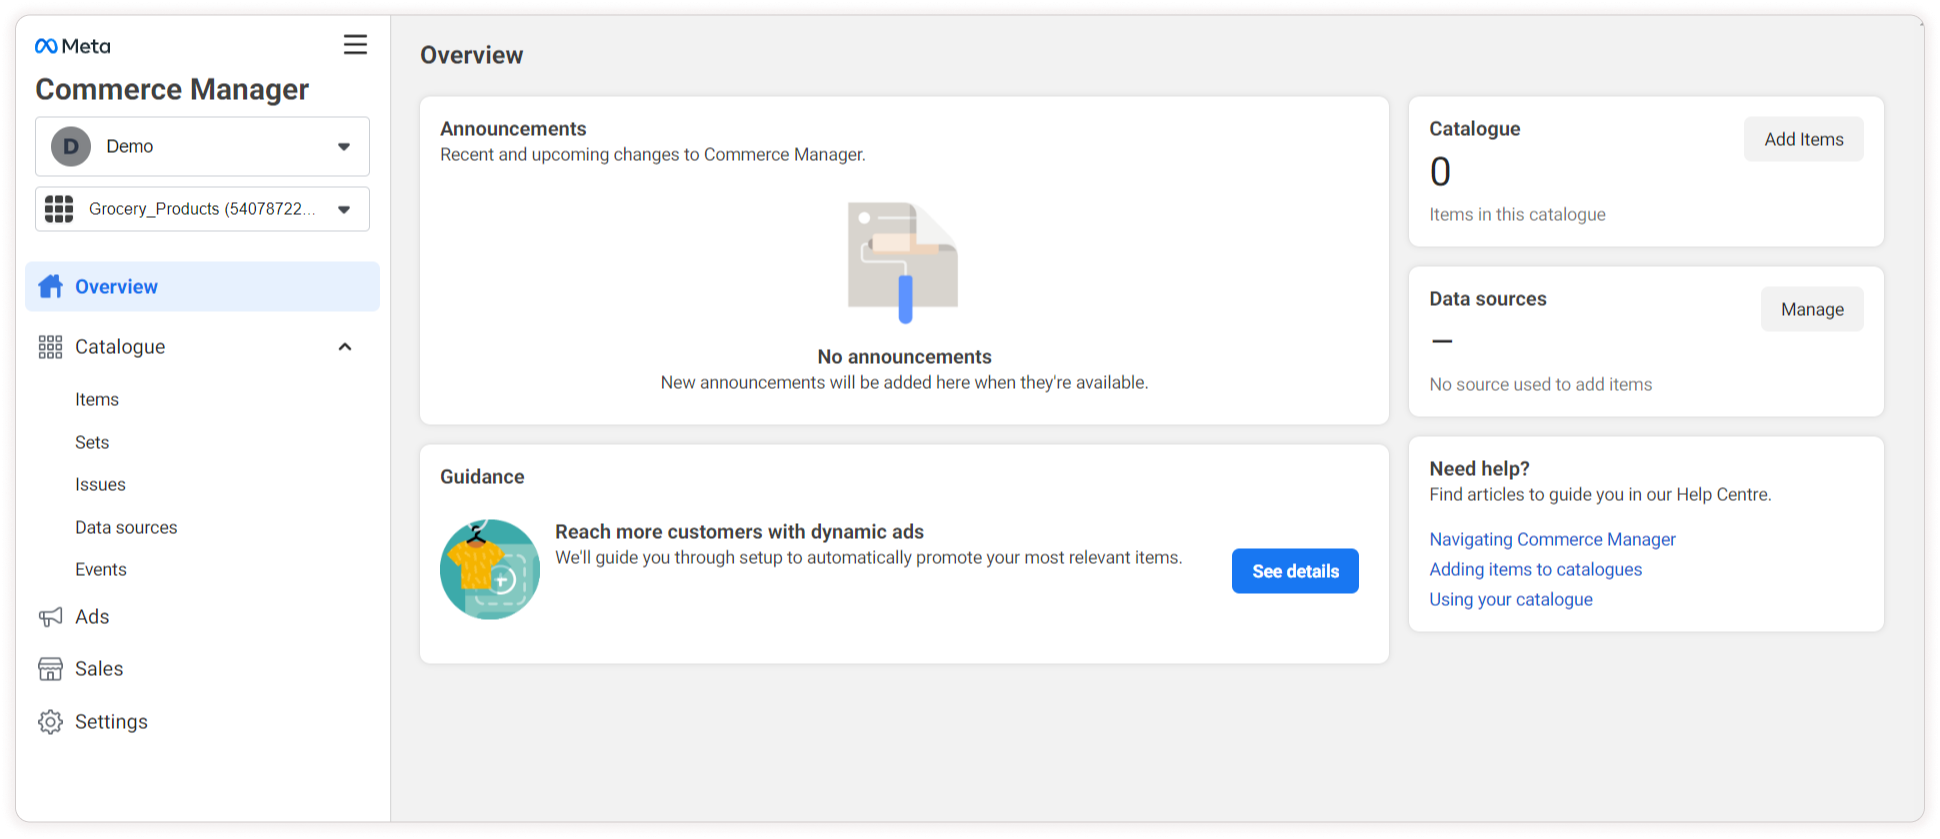
Go to business account settings and choose the Commerce menu from the sidebar and it will redirect to the ‘Commerce Manager’ page.
Click your catalogue (Grocery_Products) in the Catalogues section and it will redirect to your catalogue Commerce Manager page.
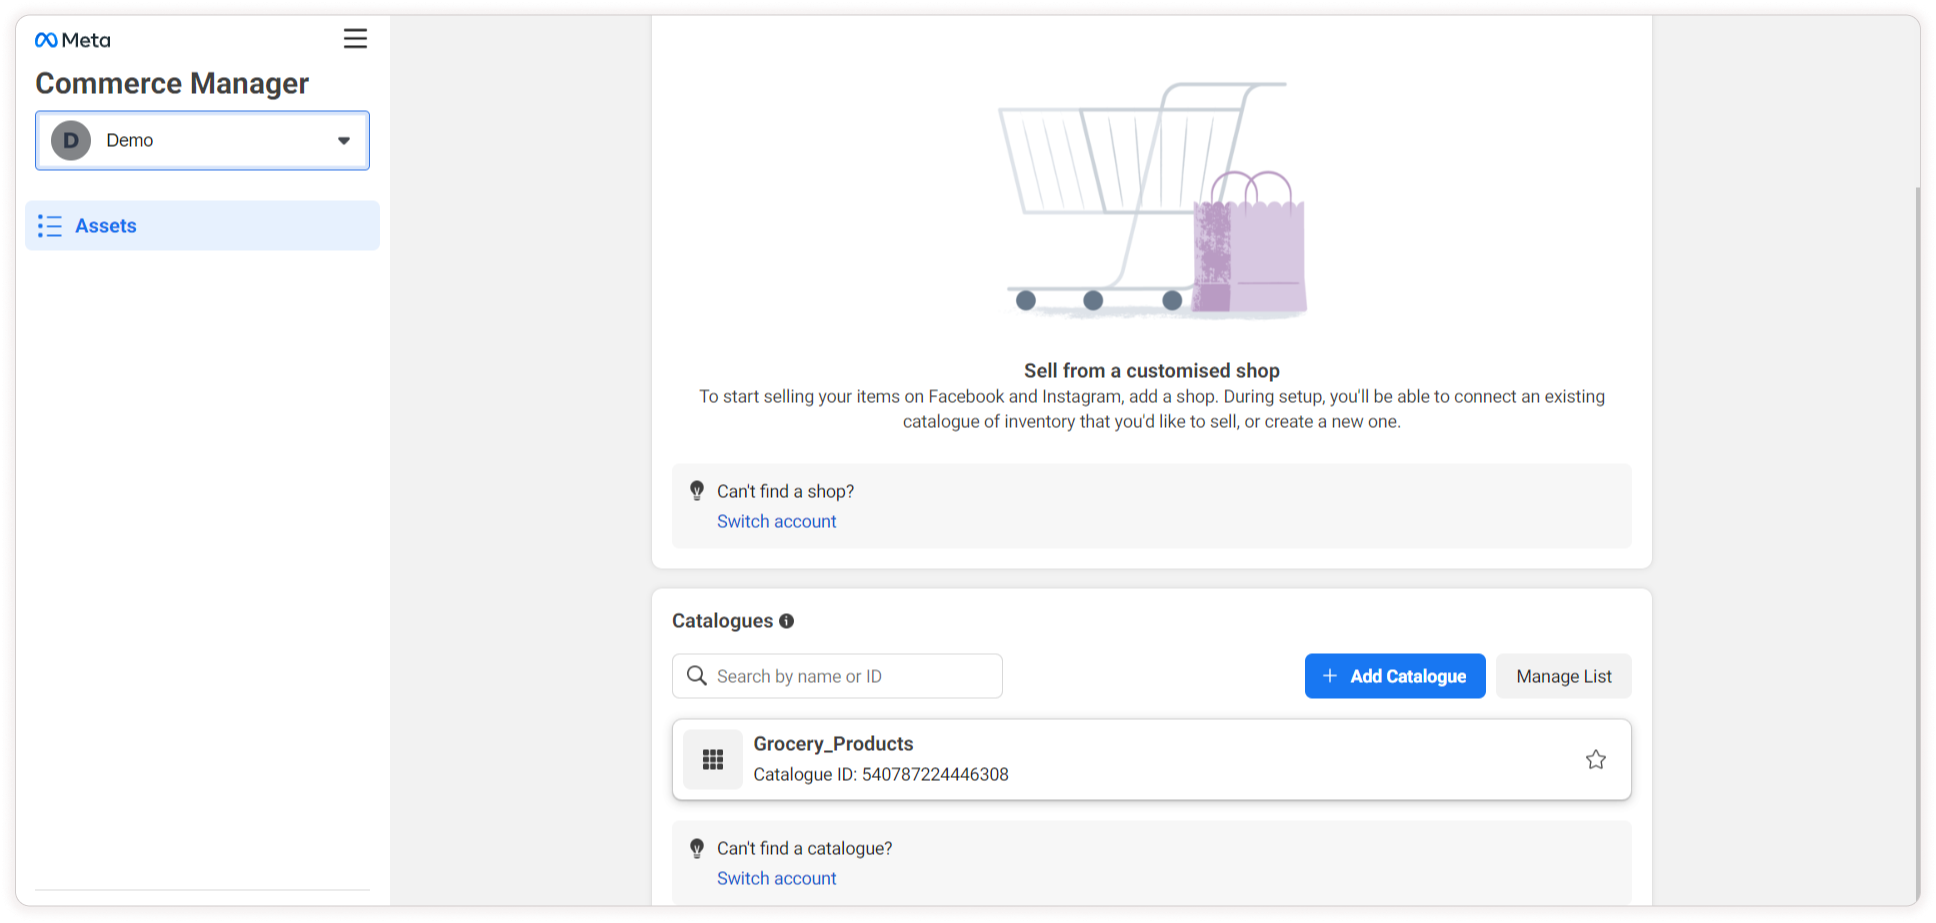
First, you need to create at least one item to connect your catalogue to your Facebook page. Click on the Add Items button in the Catalogue section on the top right.
Step 23: Goto sales and select Shops and click Connect page.
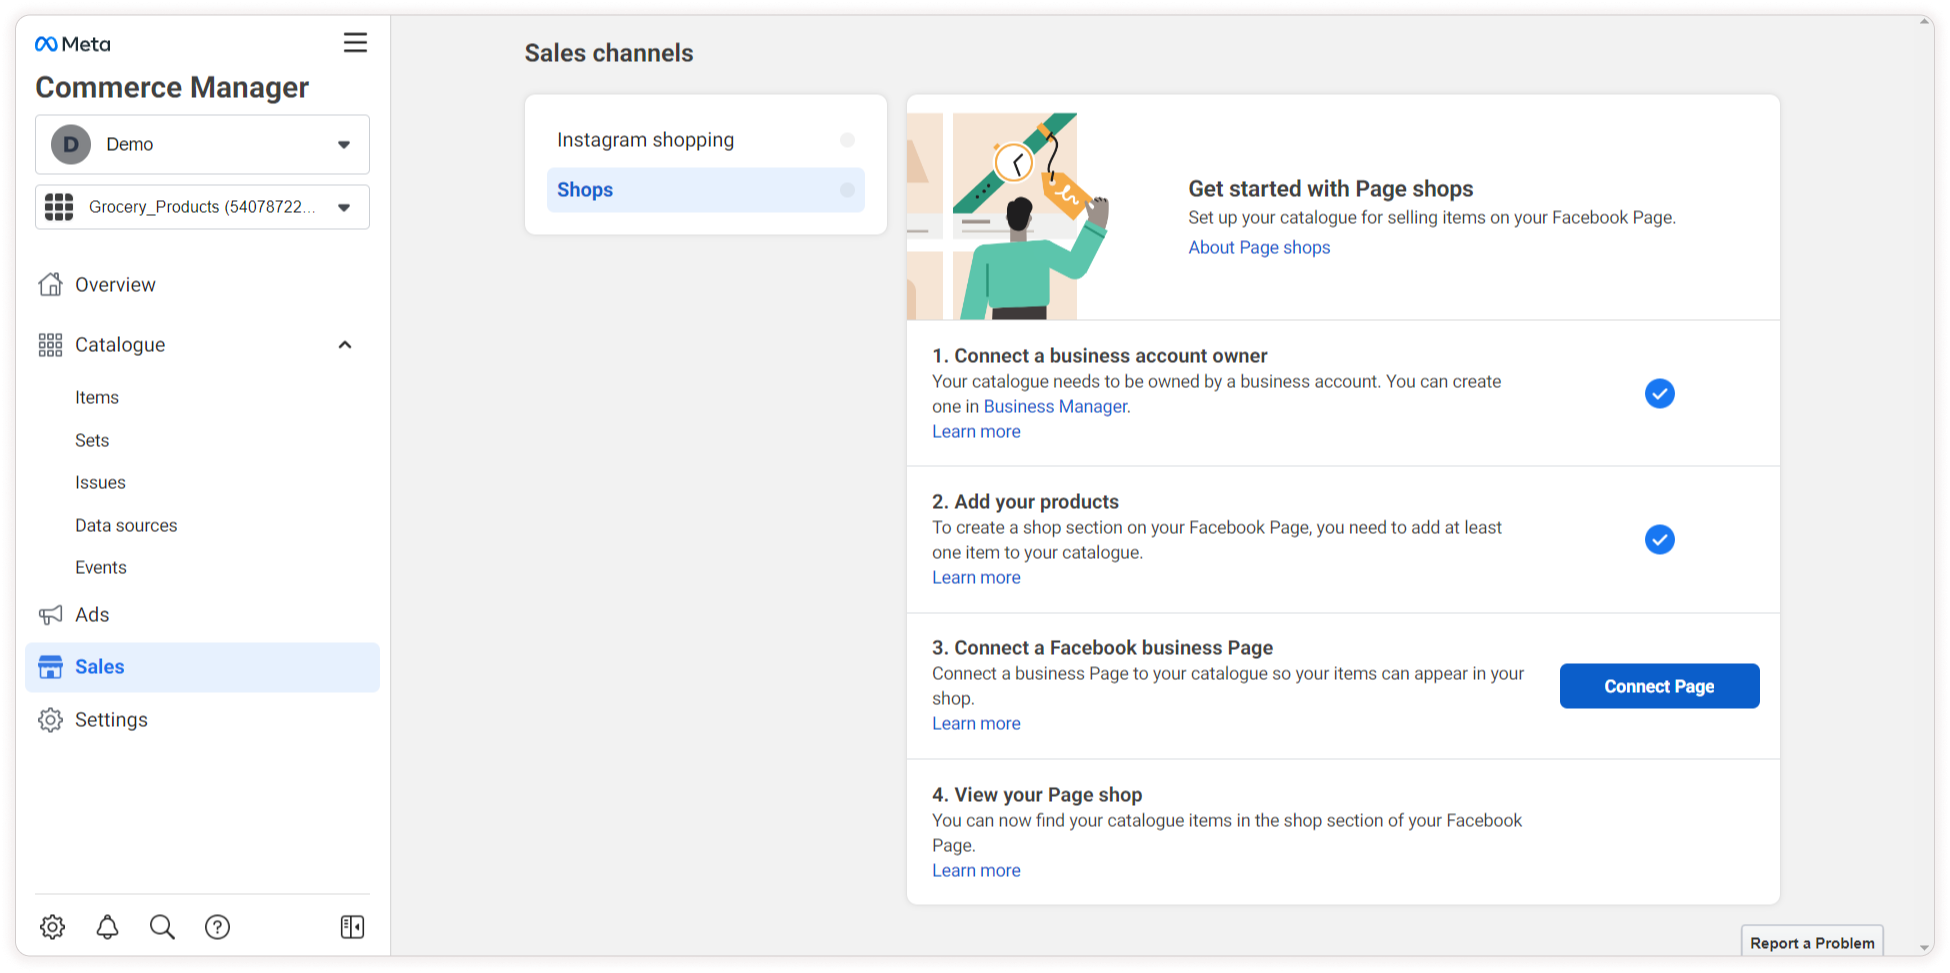
Step 24: Select your page and select next.
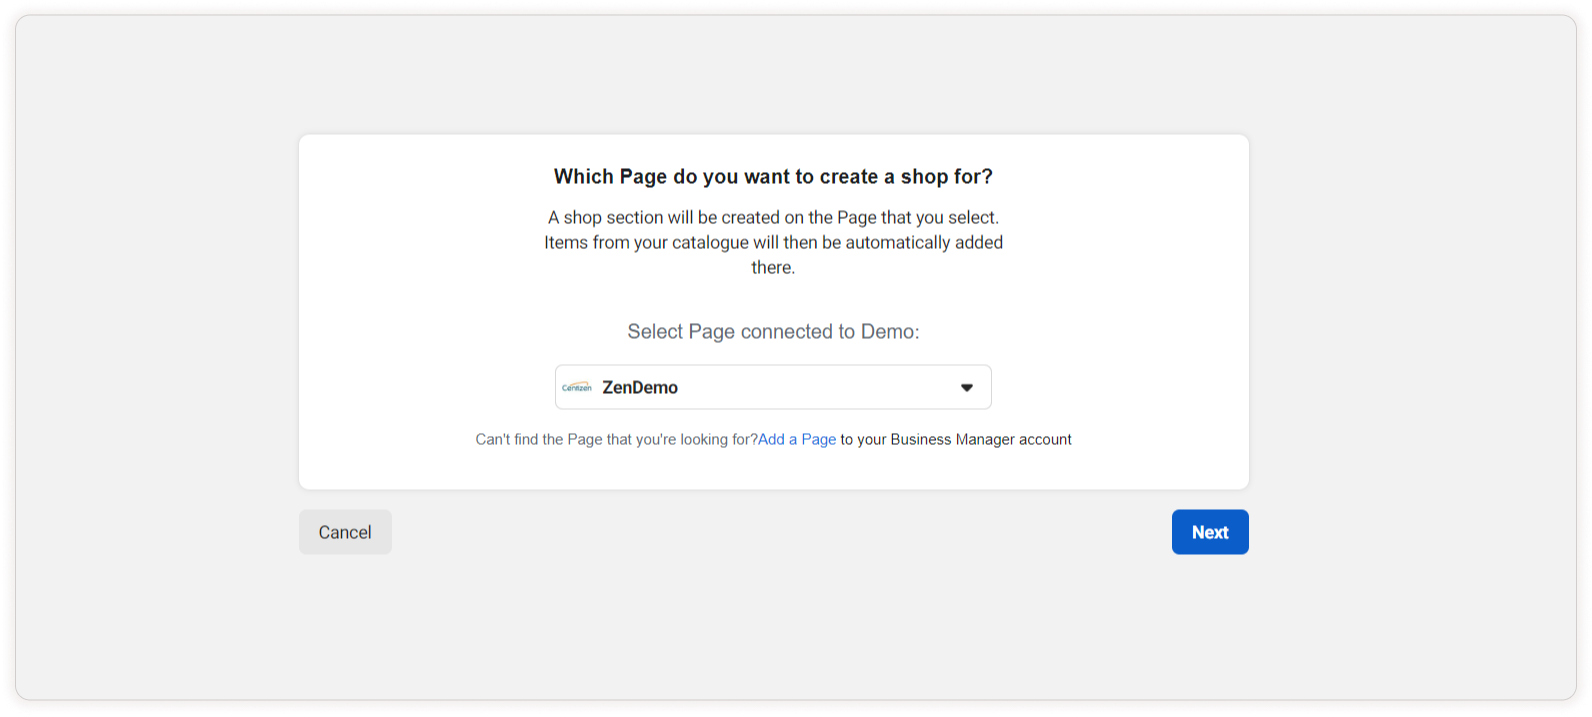
Click Next.
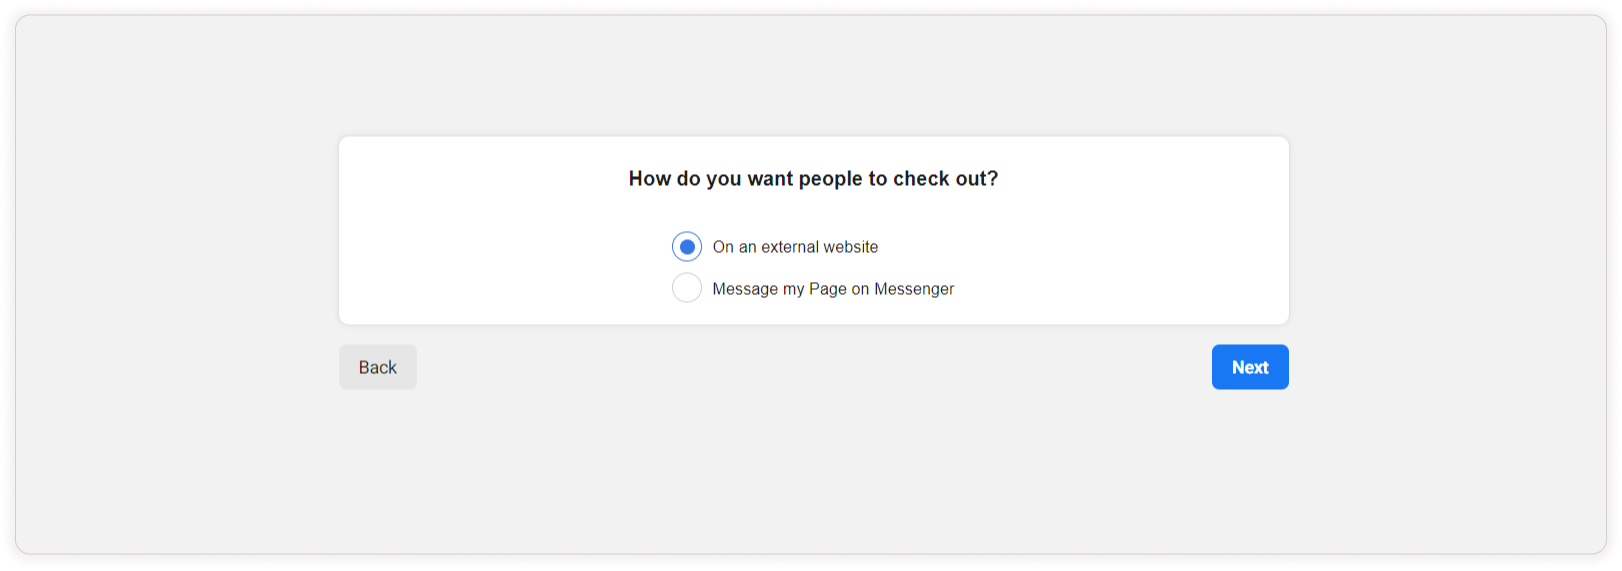
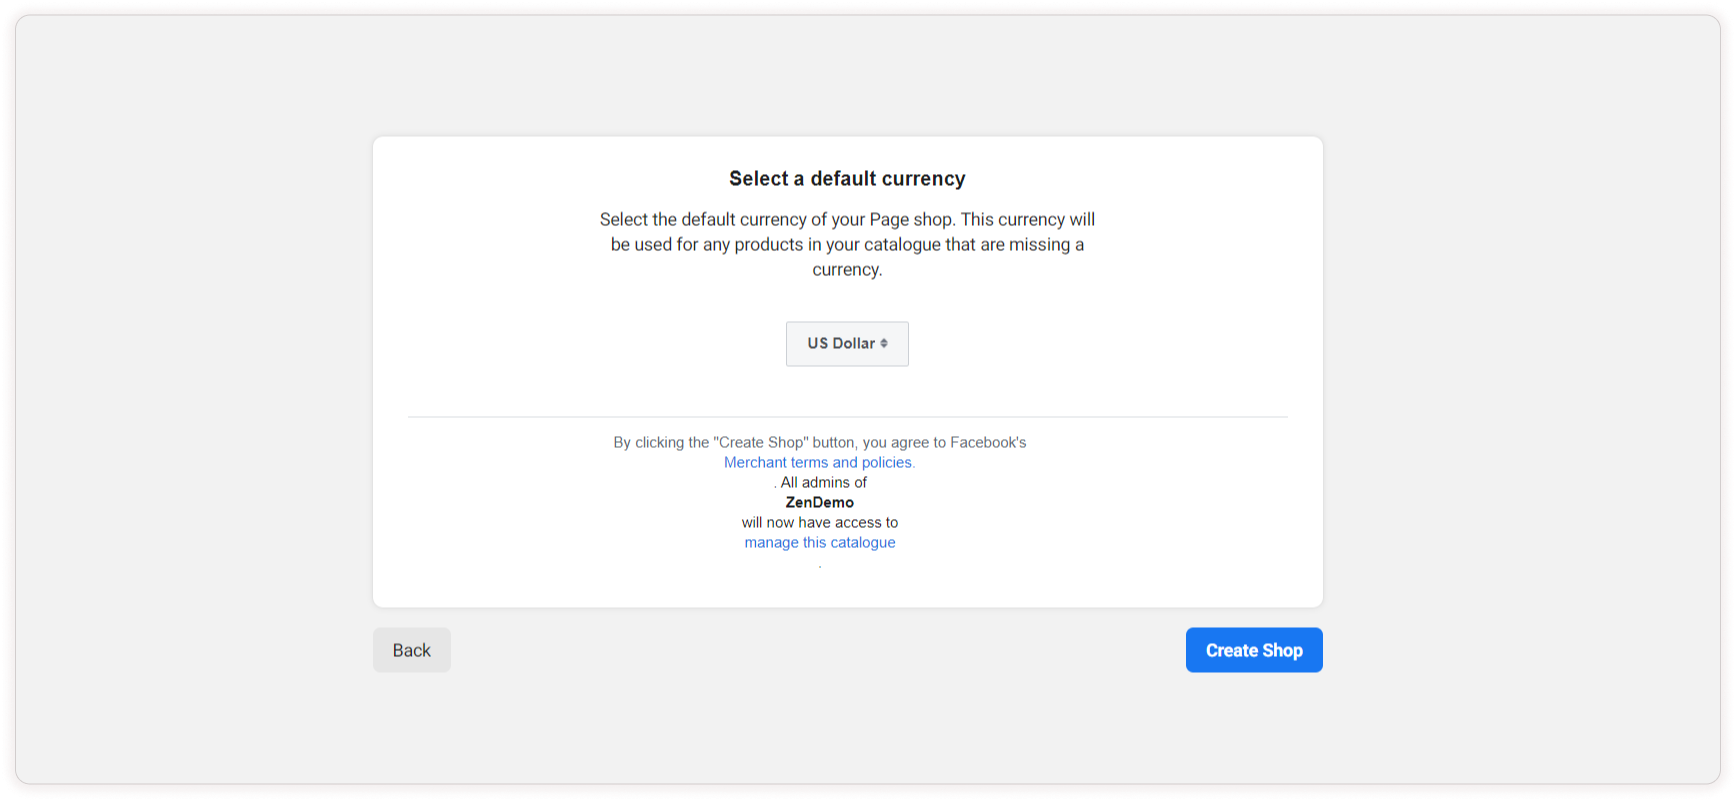
Step 25: Select Currency and click Create Shop.
At last, you successfully connected your catalogue with your Facebook page now you can add products to your catalogue it will reflect on your page automatically.
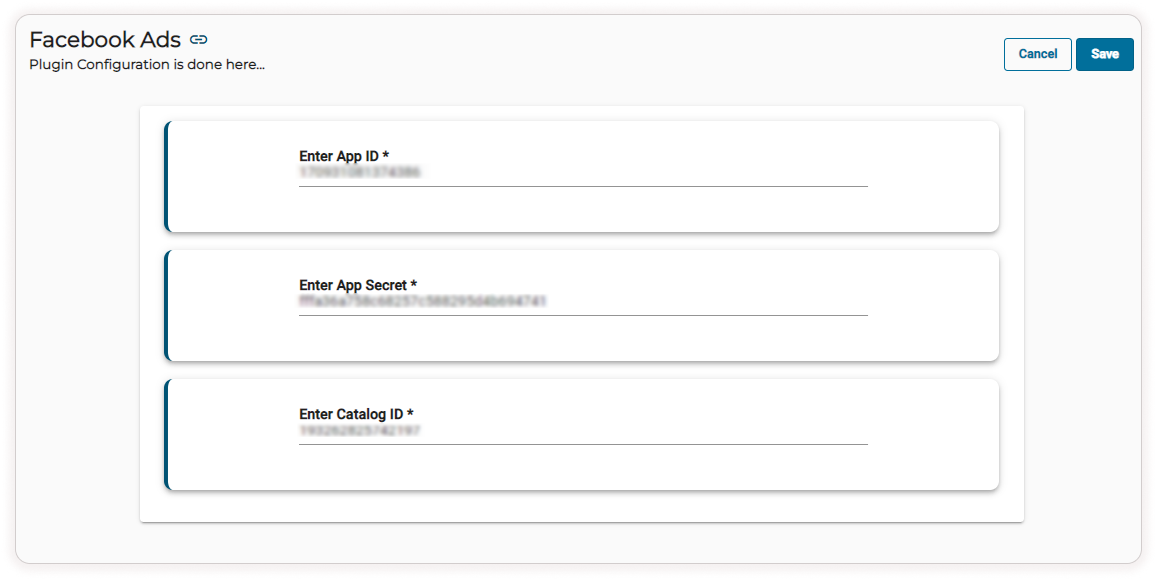
With the help of AppId, AppSecret and CatalogueId you can add, update and delete products to your catalogue from the backend.
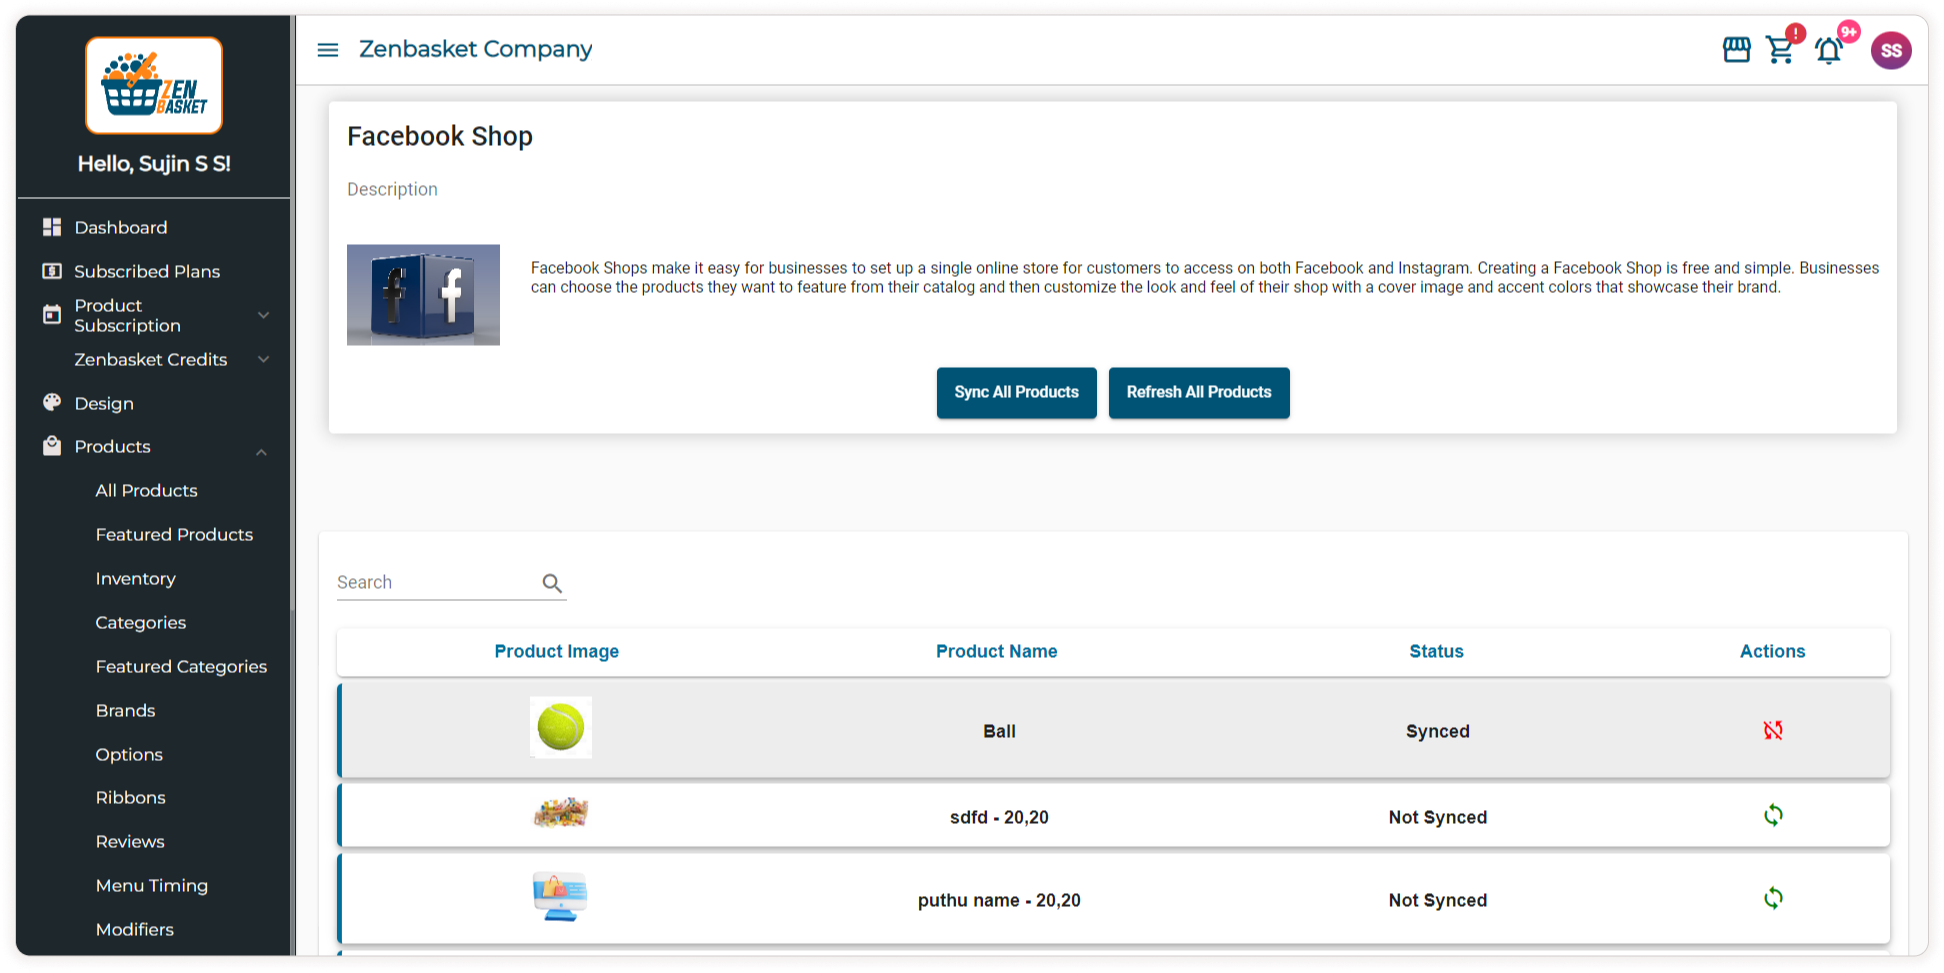
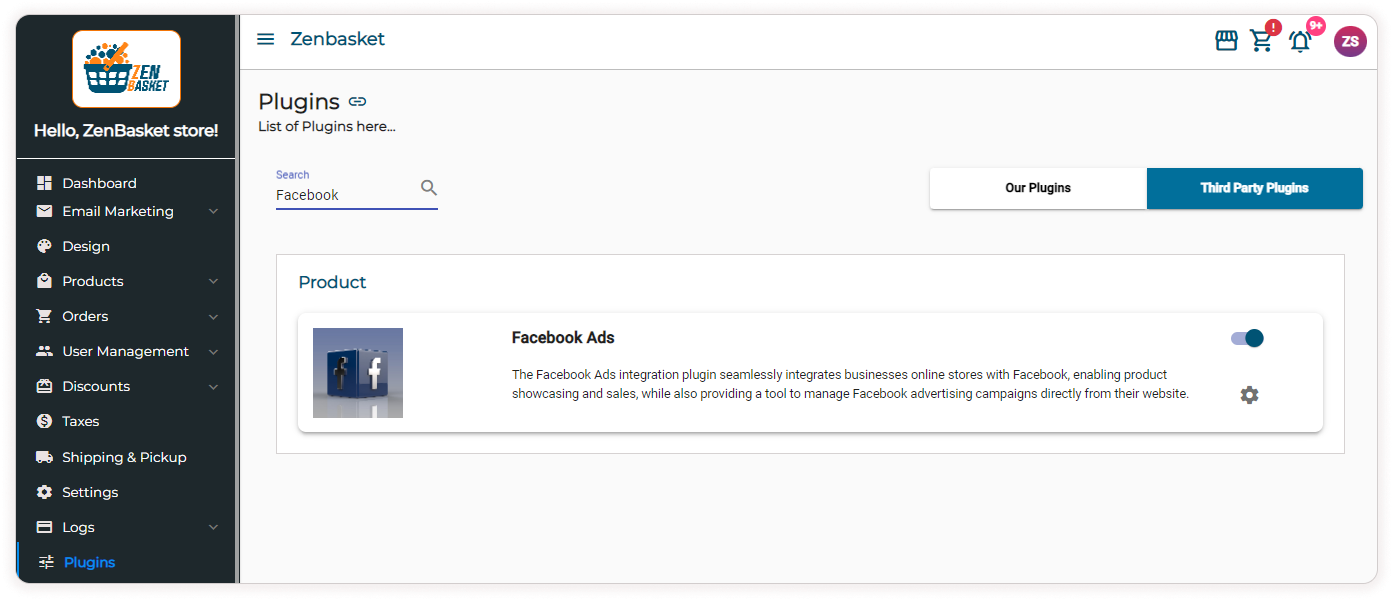
How to sync products in ZenBasket with FaceBook
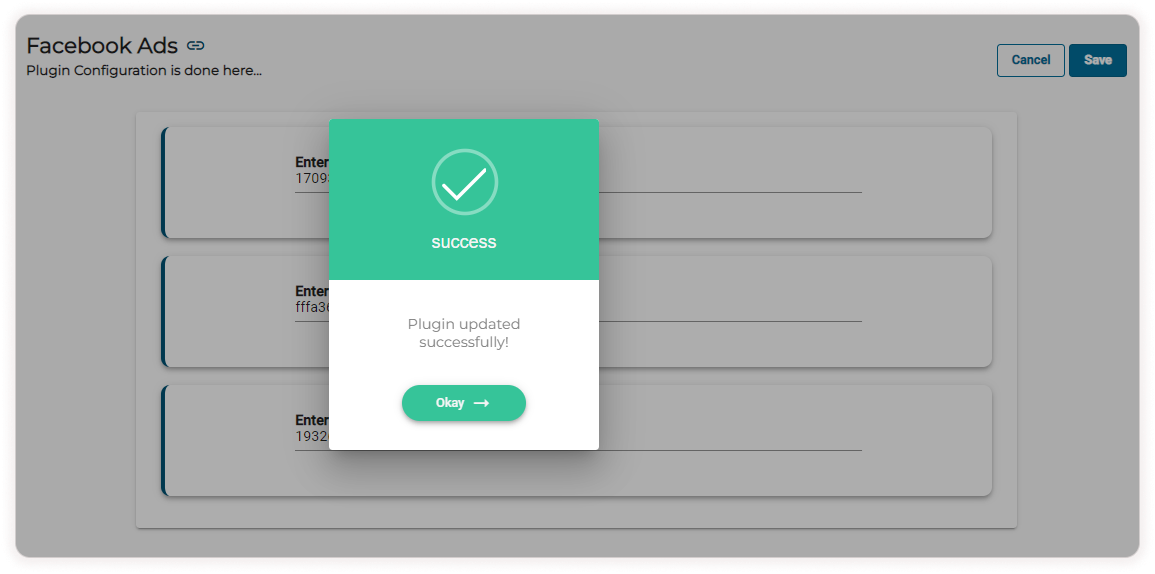
To enable Facebook in ZenBasket, go to Plugins. In the Third Party Plugins tab, enable Facebook Ads.
Enter the App ID, App Secret key and the Catalogue Id that you got from the Integration process. Click Save.
The plugin is updated successfully.
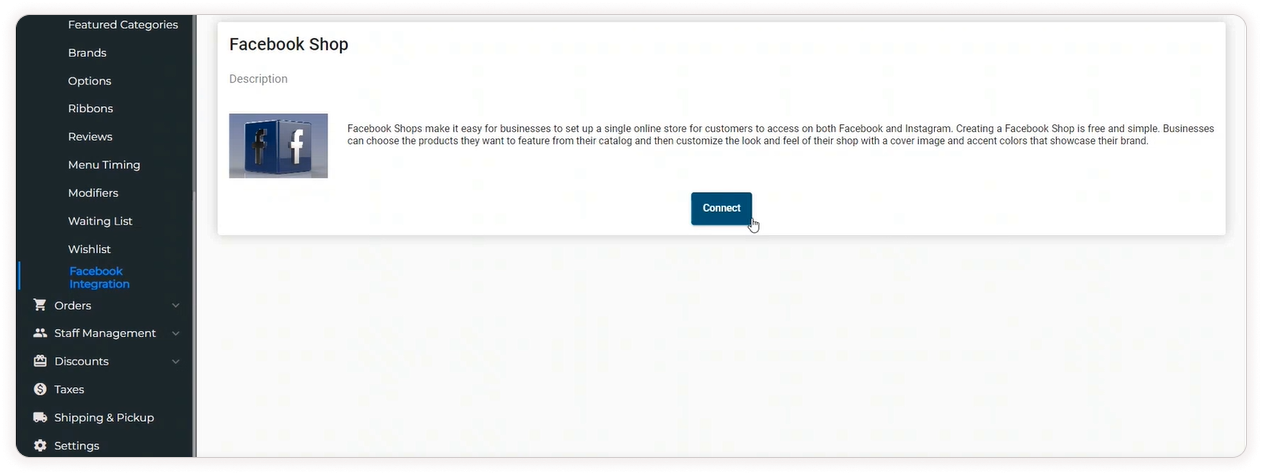
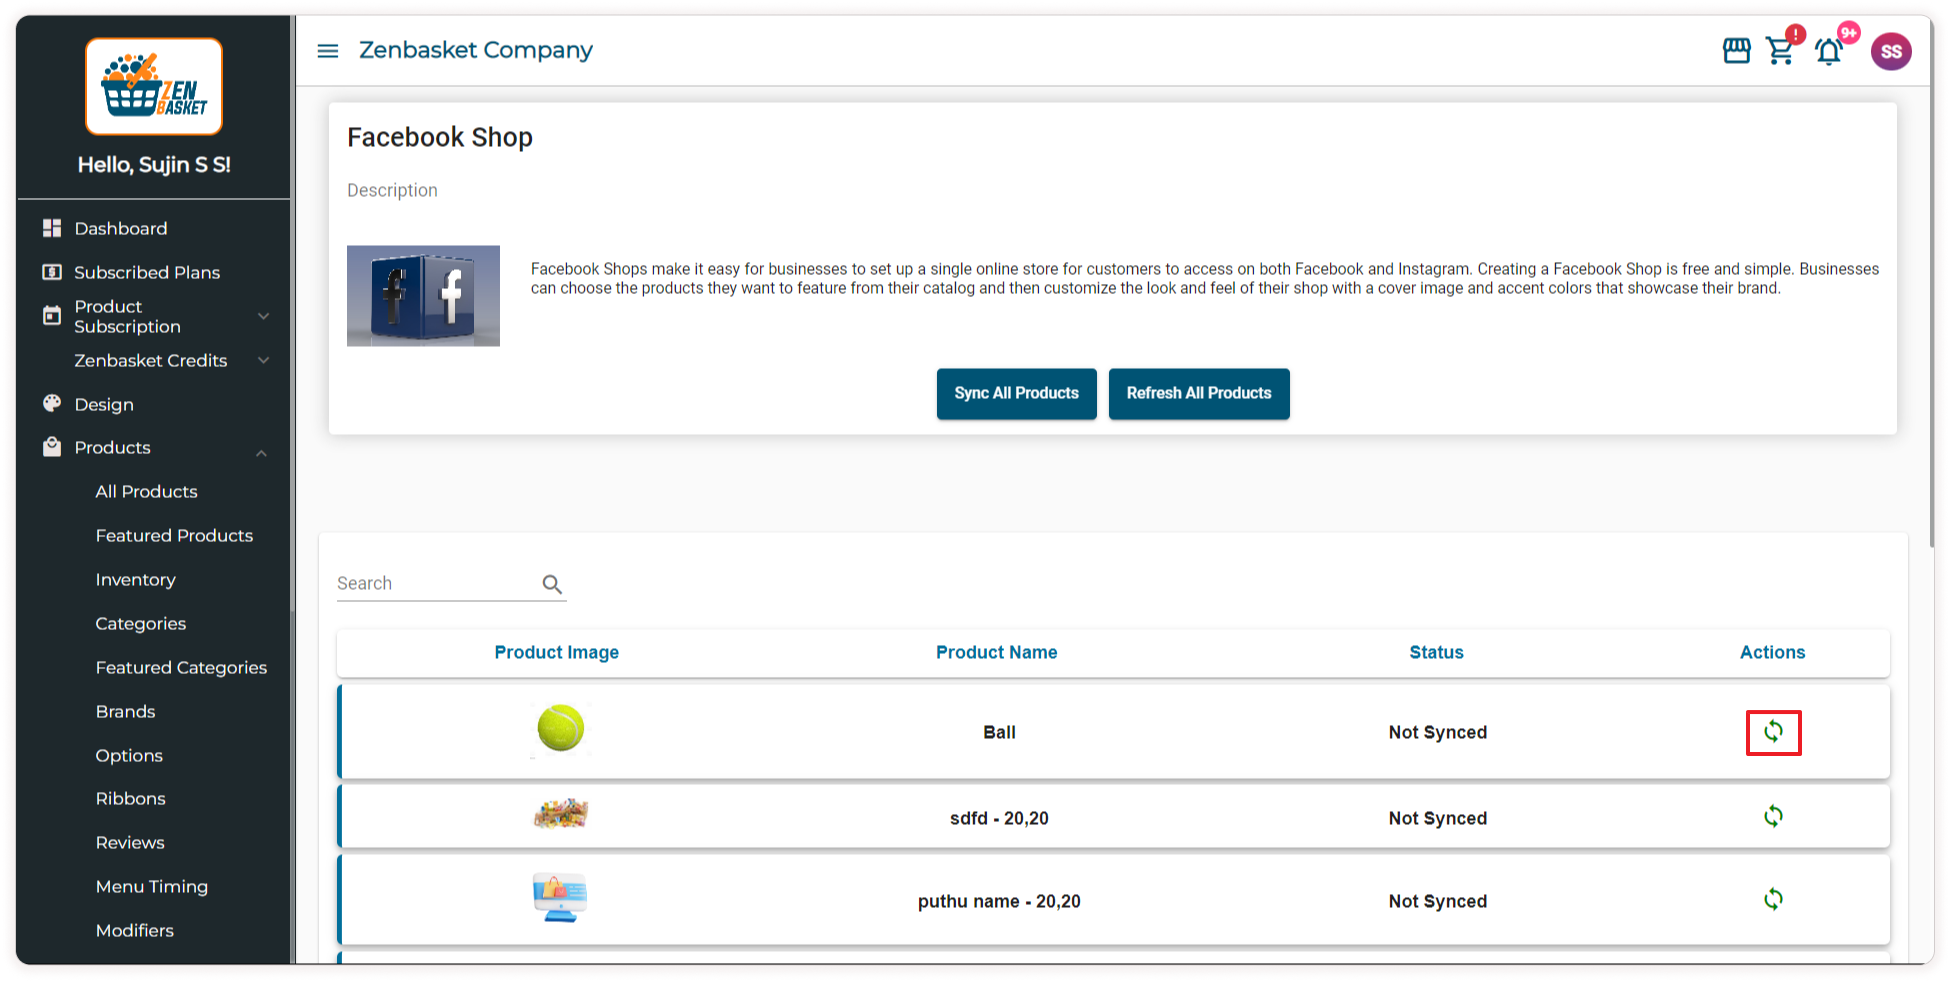
Go to the Products menu and select the Facebook Integration sub-menu. Click on Connect.
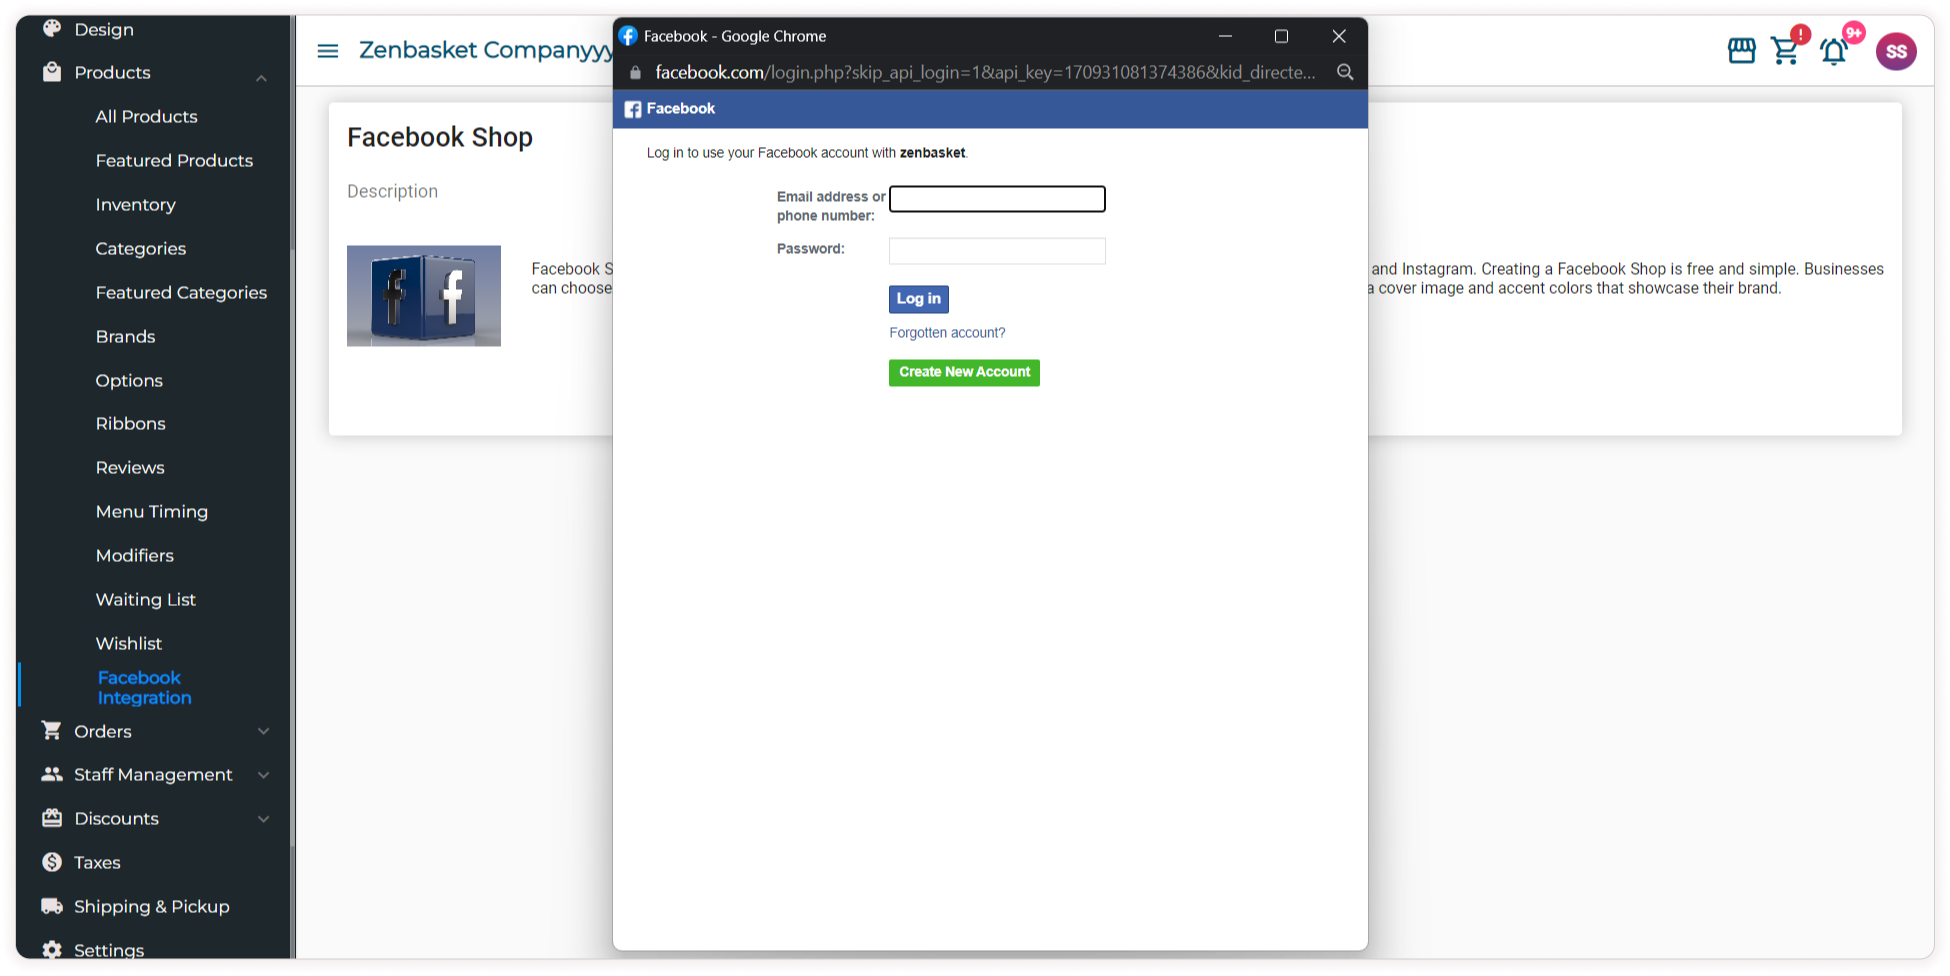
Login to your Facebook Account using your credentials.
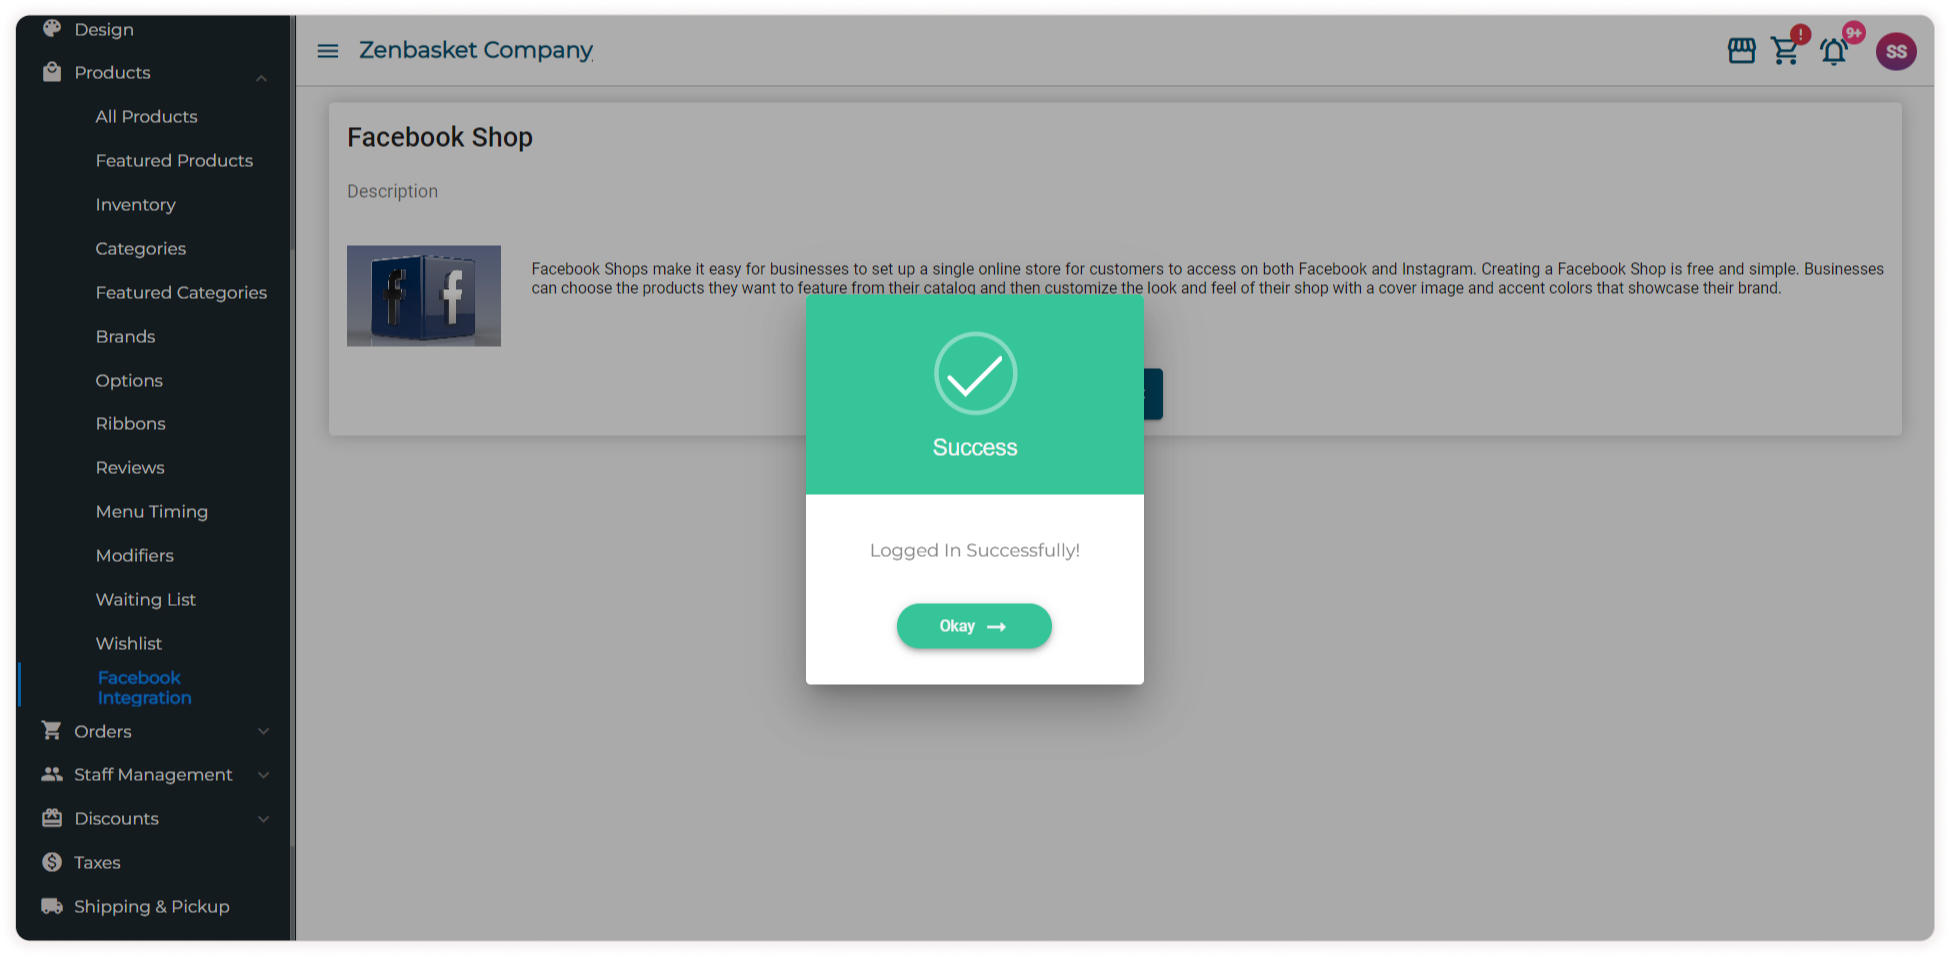
A dialog box appears stating you have logged in successfully.
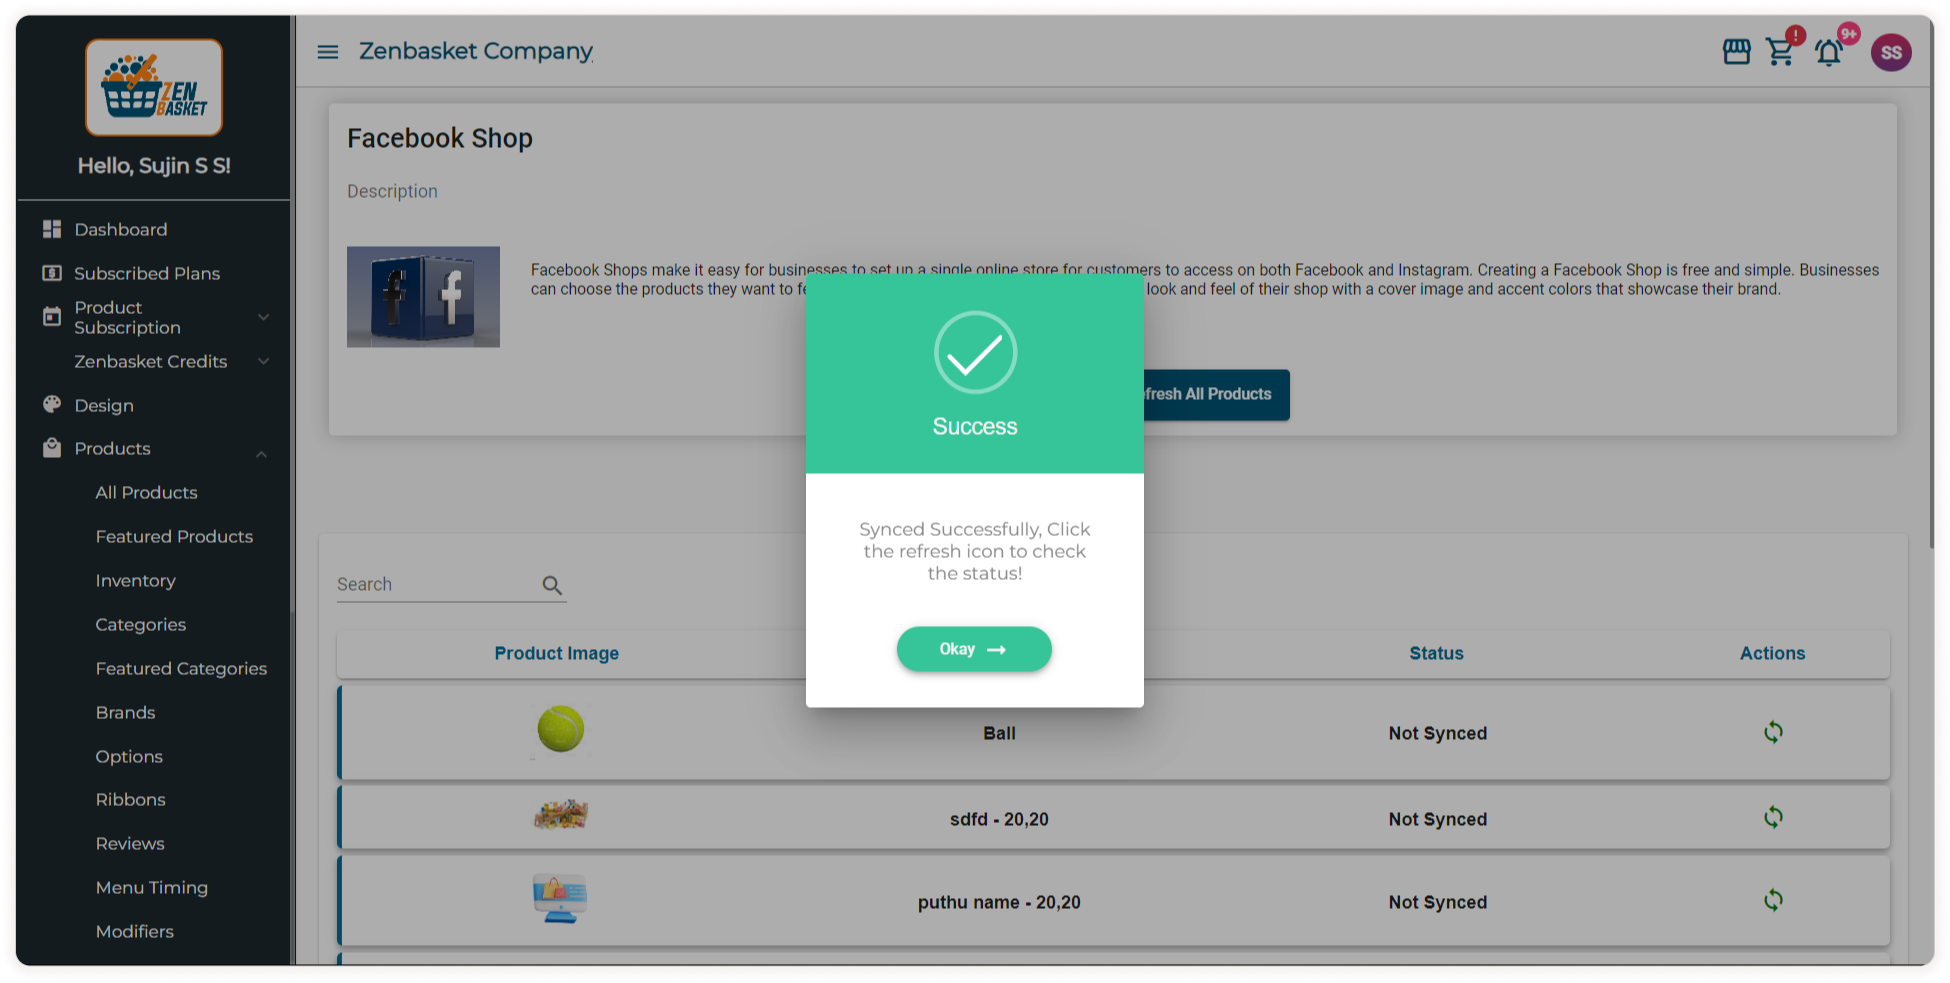
Once you’ve logged in, you can sync products on your store so that they are displayed on your business page on Facebook. Click on the sync icon against each product under actions to sync individual products or click on the Sync All products button to sync all the products of your store with Facebook at a time.
Note: It may take several minutes for the Sync process to complete.
The product is synced successfully. Click Okay in the dialog box.
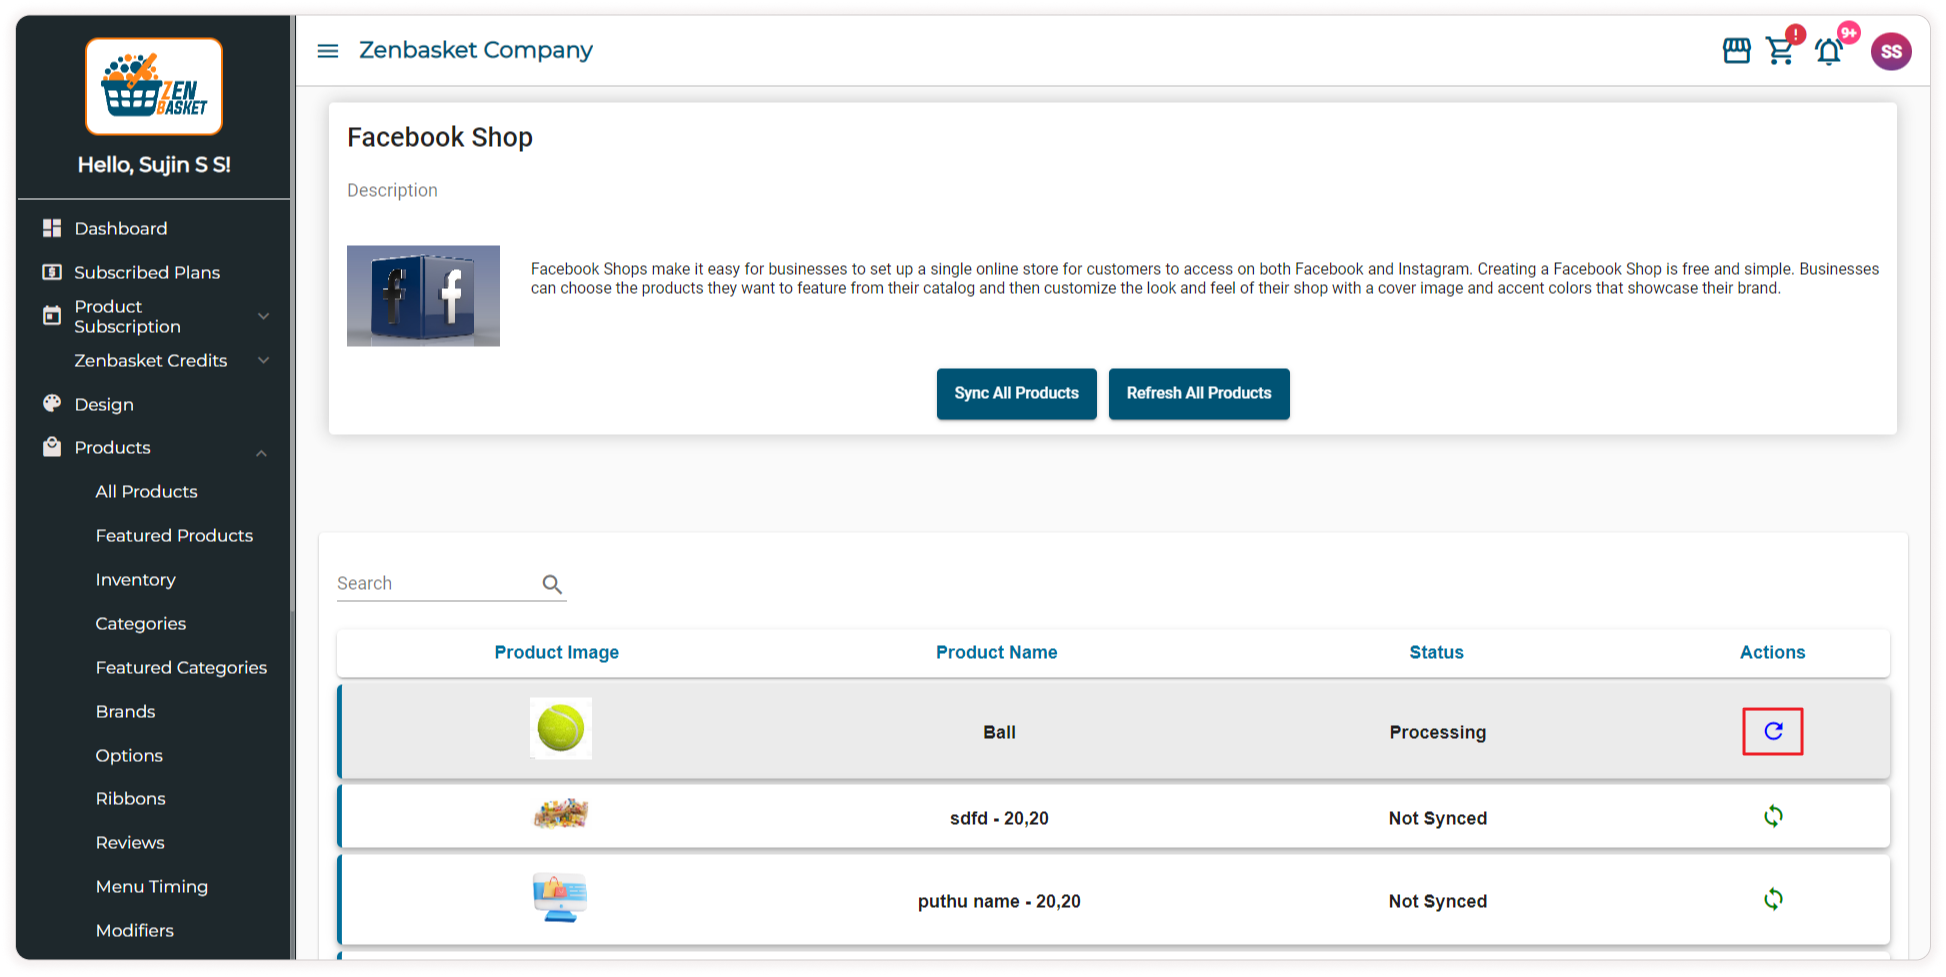
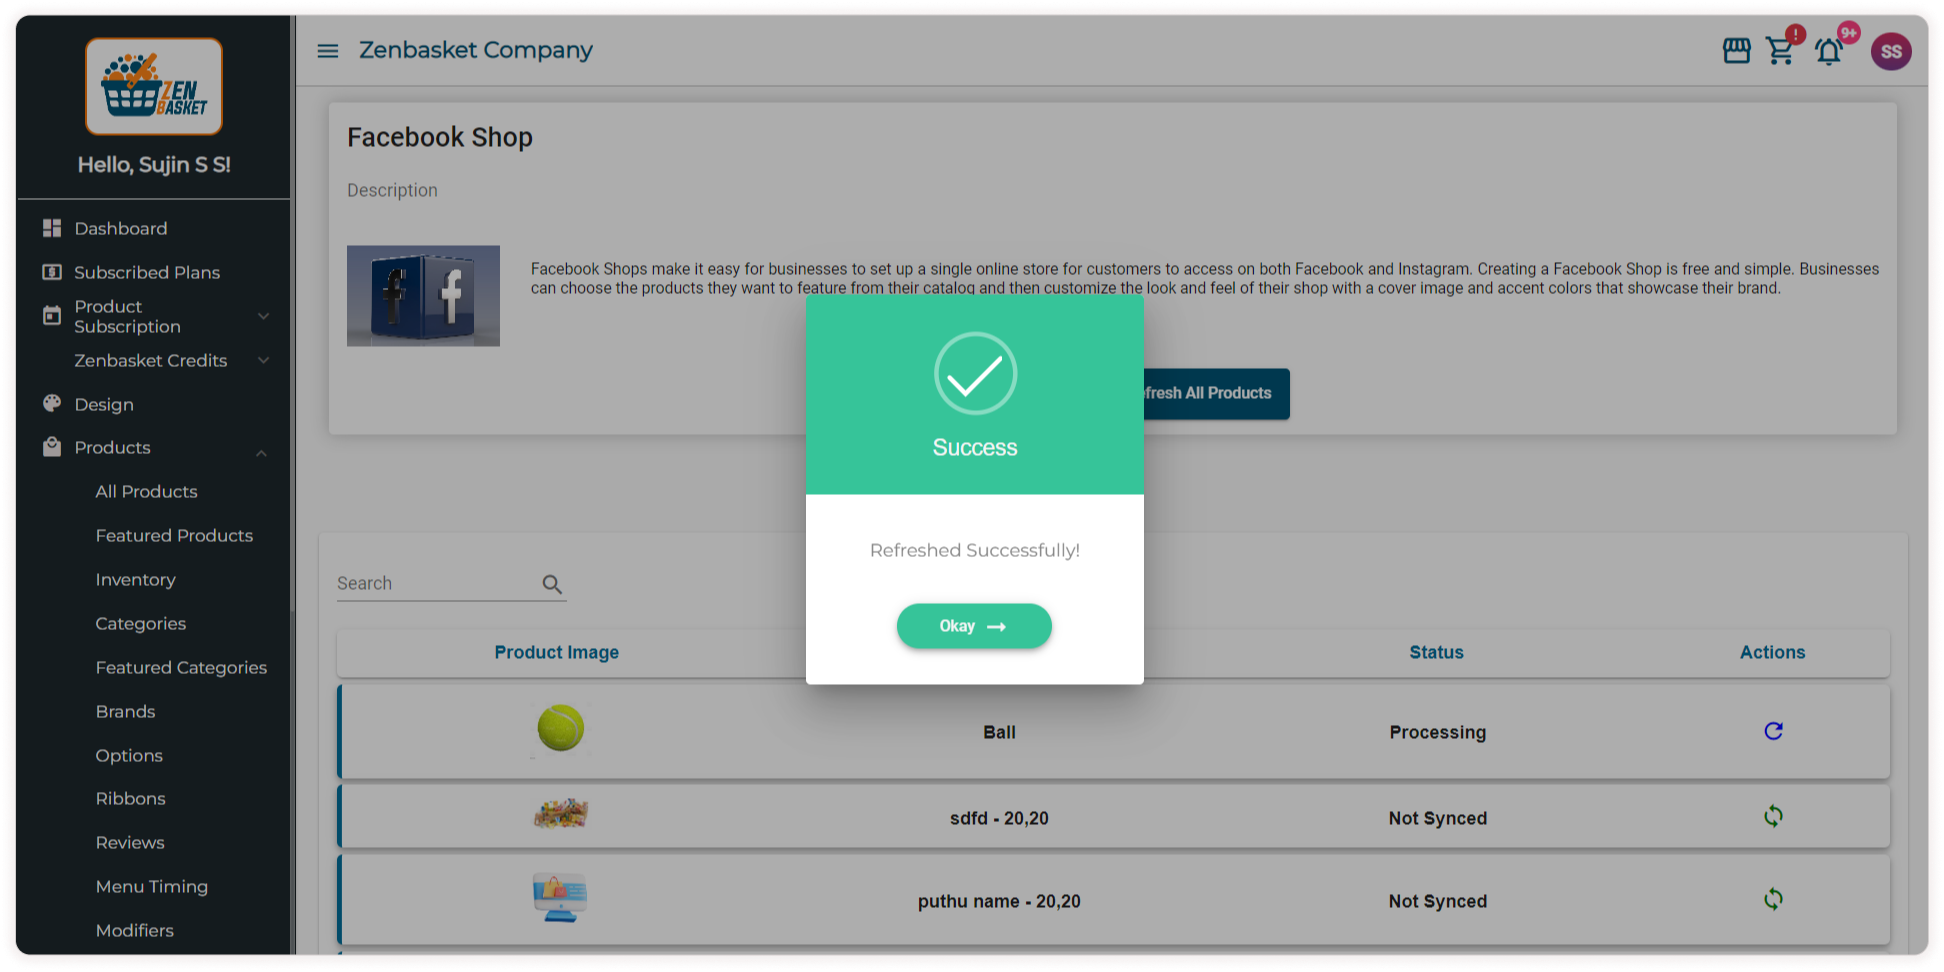
Now click on the refresh icon under actions to update the status. You can also refresh all the products by clicking on the Refresh All Products button.
A dialog box appears stating that the status is refreshed successfully.
The status changes to Synced and the Async icon appears under Actions. You may click on it to async the product.