
Pre-order
Pre-ordering involves placing an order for an item that is currently unavailable for purchase or out of stock in the store. The purpose of pre-ordering is to indicate customer interest and guarantee their reservation, ensuring they receive the item promptly once it becomes available. Enabling pre-order products allows the store owner to generate early revenue, efficiently plan inventory, and obtain valuable insights for future decisions.
To enable this feature on your store, go to Plugins and search for Pre-order in Our Plugins tab, and enable the Pre-order toggle button.
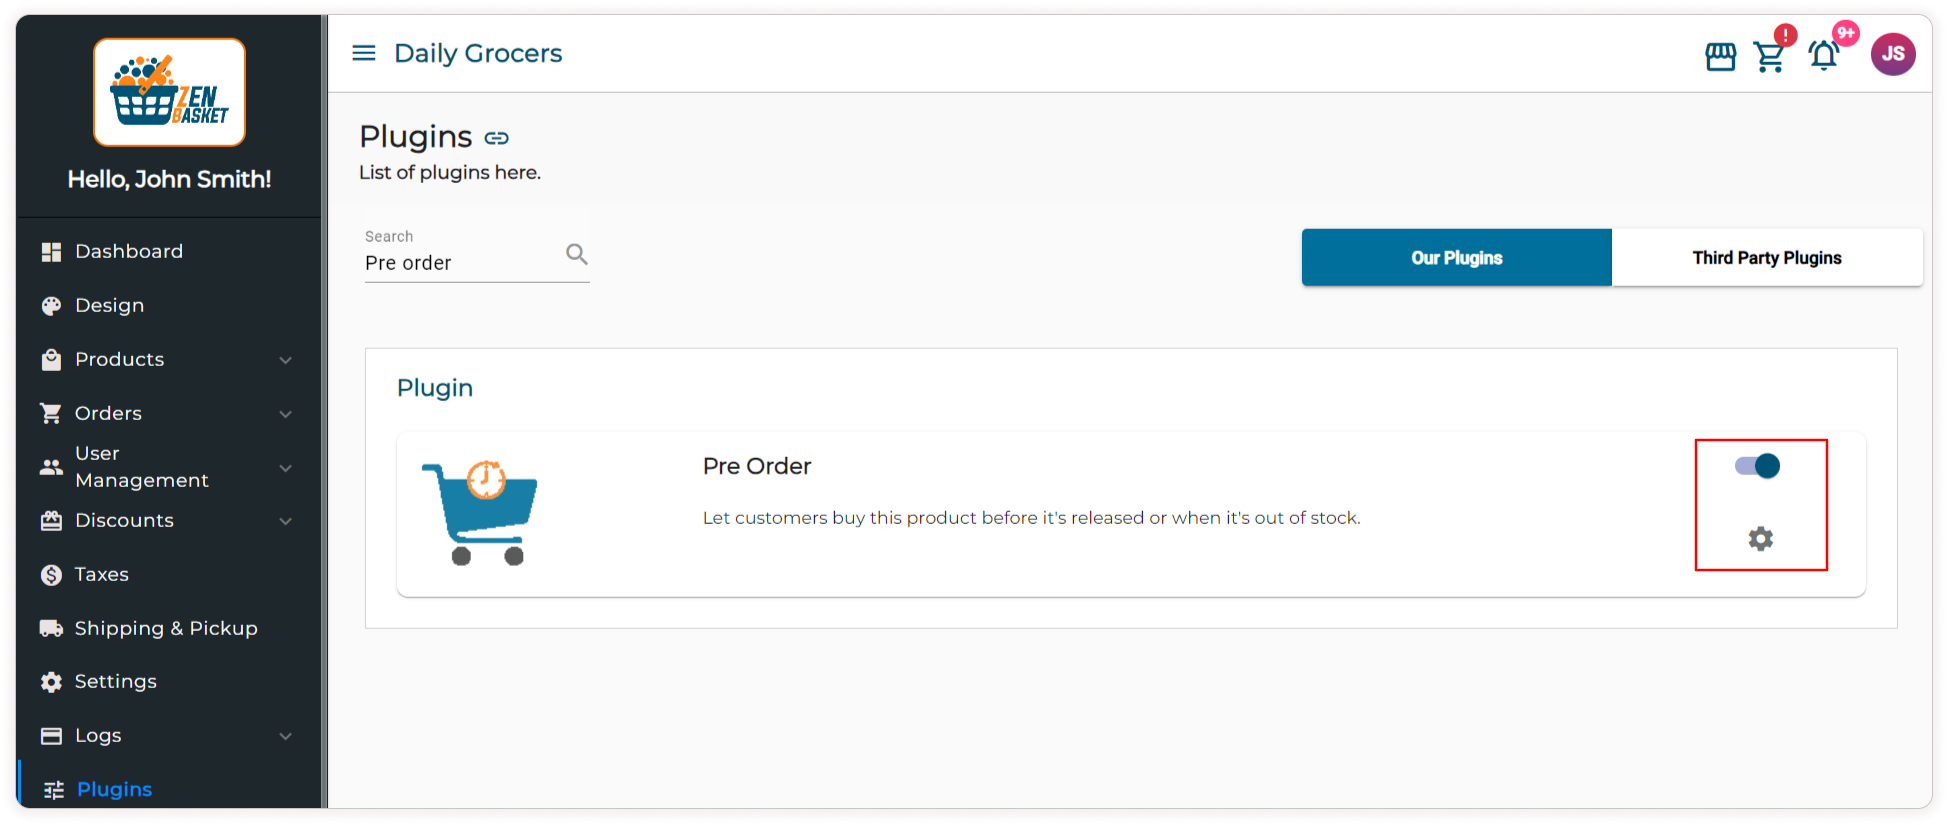
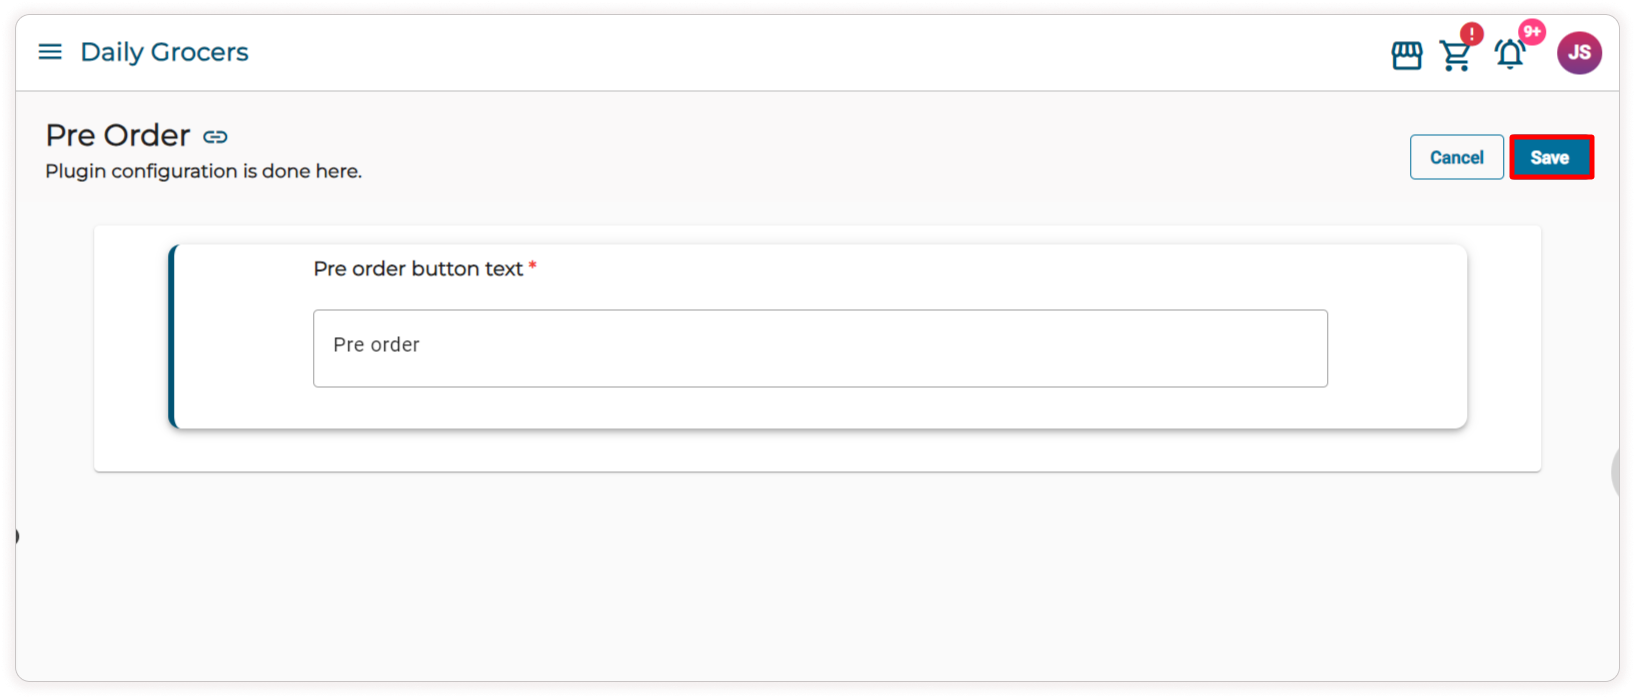
After enabling the Pre-order toggle button, the settings icon will be displayed below the toggle button. Click on the settings icon and enter the Pre-order button text, which will be displayed in the storefront. Then, click on Save.
How to add a Pre-order Product?
-
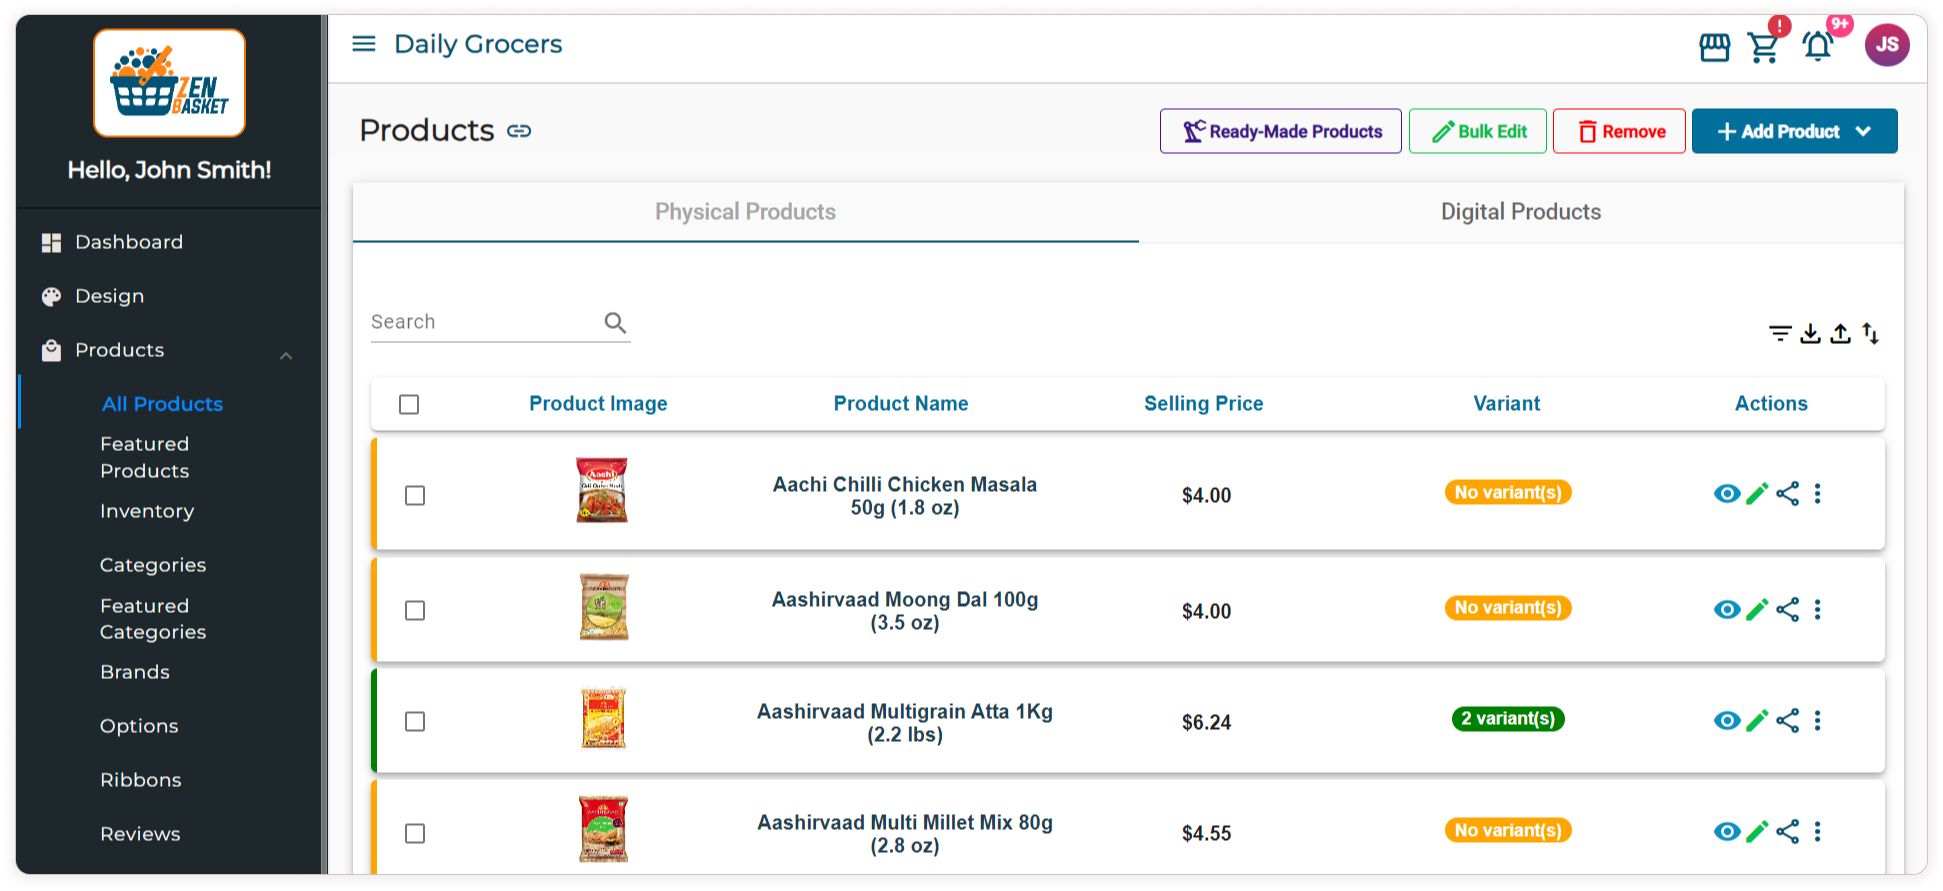
In the Products main menu, Select All Products sub menu.
-
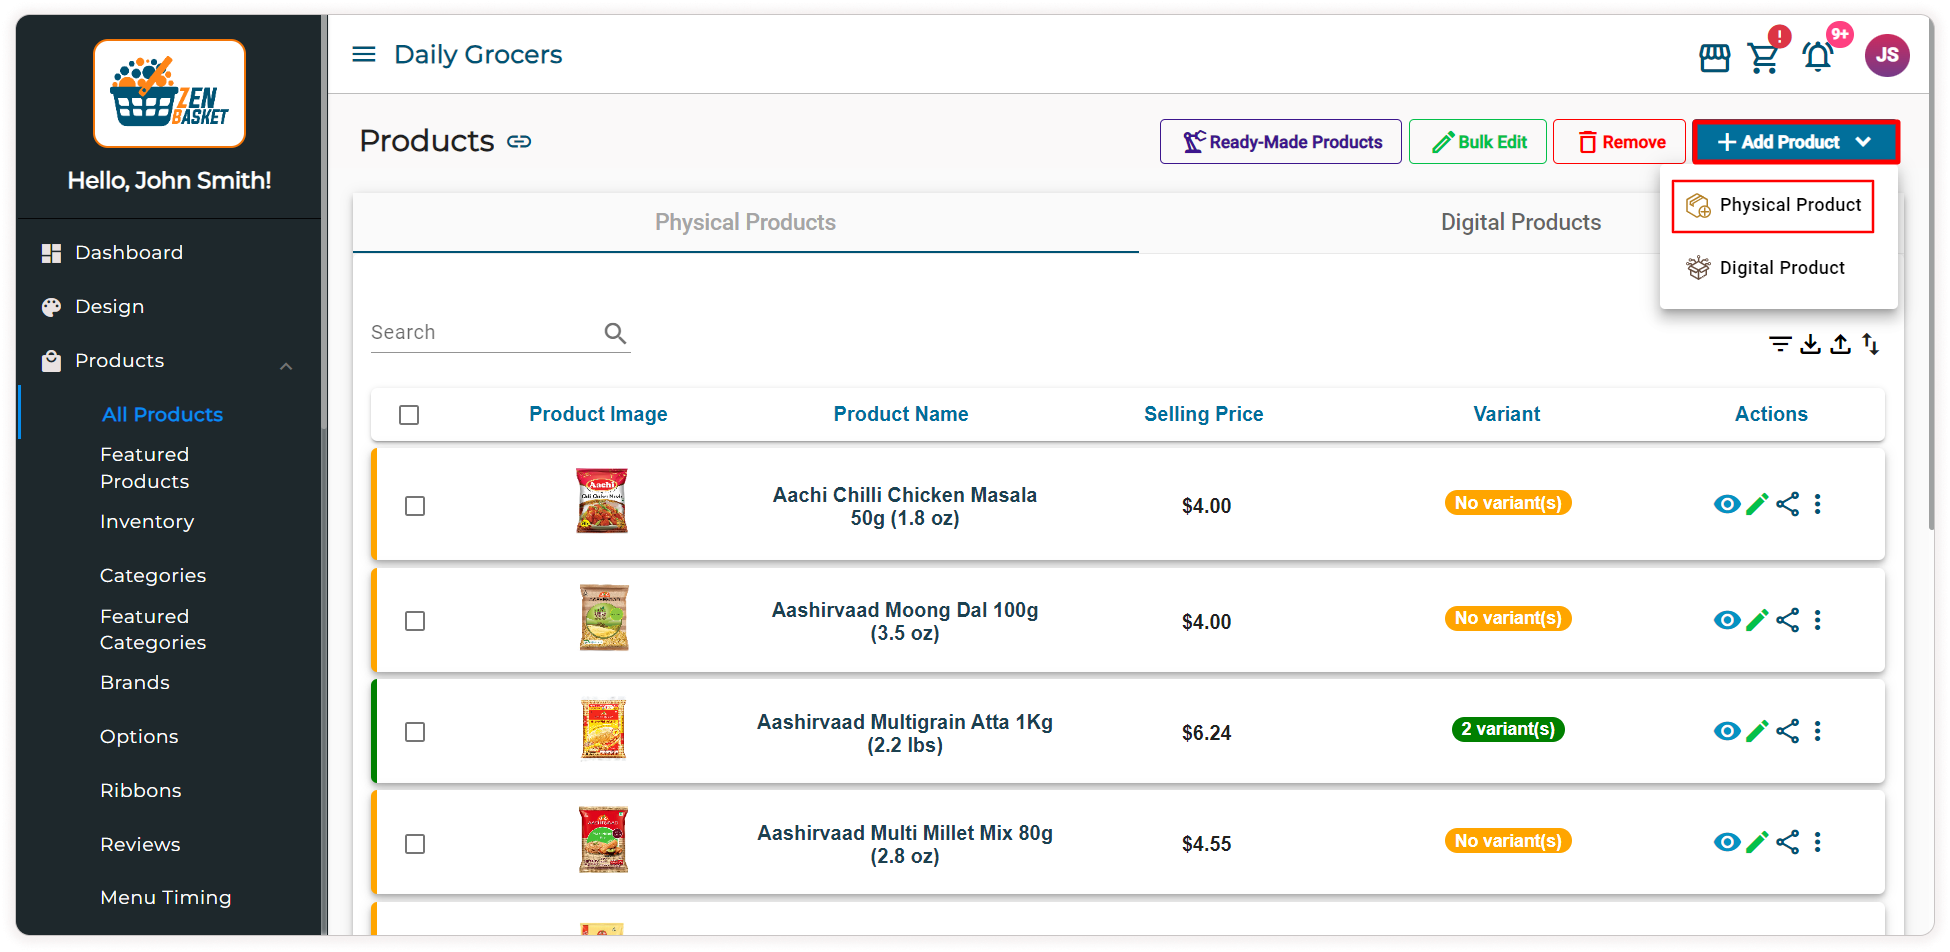
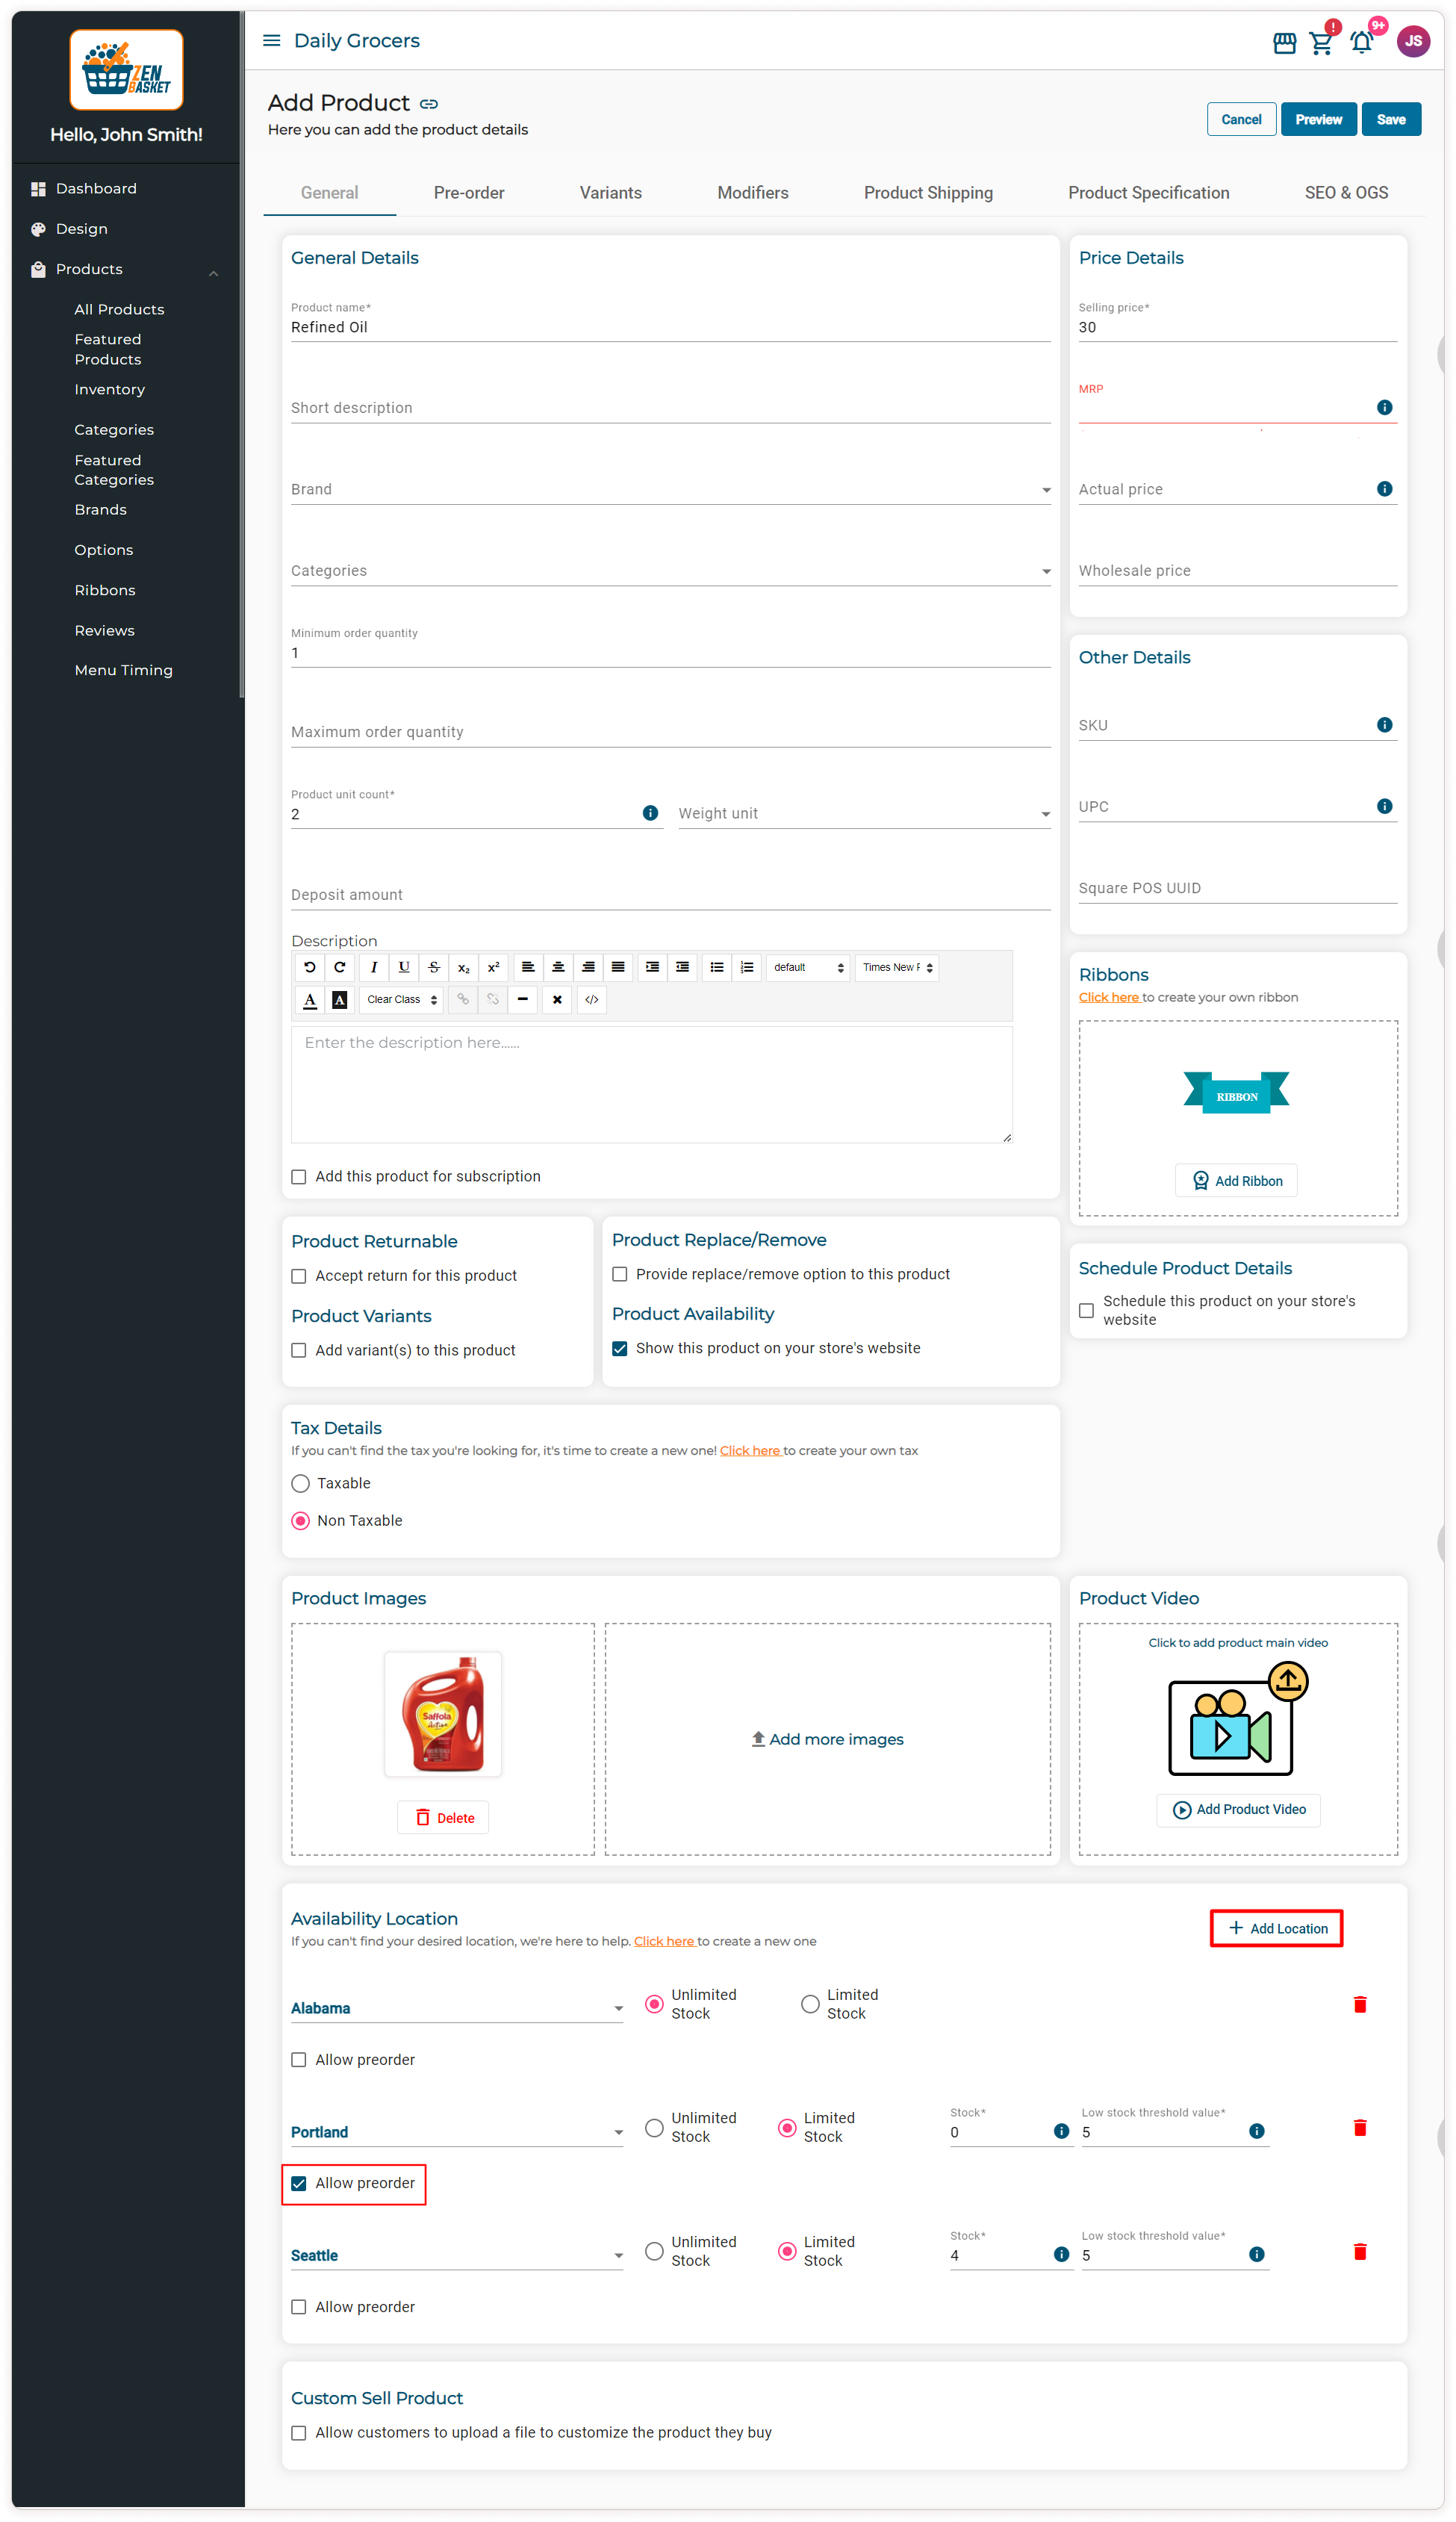
Click on Add Product, choose Physical Product. In the General tab, fill the necessary details like Product Name, Product Unit Count, and Selling Price.
Note: Pre-order will be available only for physical products.
-
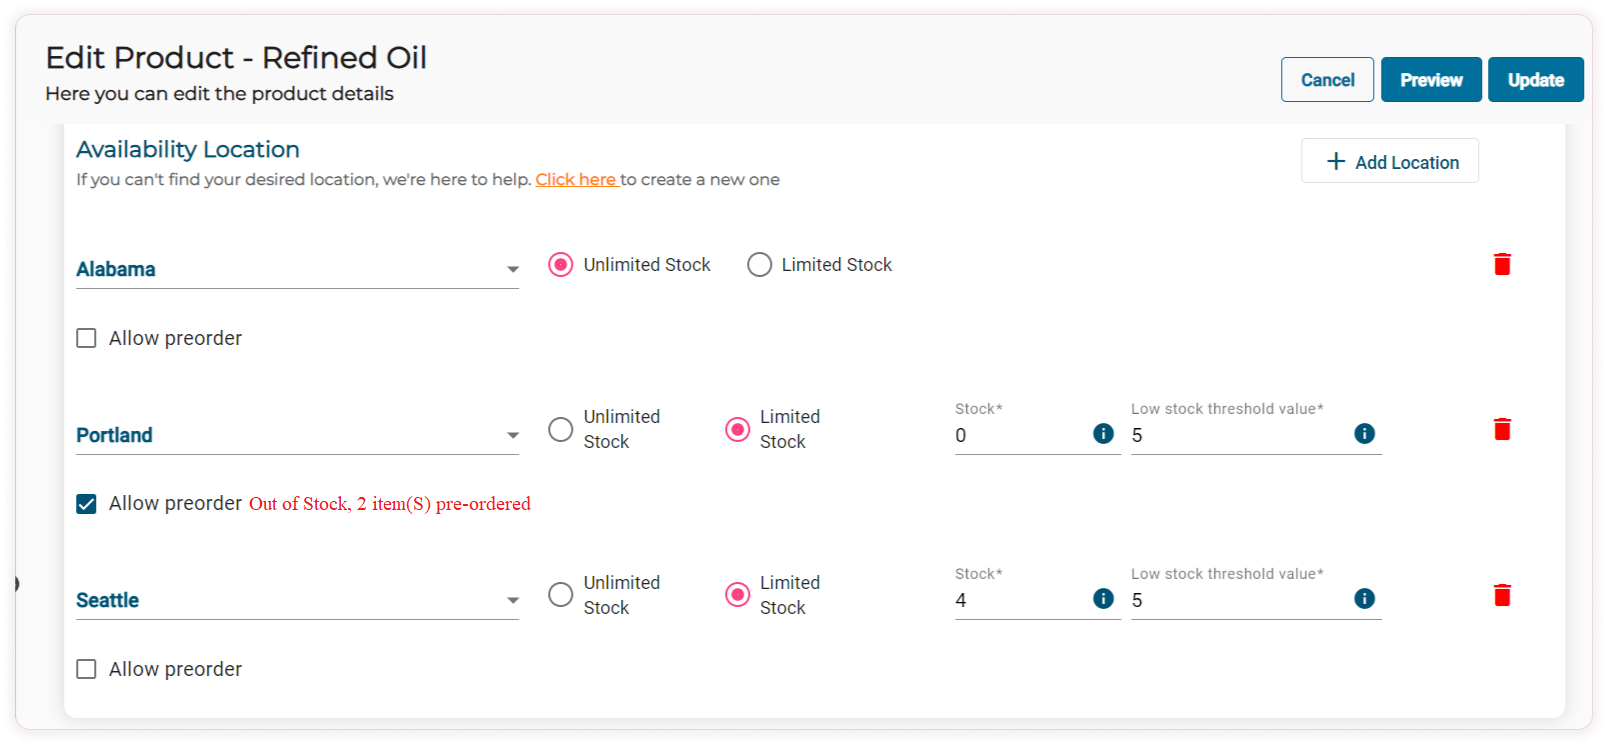
In the Availability Location section, select the Allow Pre-order checkbox. When the stock of the product reaches zero, the Pre-order button will be displayed on the storefront.
Note: If the product has variants, go to the Variants tab, choose a specific product, and select the Allow Pre-order checkbox in the Availability Location section.
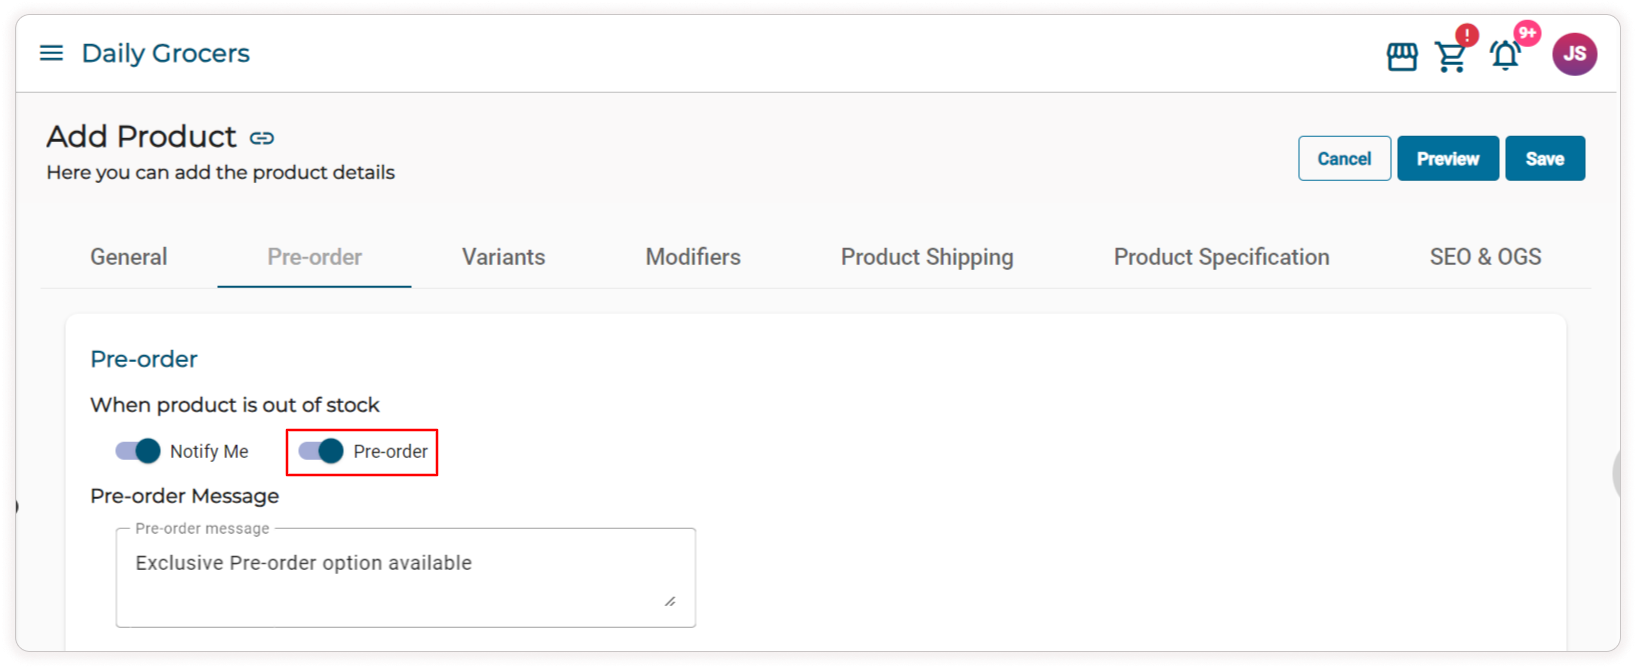
- Go to the Pre-order tab and enable the Pre-order toggle button for this product.
-
In the Pre-order Message text box, enter the message that will be displayed beneath the Pre-order button on the product details page of the storefront.
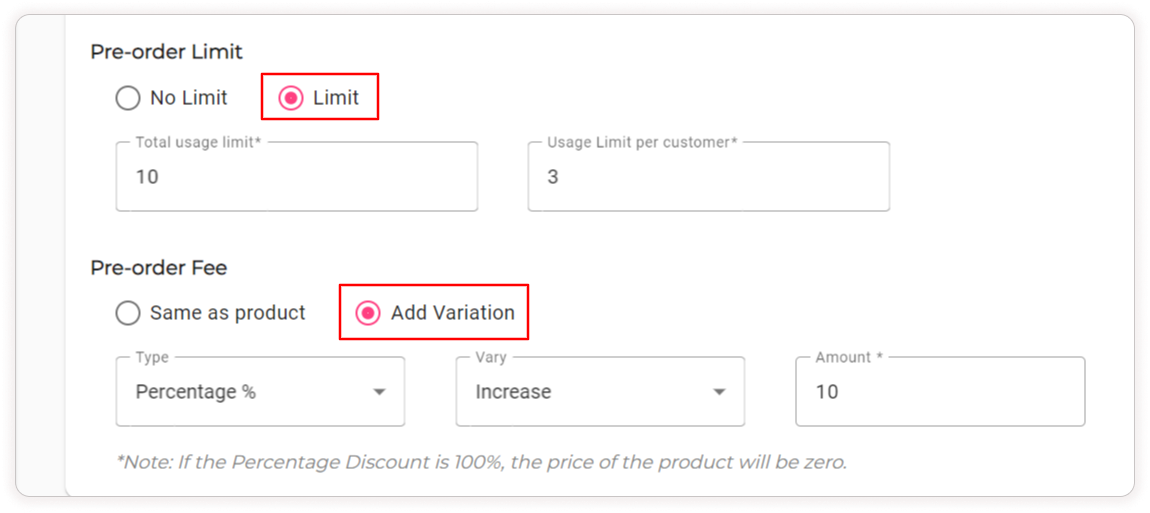
- In the Pre-order Limit section, choose the limit type: No Limit or Limit. If you choose the No Limit option, customers have the ability to pre-order an unlimited number of times. If you choose the Limit option, specify the overall usage limit (the total number of times pre-order can be used) and the usage limit per customer (the number of times pre-order can be used by a single customer).
- In the Pre-order Fee Section, choose the Same as Product or Add variation” option.
-
If you choose the Pre-order fee as Same as Product, customers will pay the same product price. There will be no additional fee or discount fee for the pre-order product.
-
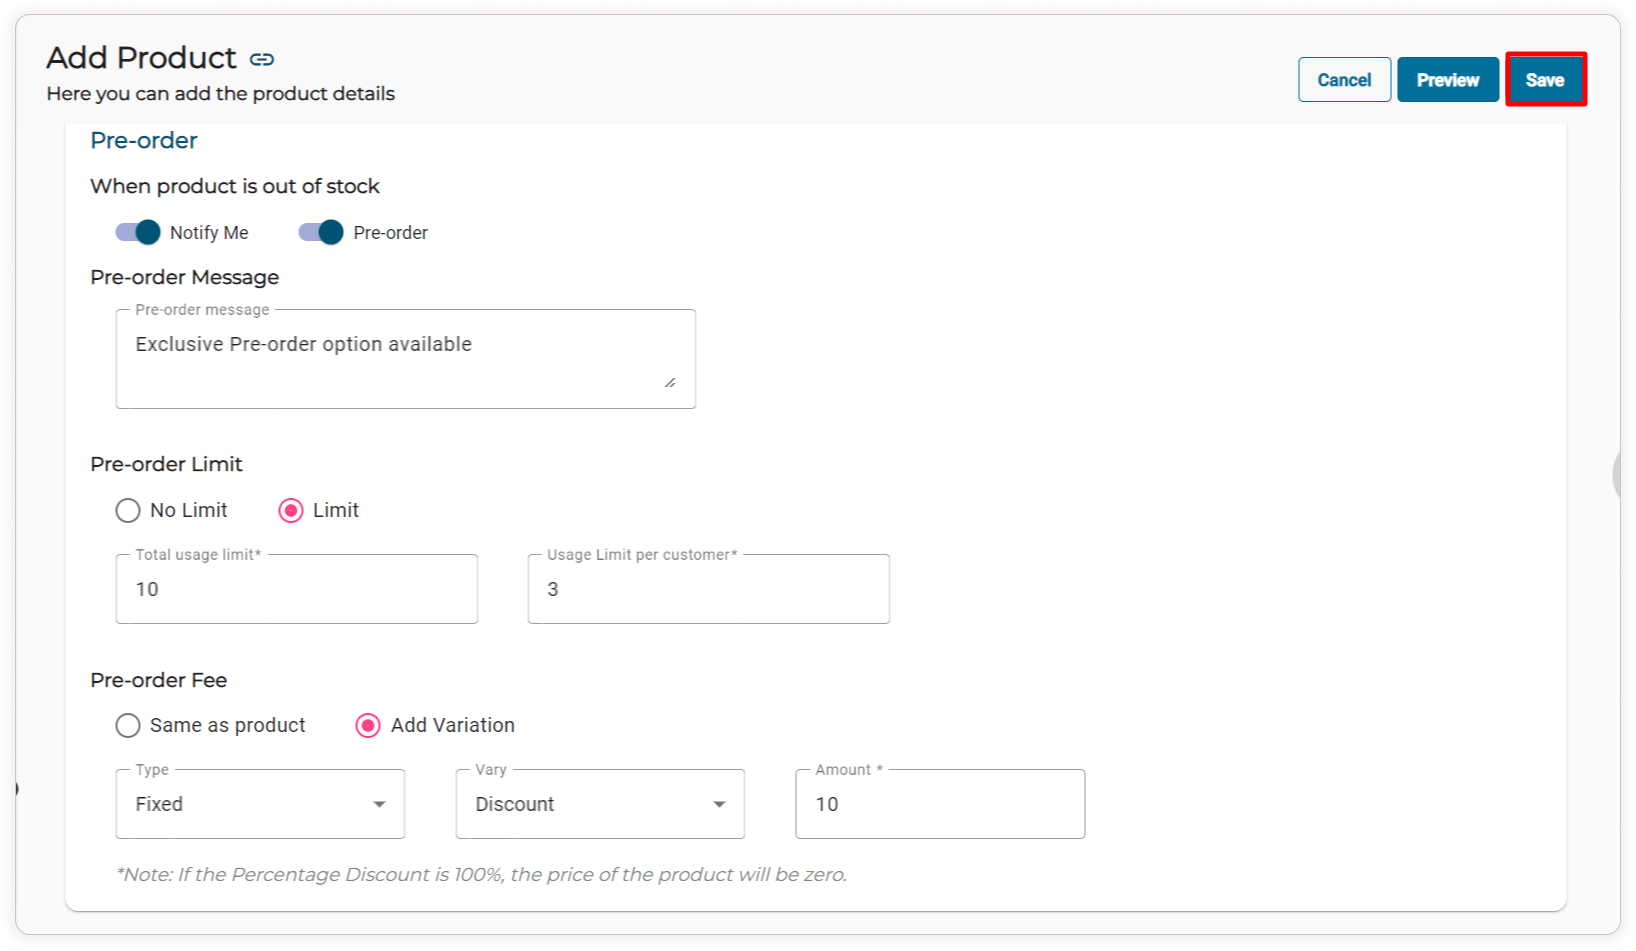
If you choose the Pre-order fee as Add Variation, you can choose the fee type under Add Variation as either Fixed or Percentage. You can then select either Increase or Discount under the Vary. Enter the amount in the Amount or Percentage in the text box.
-
Click on the Save button.
Note:
- The Notify Me button will be displayed in the storefront, if the Notify Me toggle button is enabled and the Pre order button is disabled.
- The Pre-order button will be displayed in the storefront, if the Notify Me toggle button is disabled and the Pre-order button is enabled.
- The Pre-order button will be displayed in the storefront, if both the Notify Me and the Pre-order toggle button is enabled.
- The Out of stock will be displayed in the storefront, if both the Notify Me and the Pre order toggle button is disabled.
How Pre-order works on the storefront:
-
When a customer searches for Refined Oil in the storefront, Pre-order Available text will be displayed on the Product list page and the Pre Order button will be displayed on the Product details page.
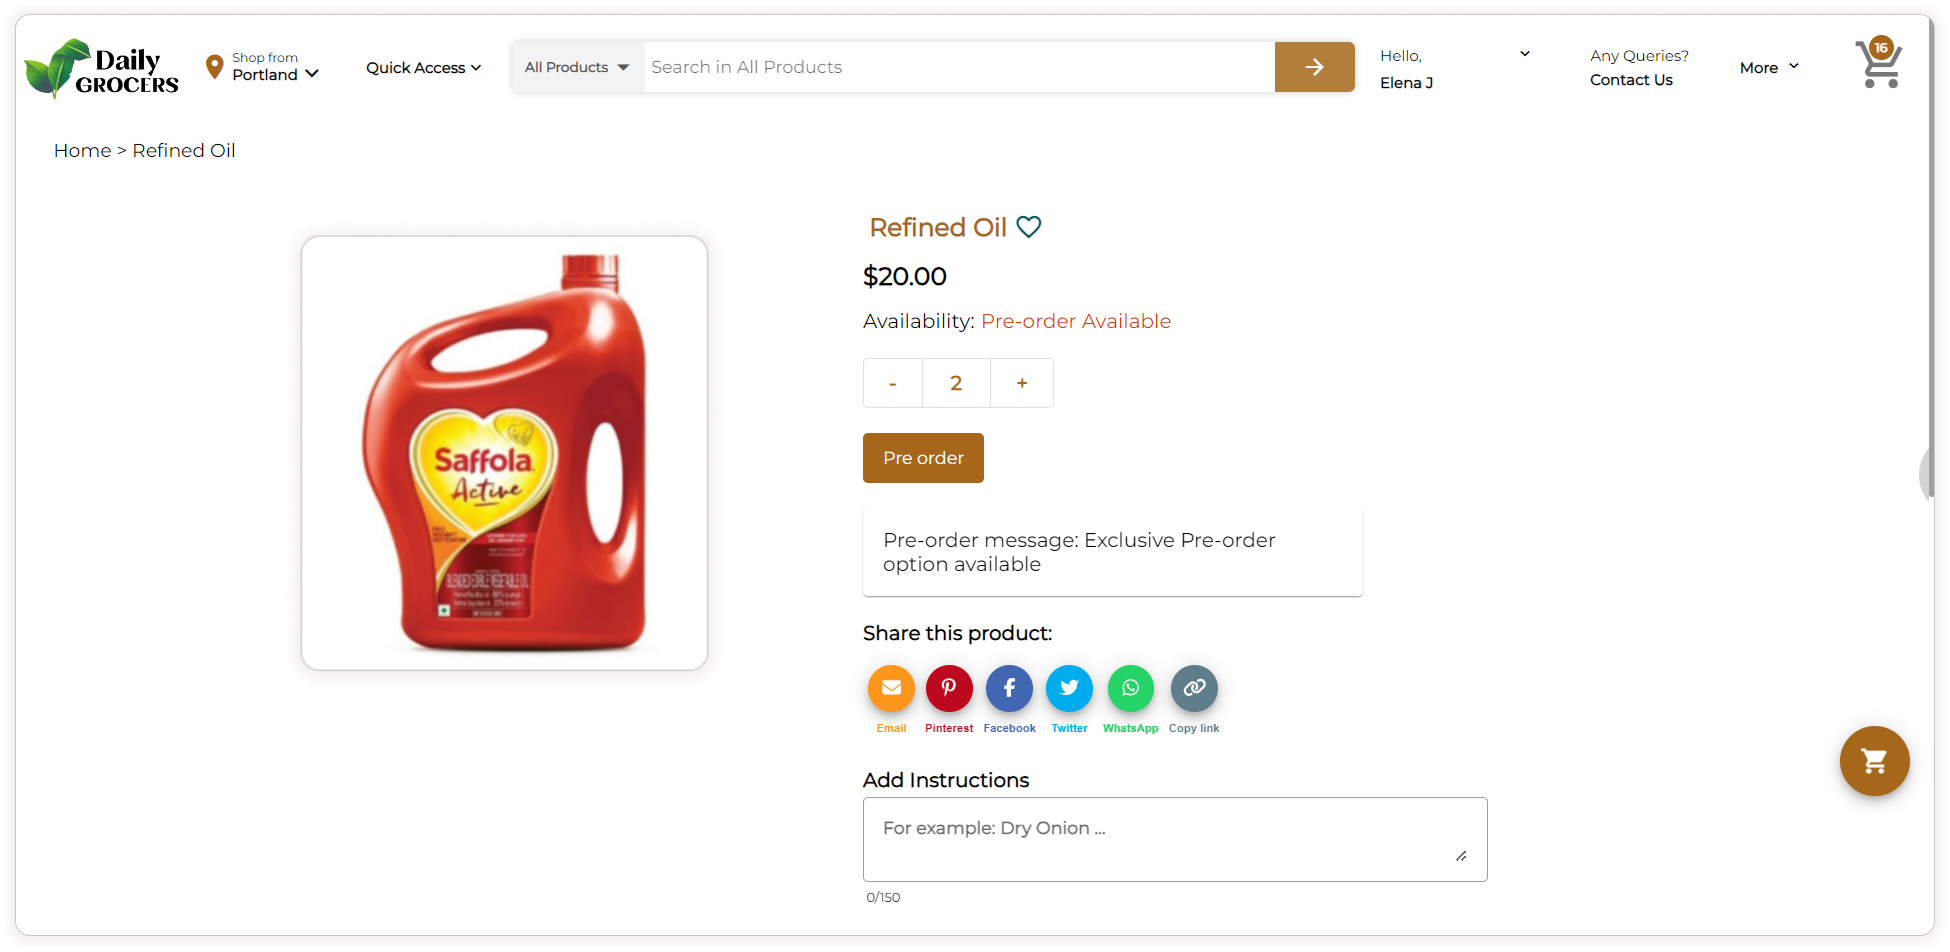
- Pre-orders can be placed by the customers in the storefront based on the pre-order limit set on the admin side.
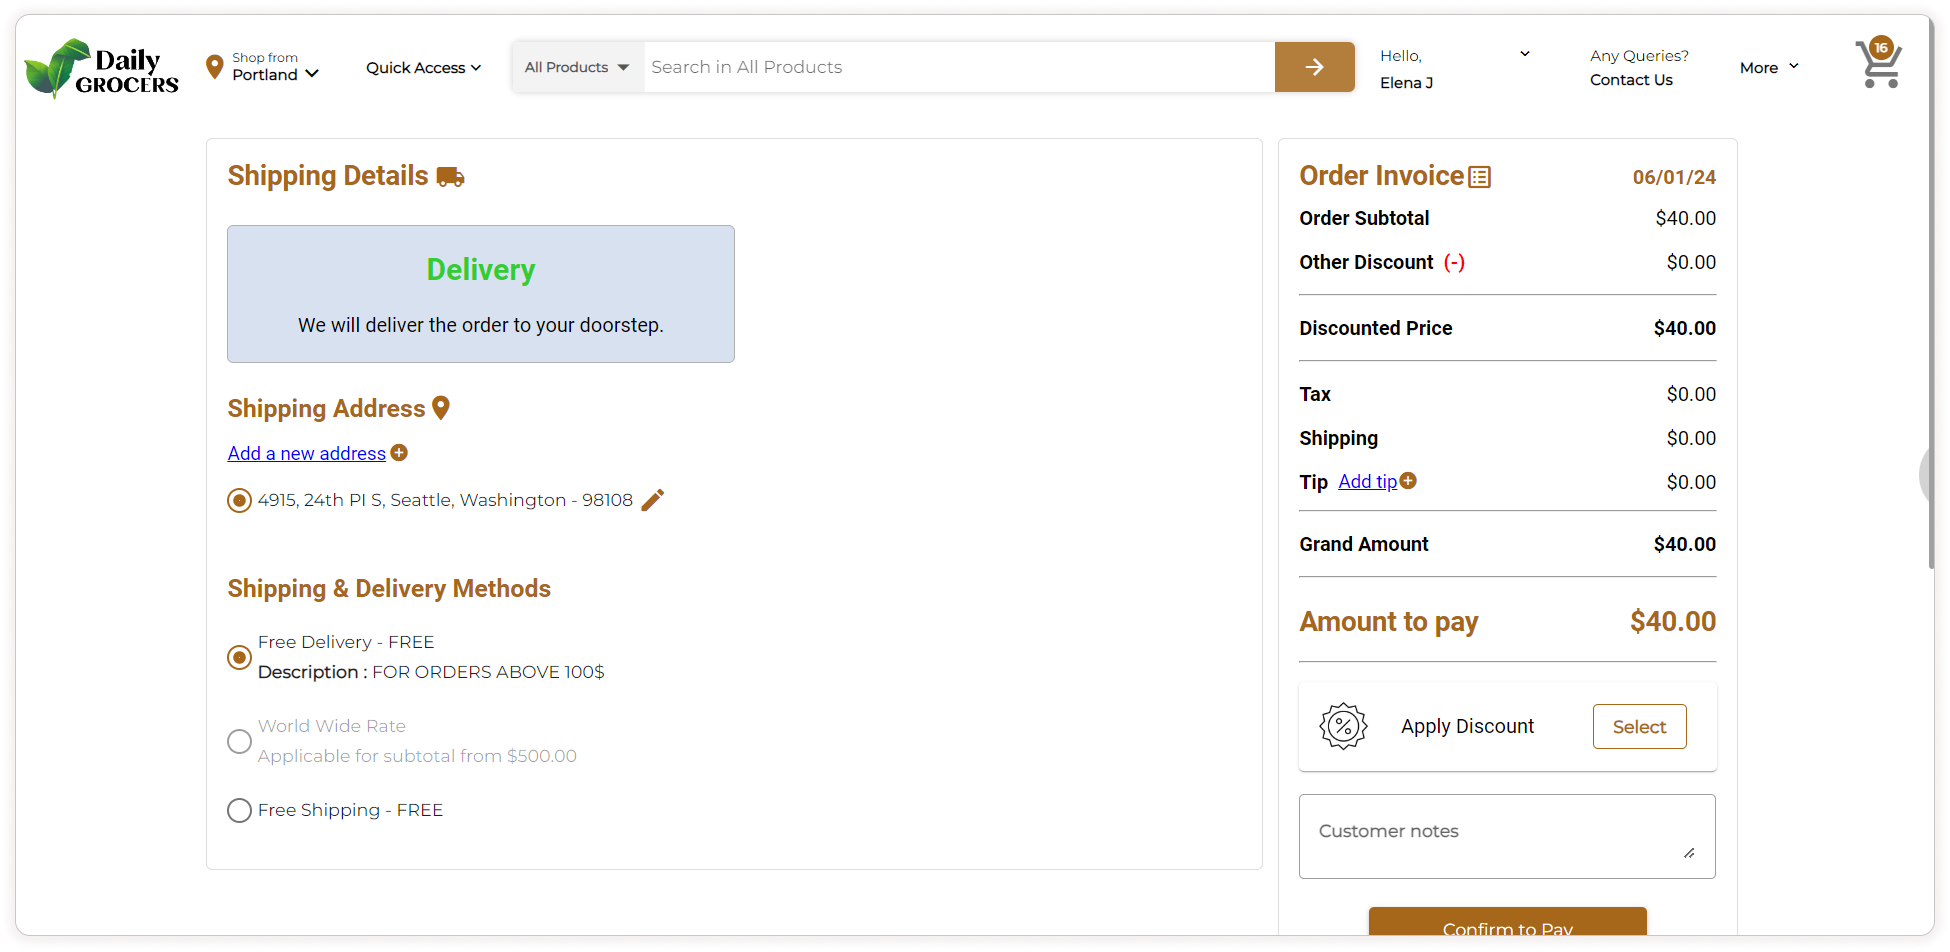
- When a customer clicks the Pre-order button, it will redirect them directly to the checkout page instead of the cart page.
-
Customers can apply discount coupons during the checkout process in the Apply Discount section.
Note: Cash on delivery is not applicable for Pre-order.
My Orders Page:
-
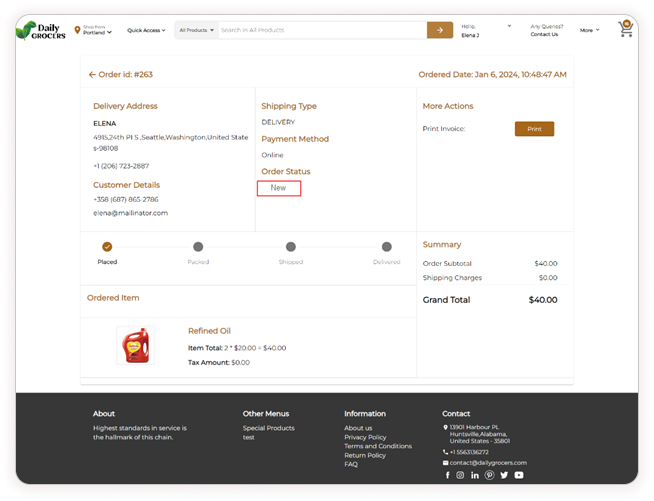
In the My Orders, the customer can view their pre-order details with the Pre-order label.
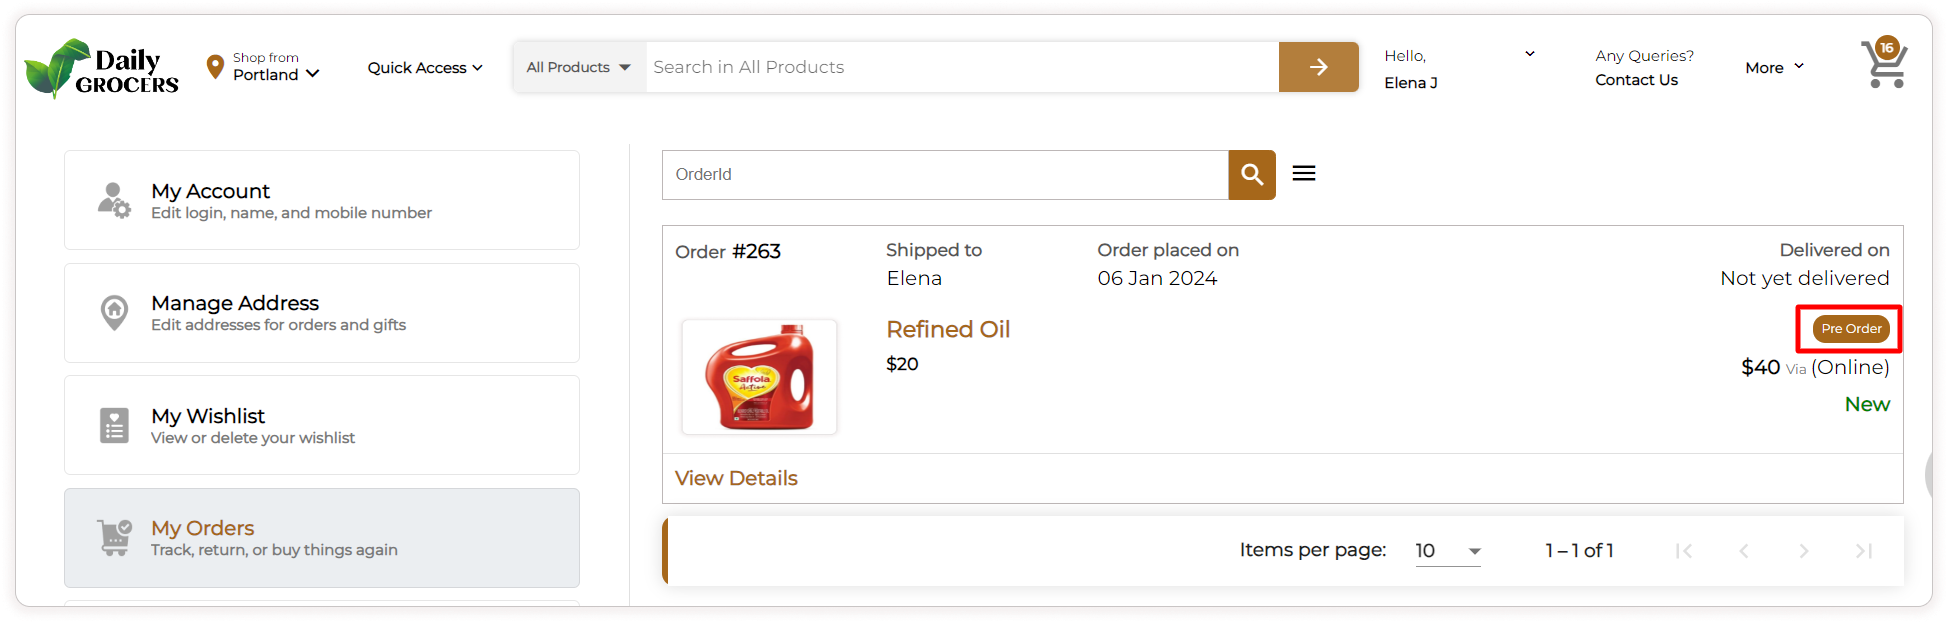
For pre-orders, customers cannot add items, increase the pre-ordered quantity, or delete the pre-order product on their order details page.
Note: Pre-orders can be canceled by both the Admin and the Customers.
Pre-ordered count on the Product details page:
-
The Pre-order count will be displayed under the location on the product details page.
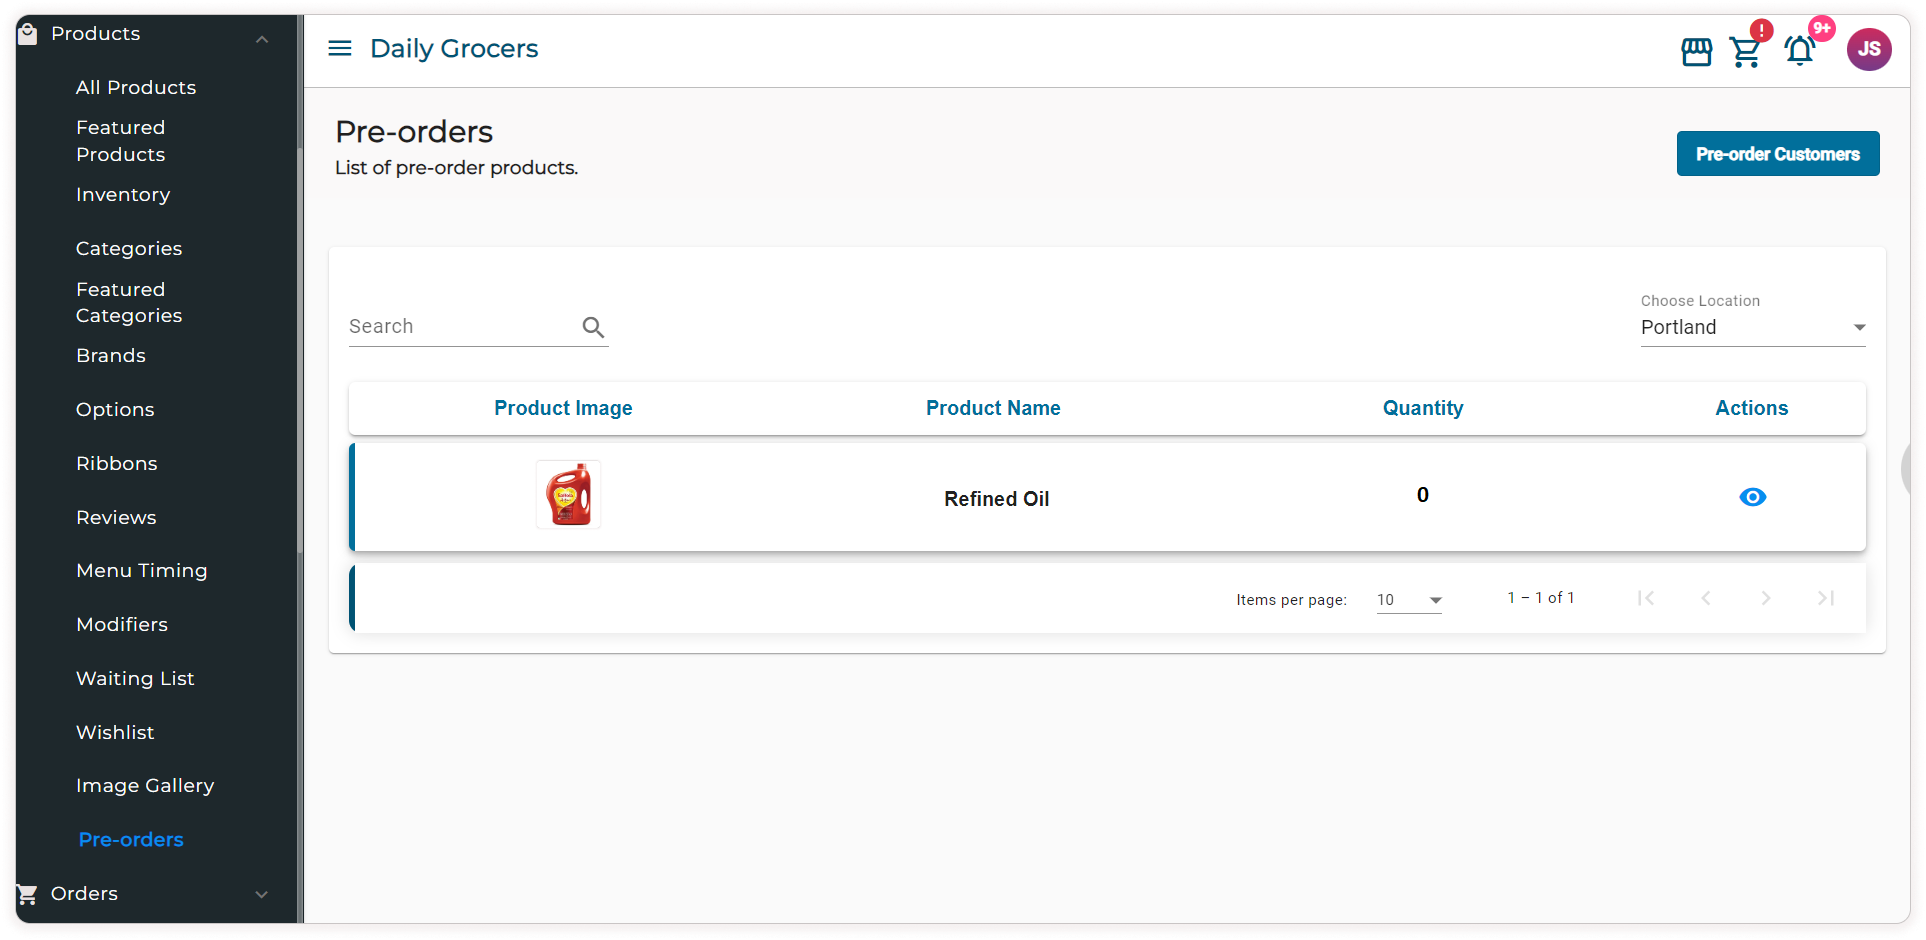
Pre-order products in the Pre-orders sub-menu:
Note: If the Allow Pre-order checkbox under the location and Pre-order toggle under the Pre-order tab is enabled for a product, then that product will be listed in the Pre-orders submenu with a quantity of 0 before ordering from the storefront.
-
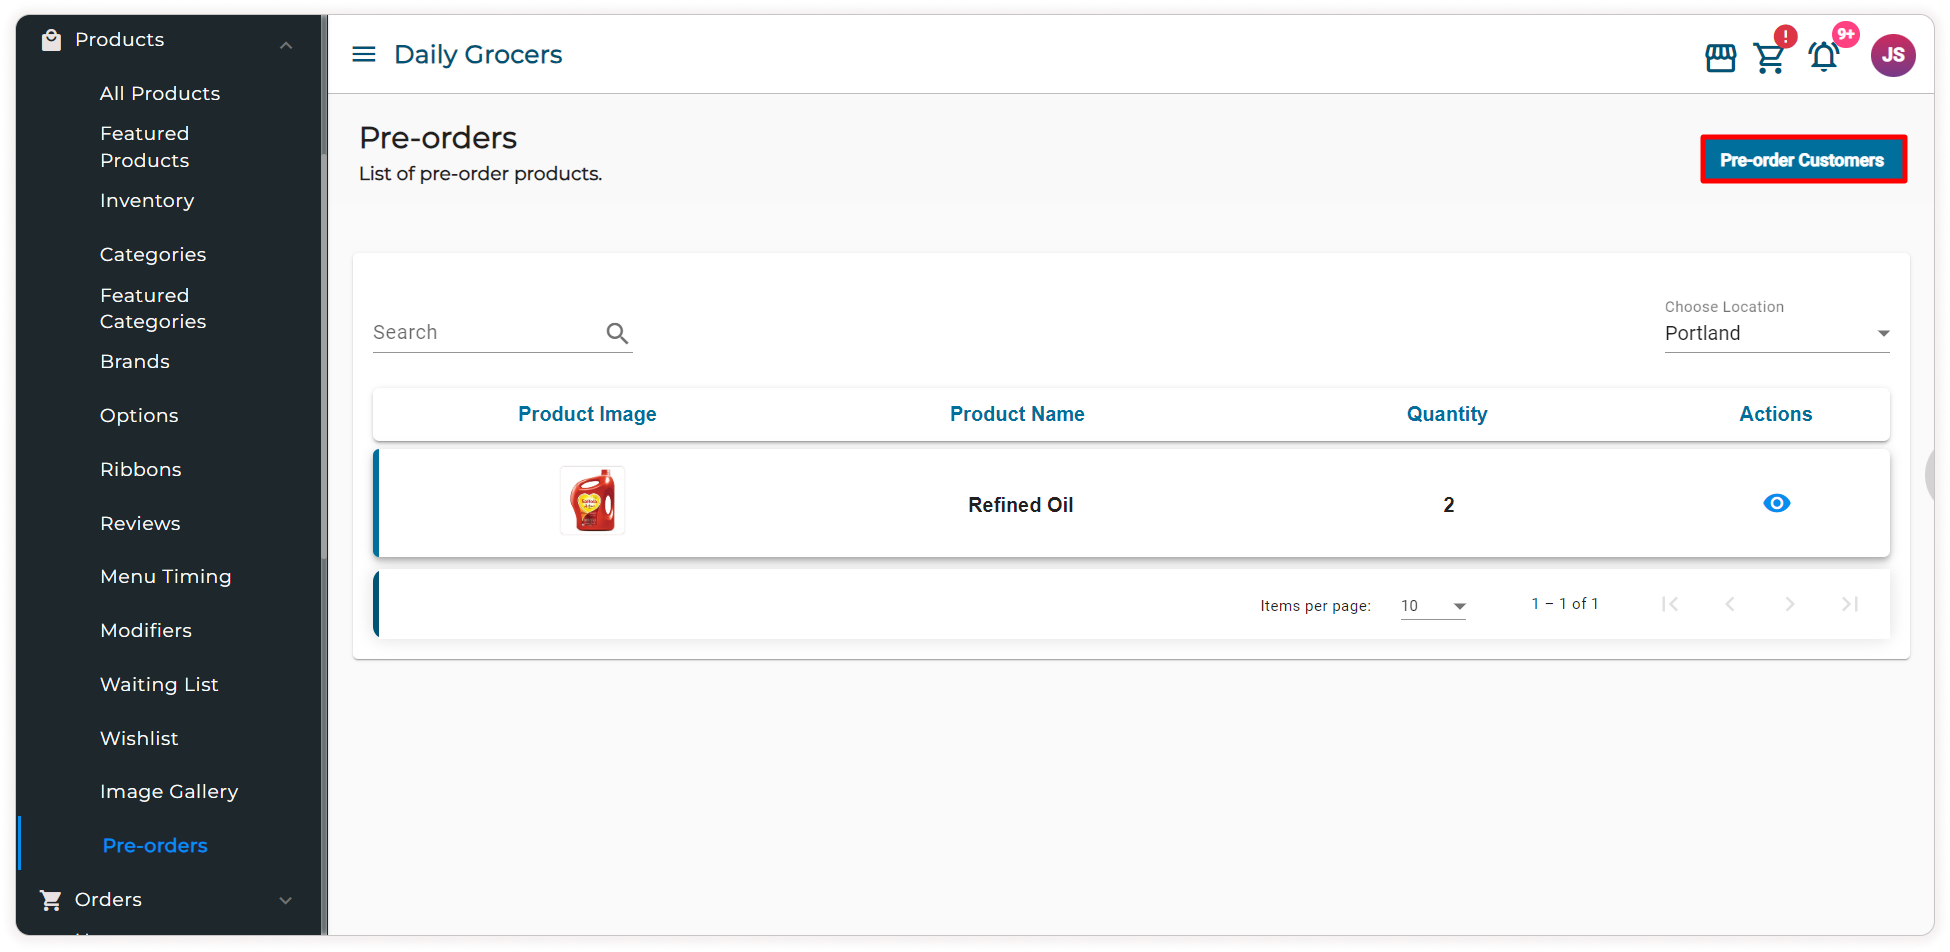
On the admin side Go to the Product main menu, and click on the Pre-orders sub-menu to view the pre-ordered products from the storefront.
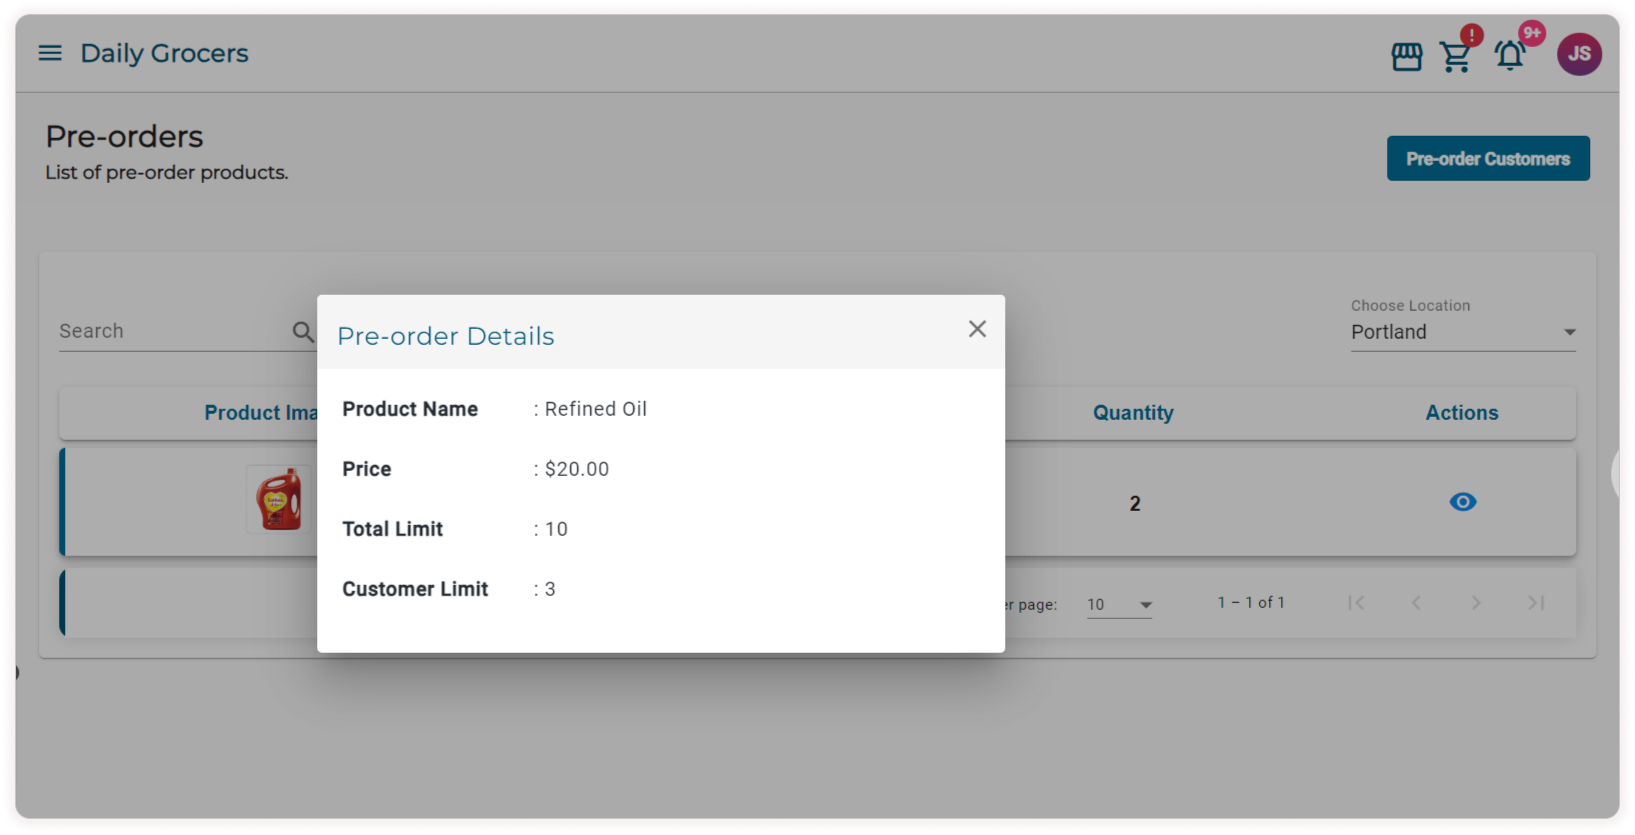
-
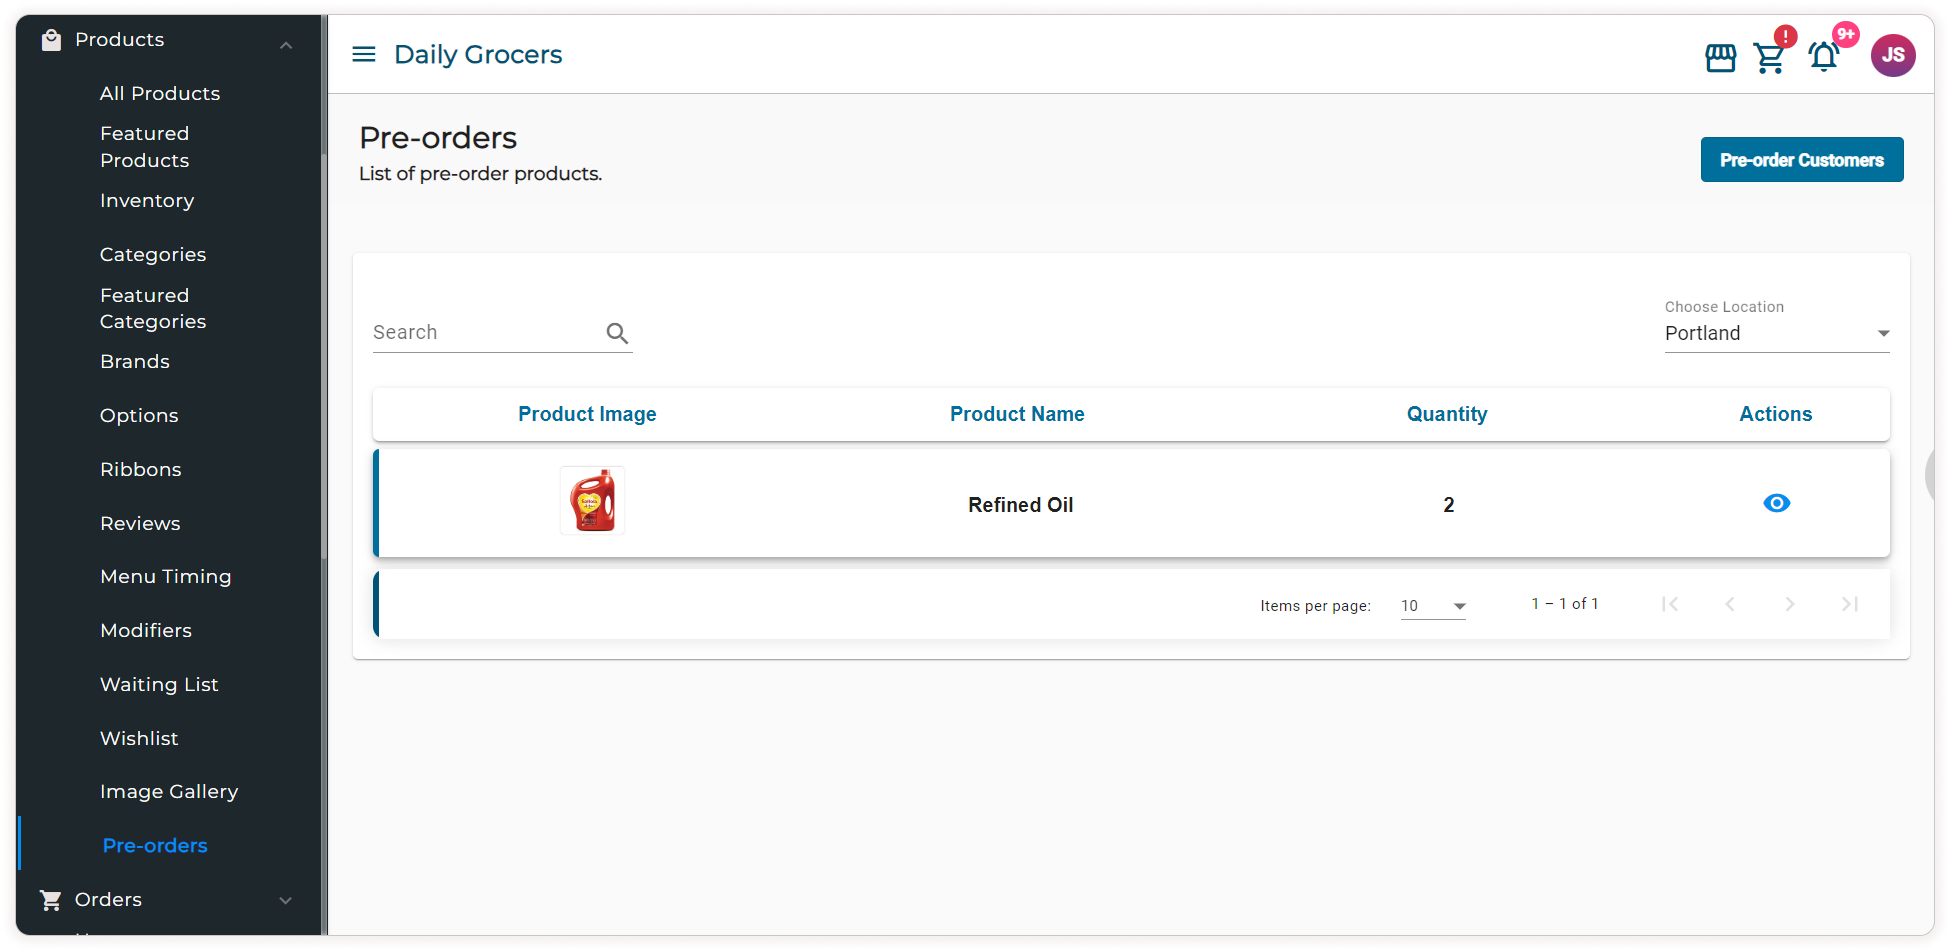
Click on the View icon, to view the pre-order details such as Product Name, Price, Total Limit, Customer Limit.
-
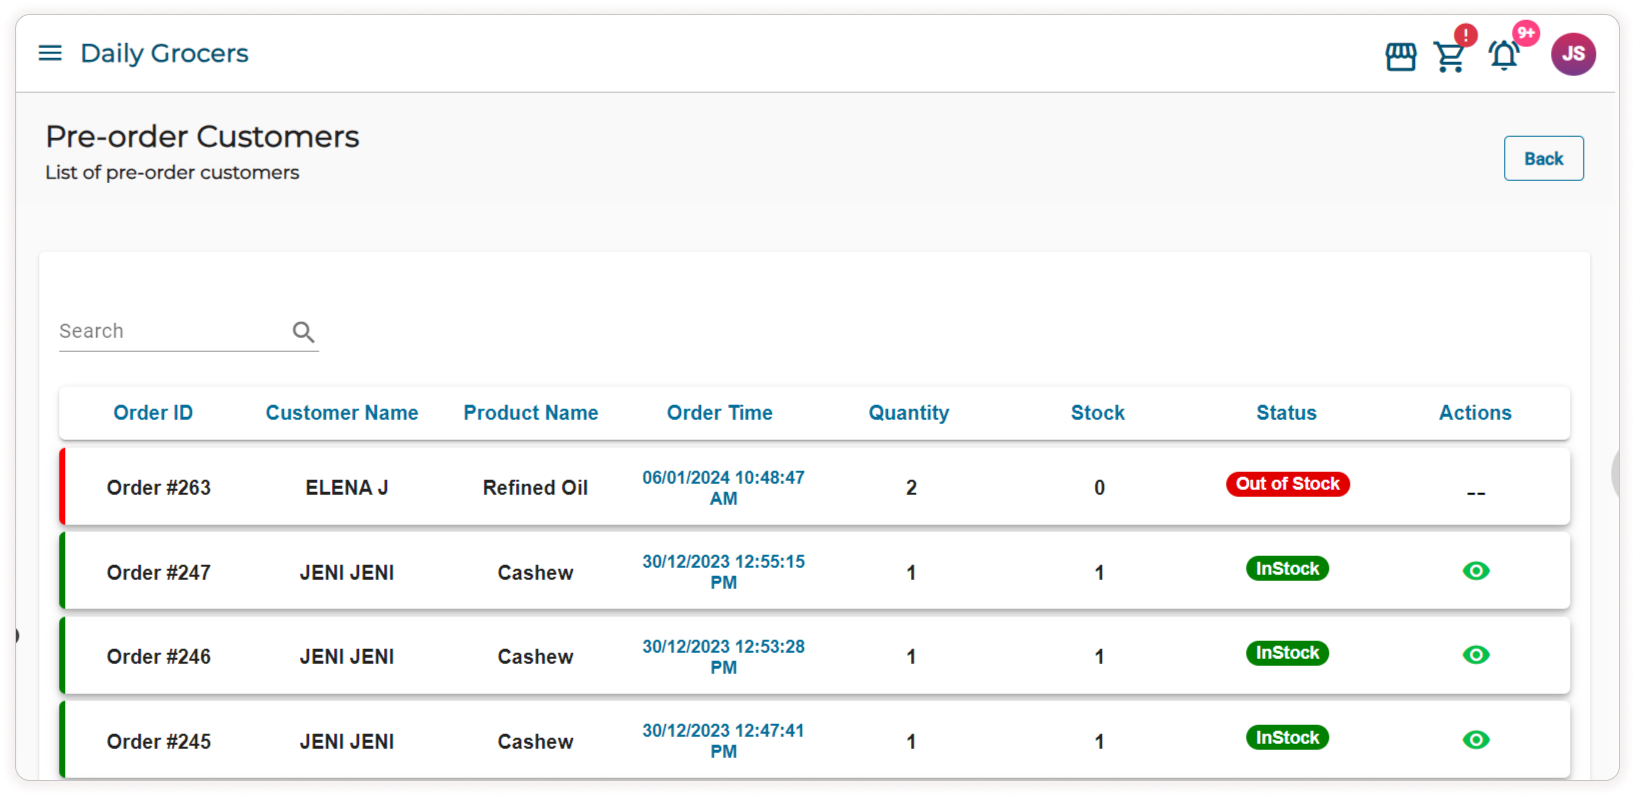
Click on the Pre-order Customers button to view details of customers who have pre-ordered.
-
Clicking on the View icon will redirect to the order details page.
Note: After the customer places a pre-order, when the stock is updated in the inventory, priority is given to the pre-ordered customers.
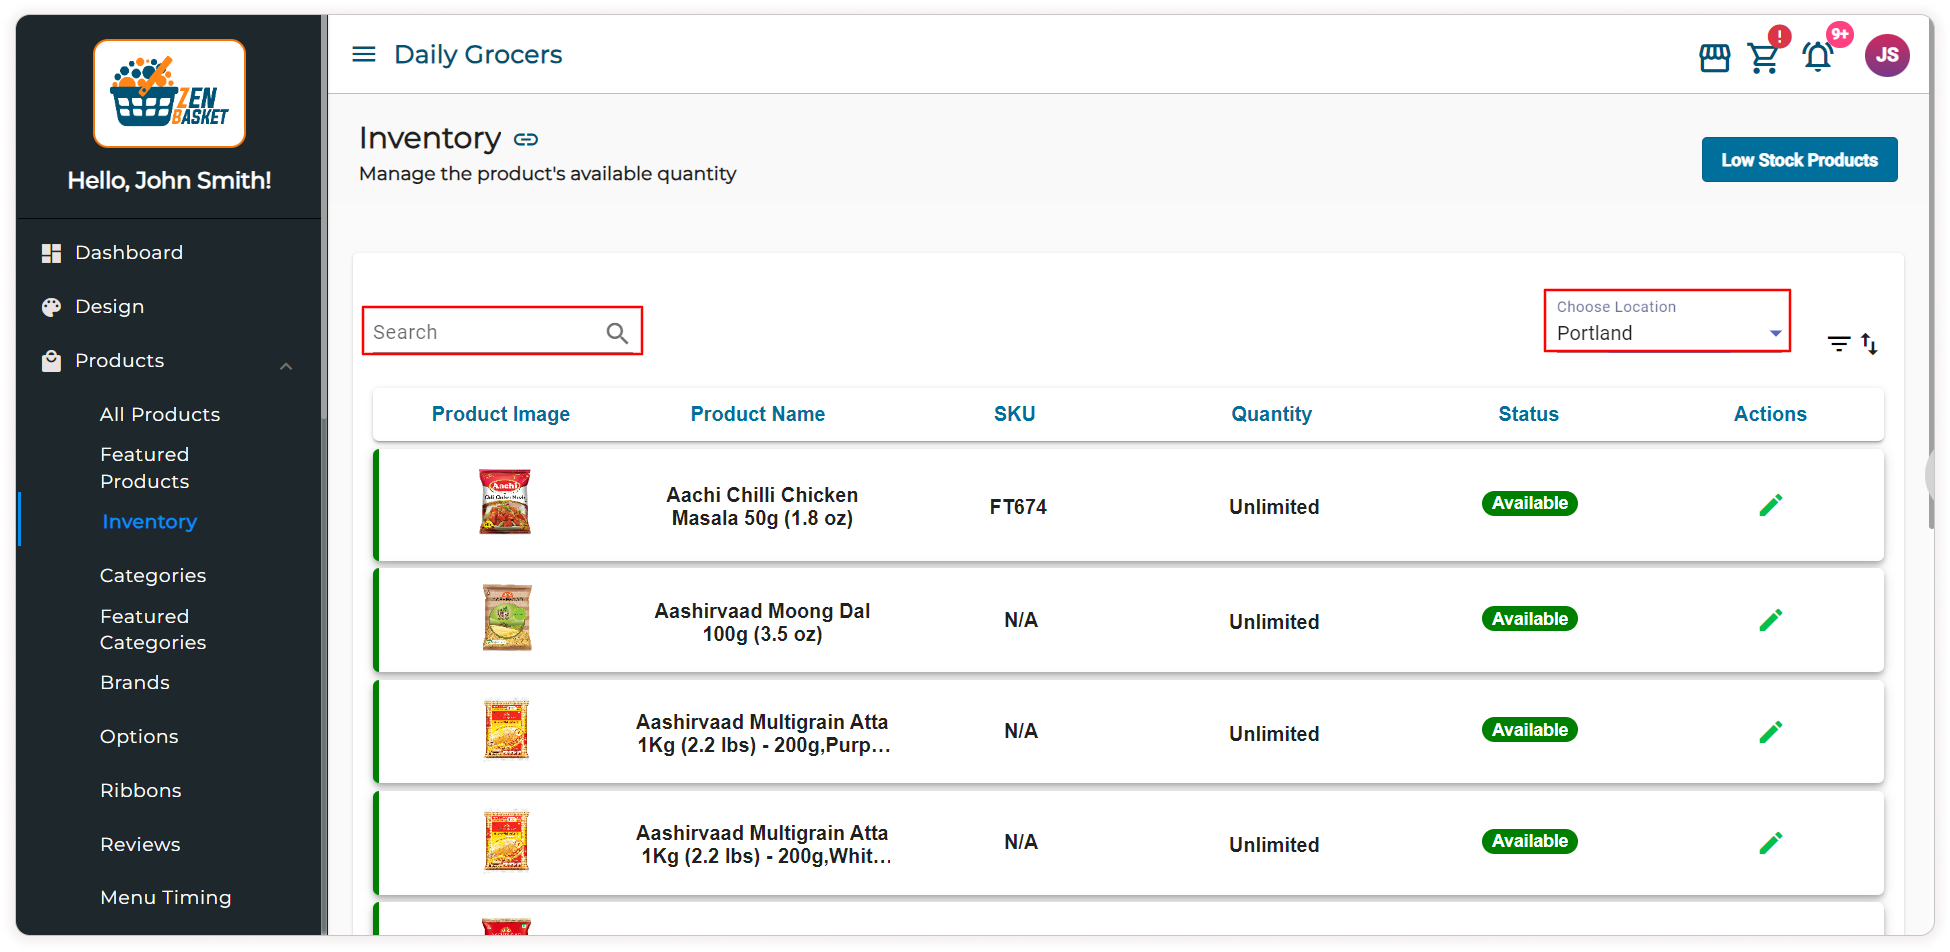
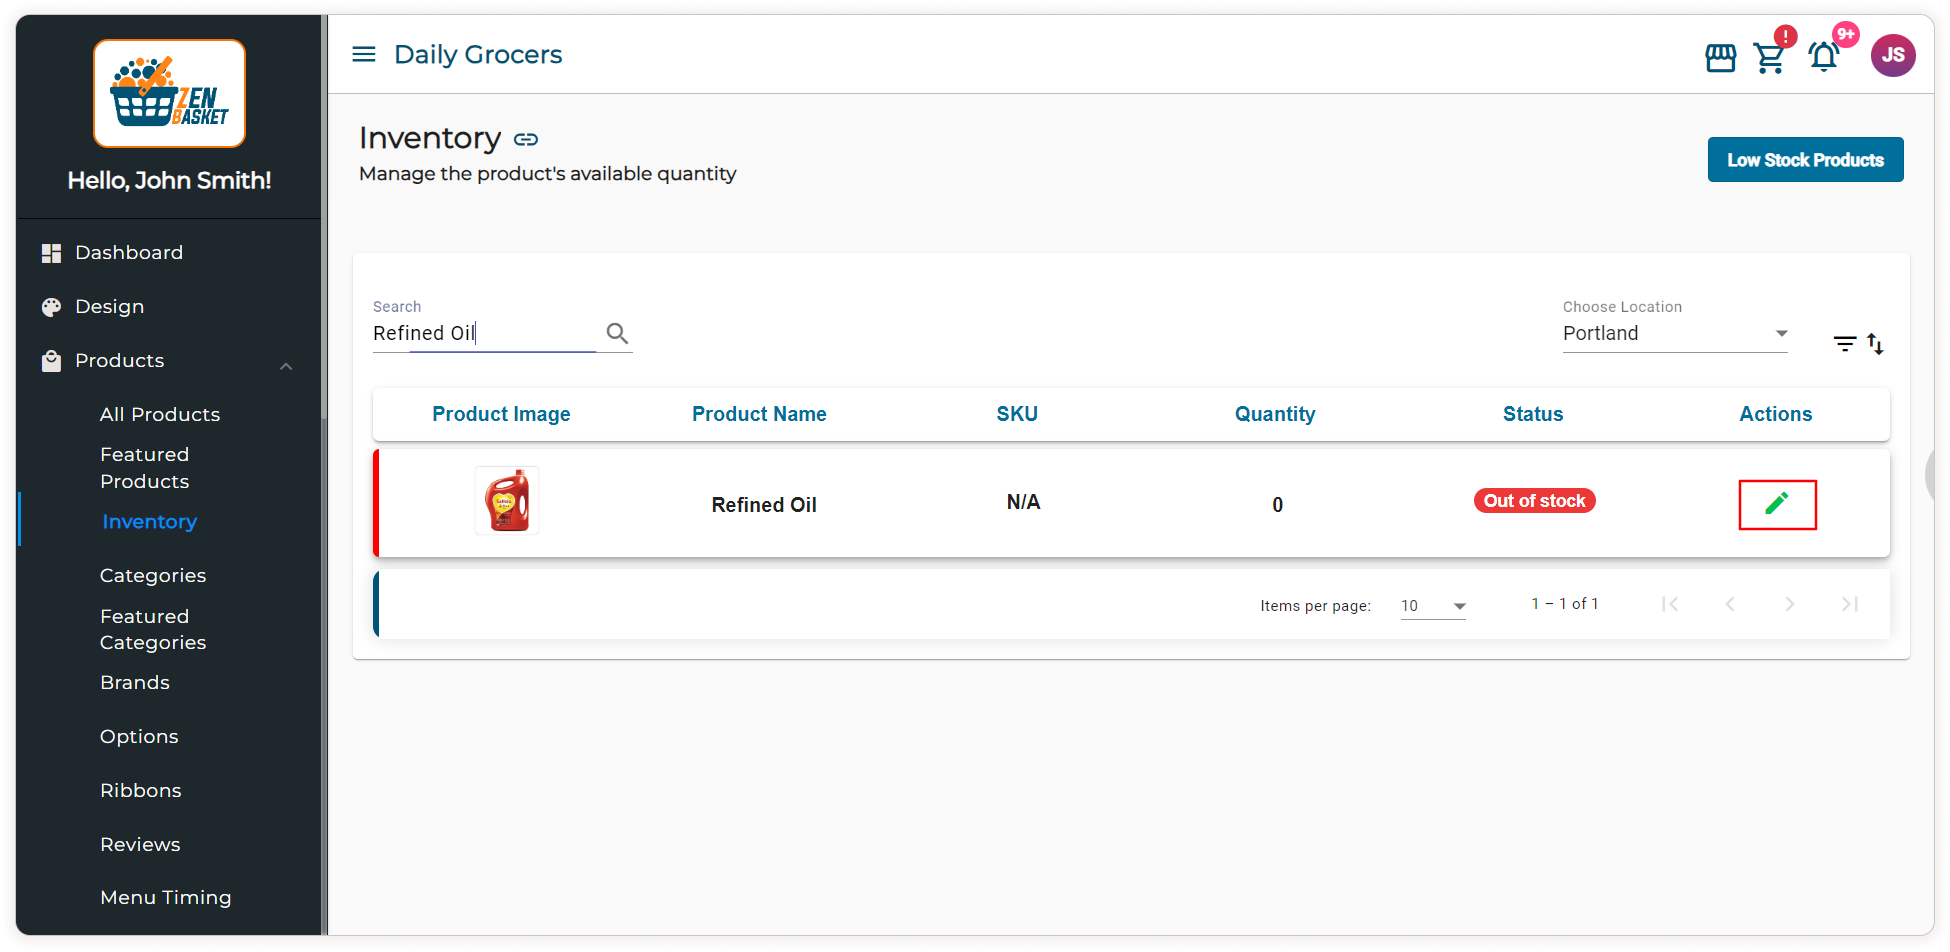
- In the Product main menu, click on the Inventory sub menu.
-
In the Search bar, type the pre-order product name, and in the Choose Location section, select the location where the pre-order was placed.
-
Click on Edit Quantity icon to update the quantity.
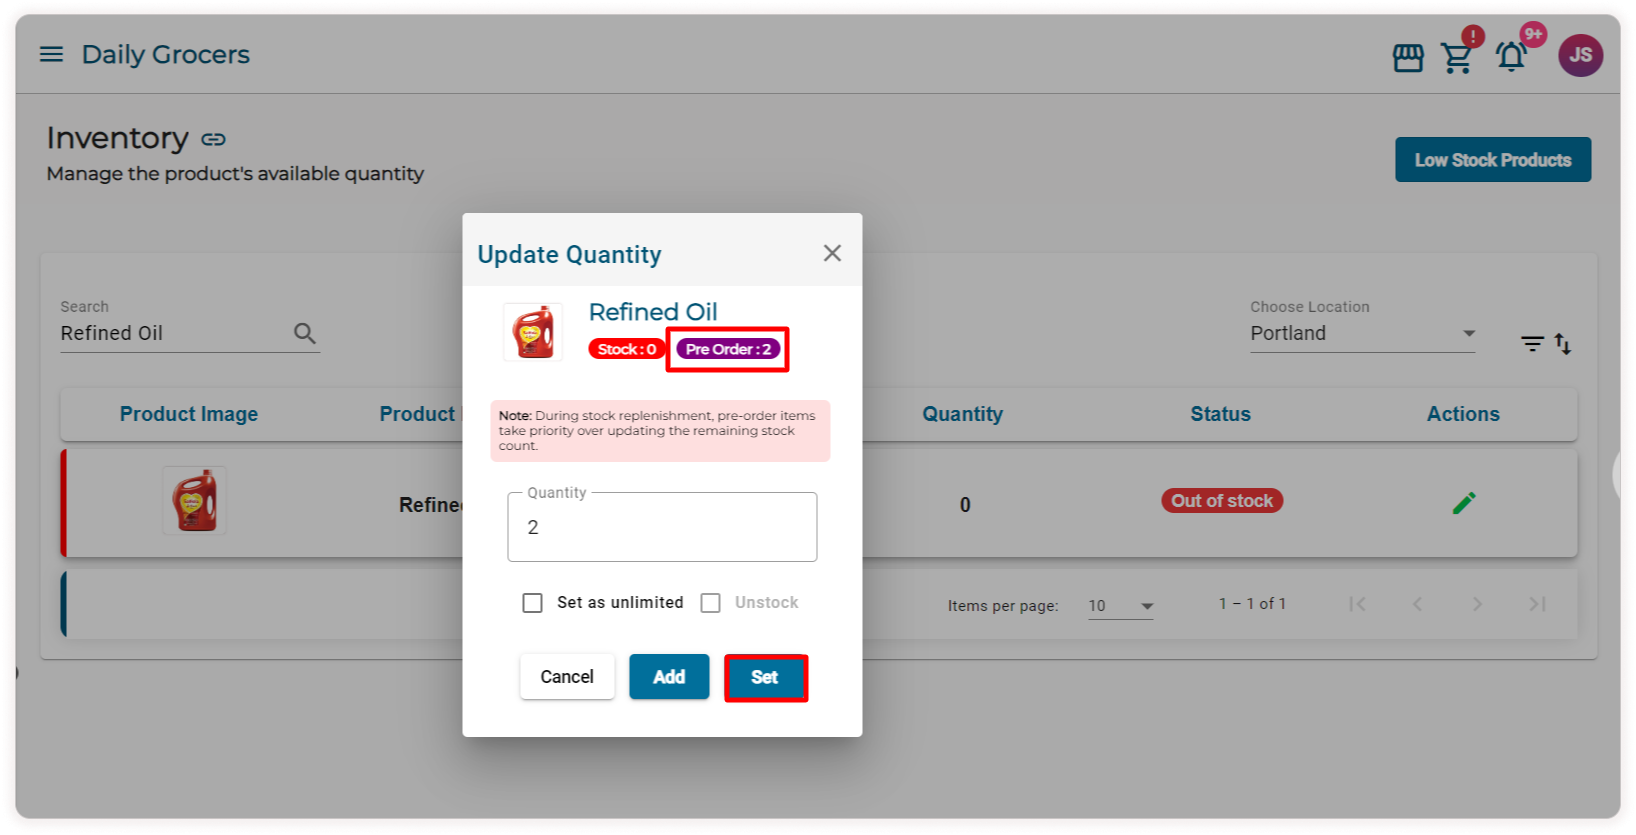
-
In the Update Quantity popup, the pre-order count will be displayed. During stock replenishment, pre-order items take priority while updating the stock count. Enter the quantity for the Pre-order , and then click on Set button.
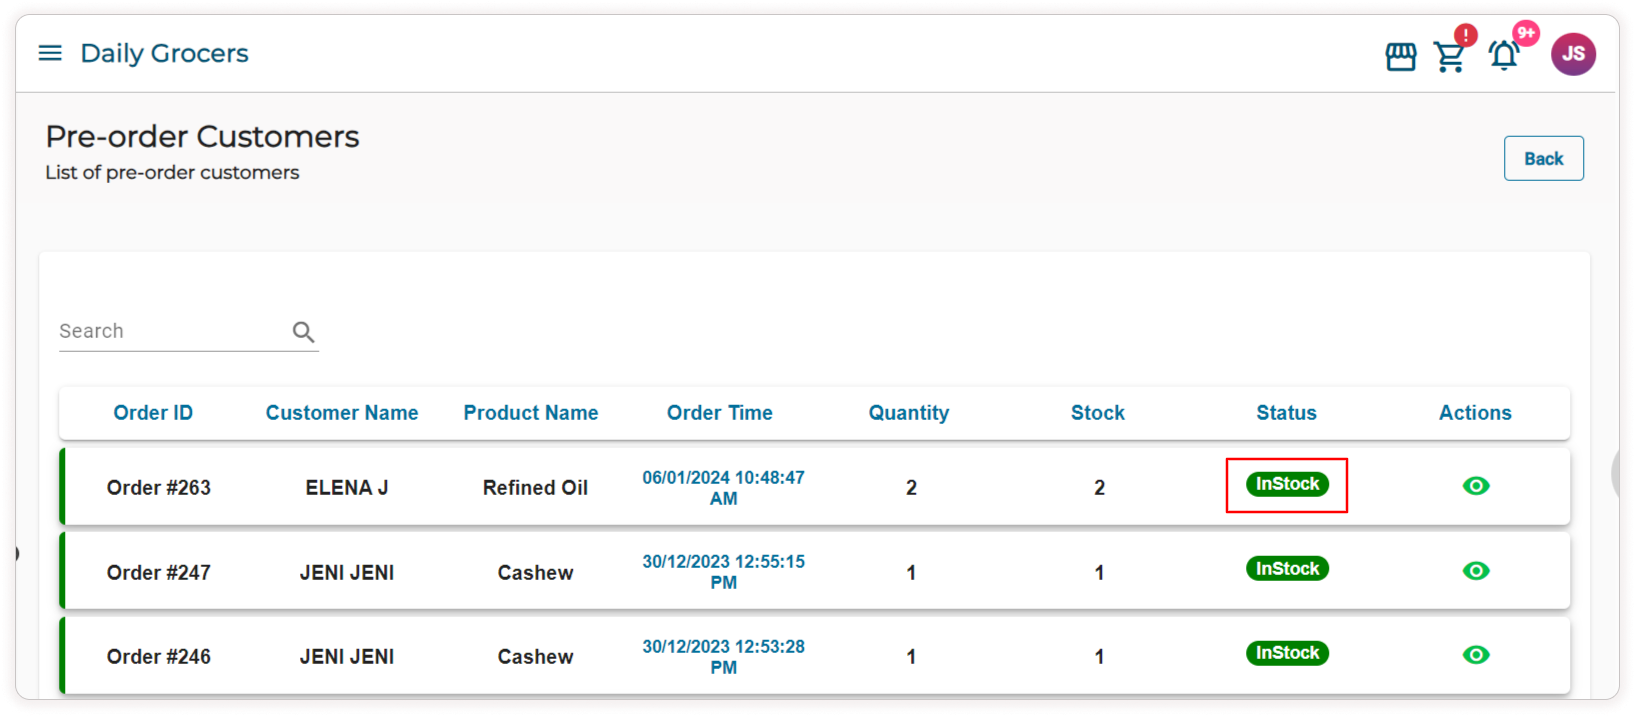
-
Once the stock gets replenished the Out of Stock status will be changed to In Stock.
-
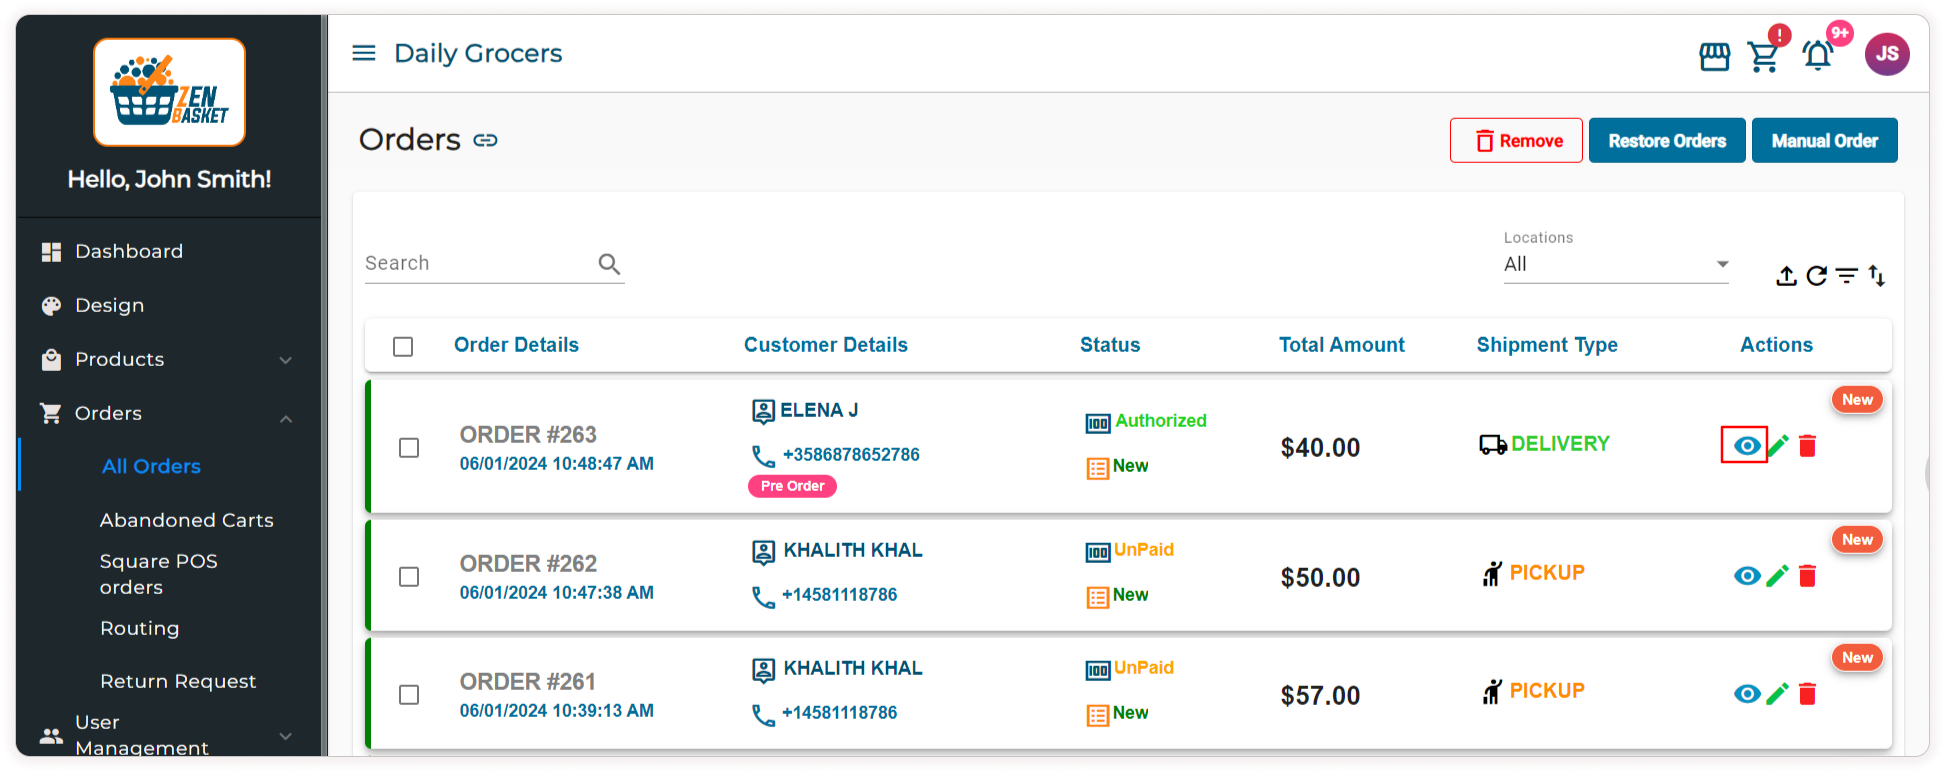
To process the pre-orders, go to the Orders main menu, and click on All Orders sub menu. In the orders list page Pre order will be labeled as Pre order.
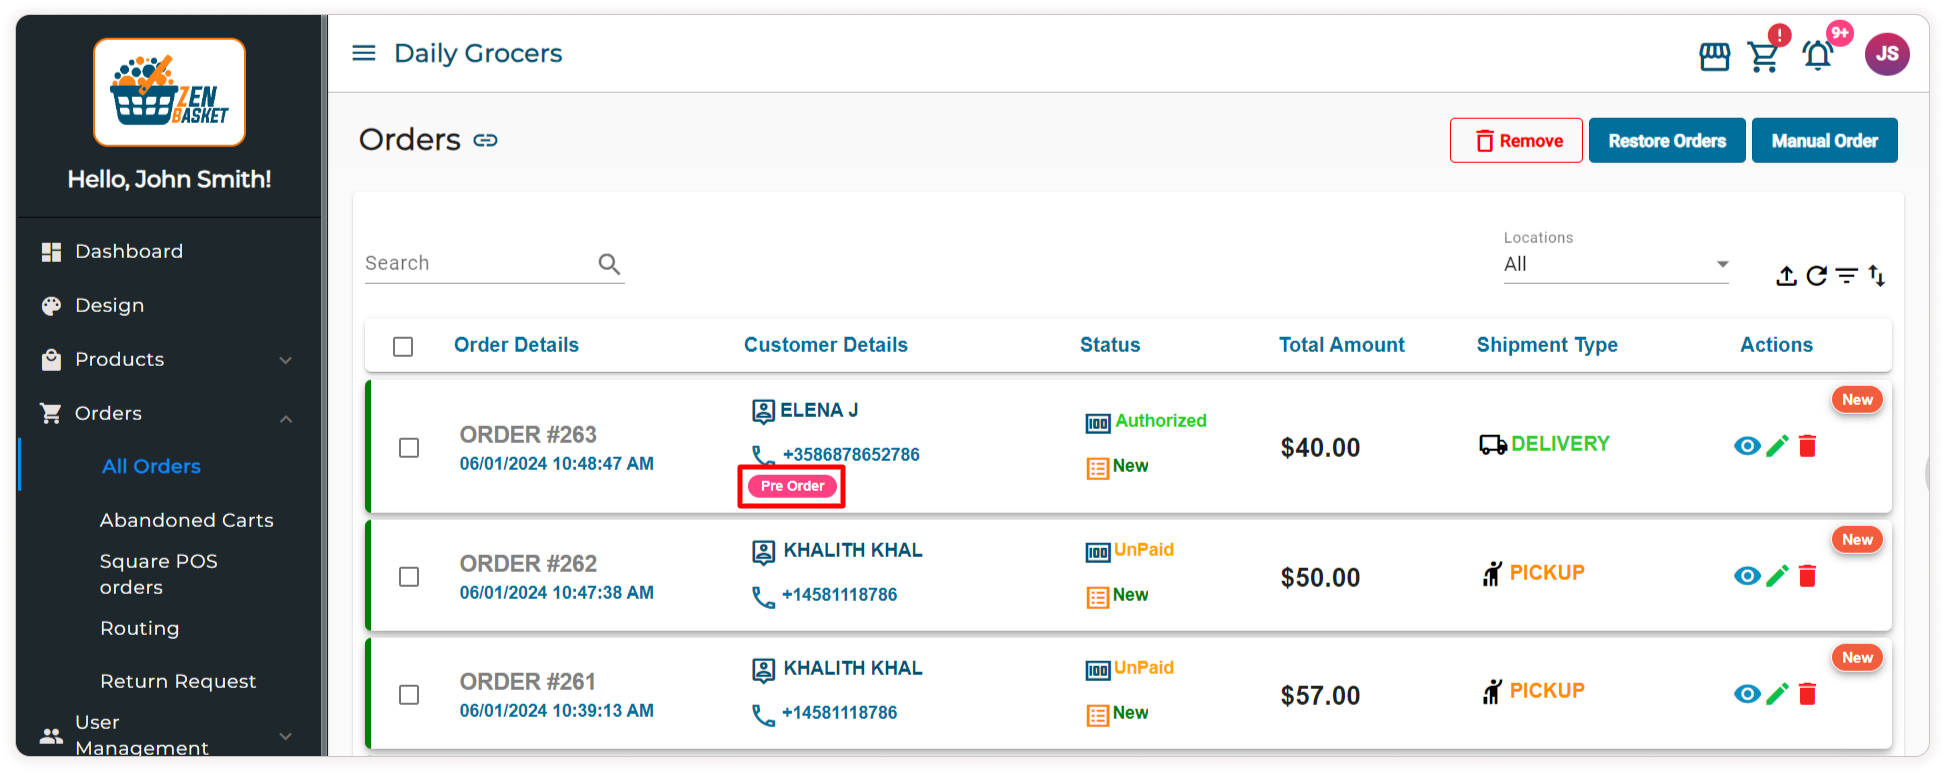
-
Click on the View to process the pre-order.
-
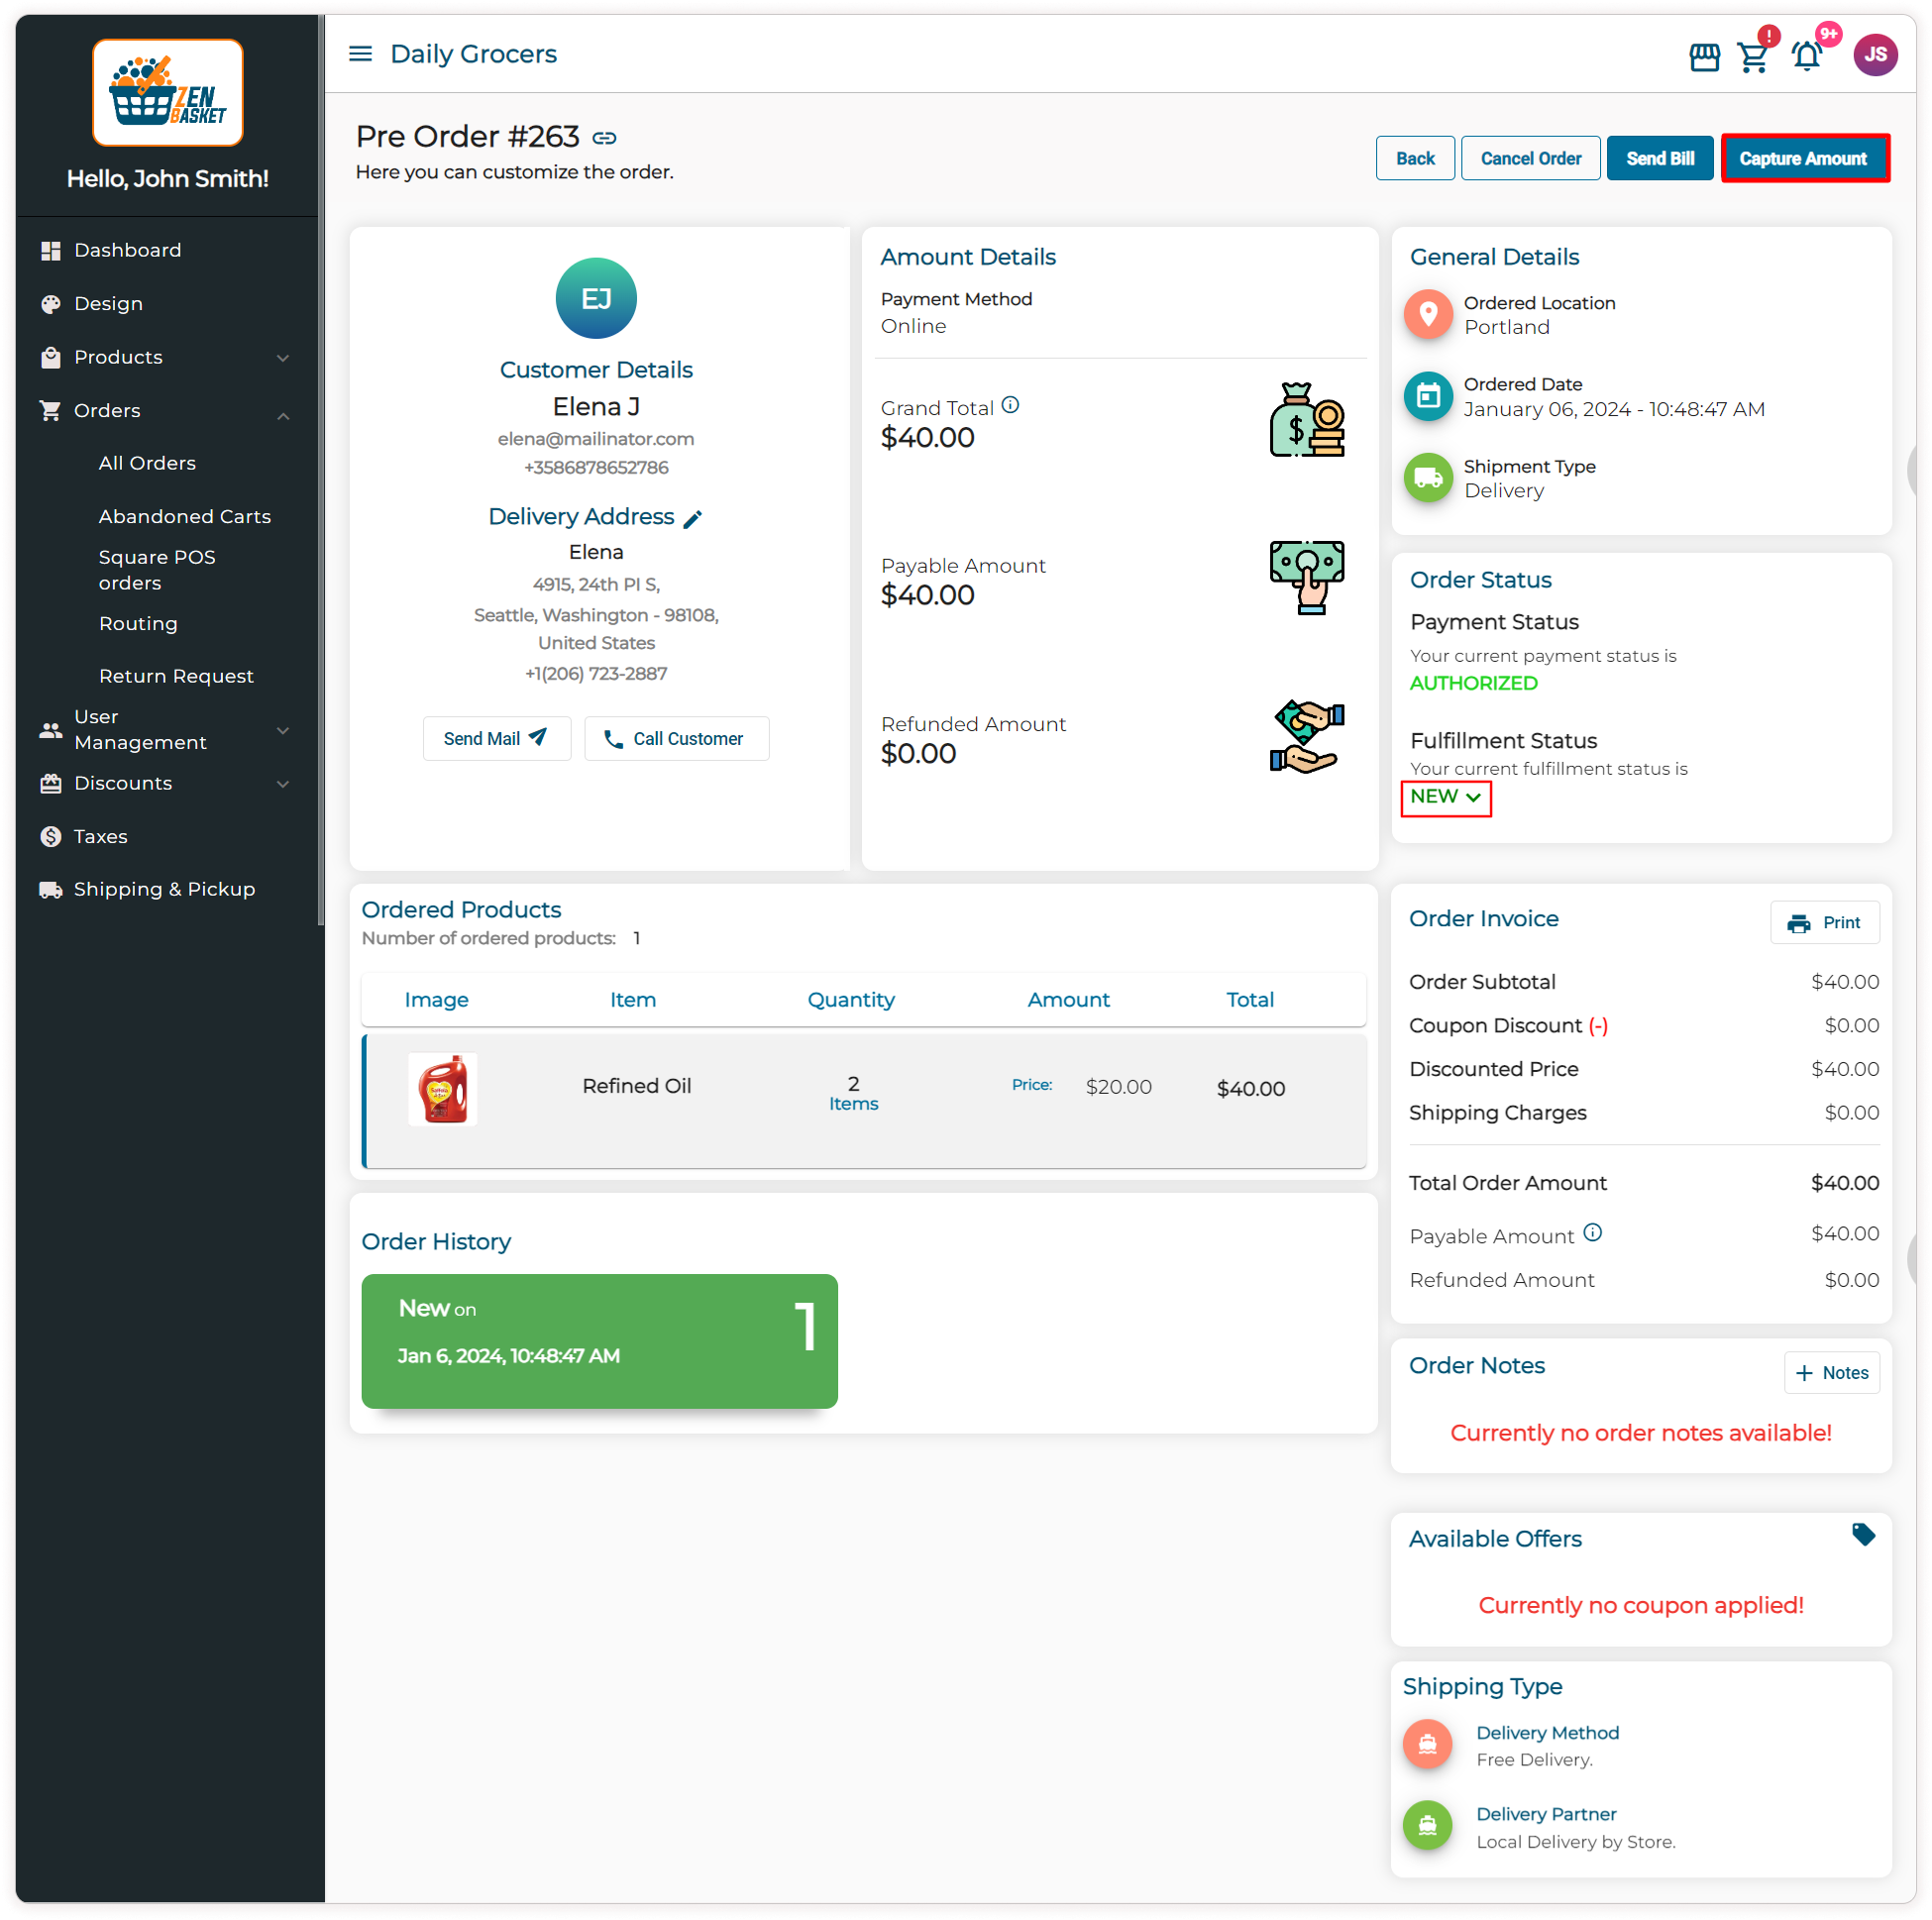
The Capture Amount button allows the admin to capture the amount paid by the customer. Typically, if an order isn’t packed within 7 days the amount paid by the customer will be refunded. The Capture Amount button will automatically disappear when the fulfillment status is changed to Packed.
-
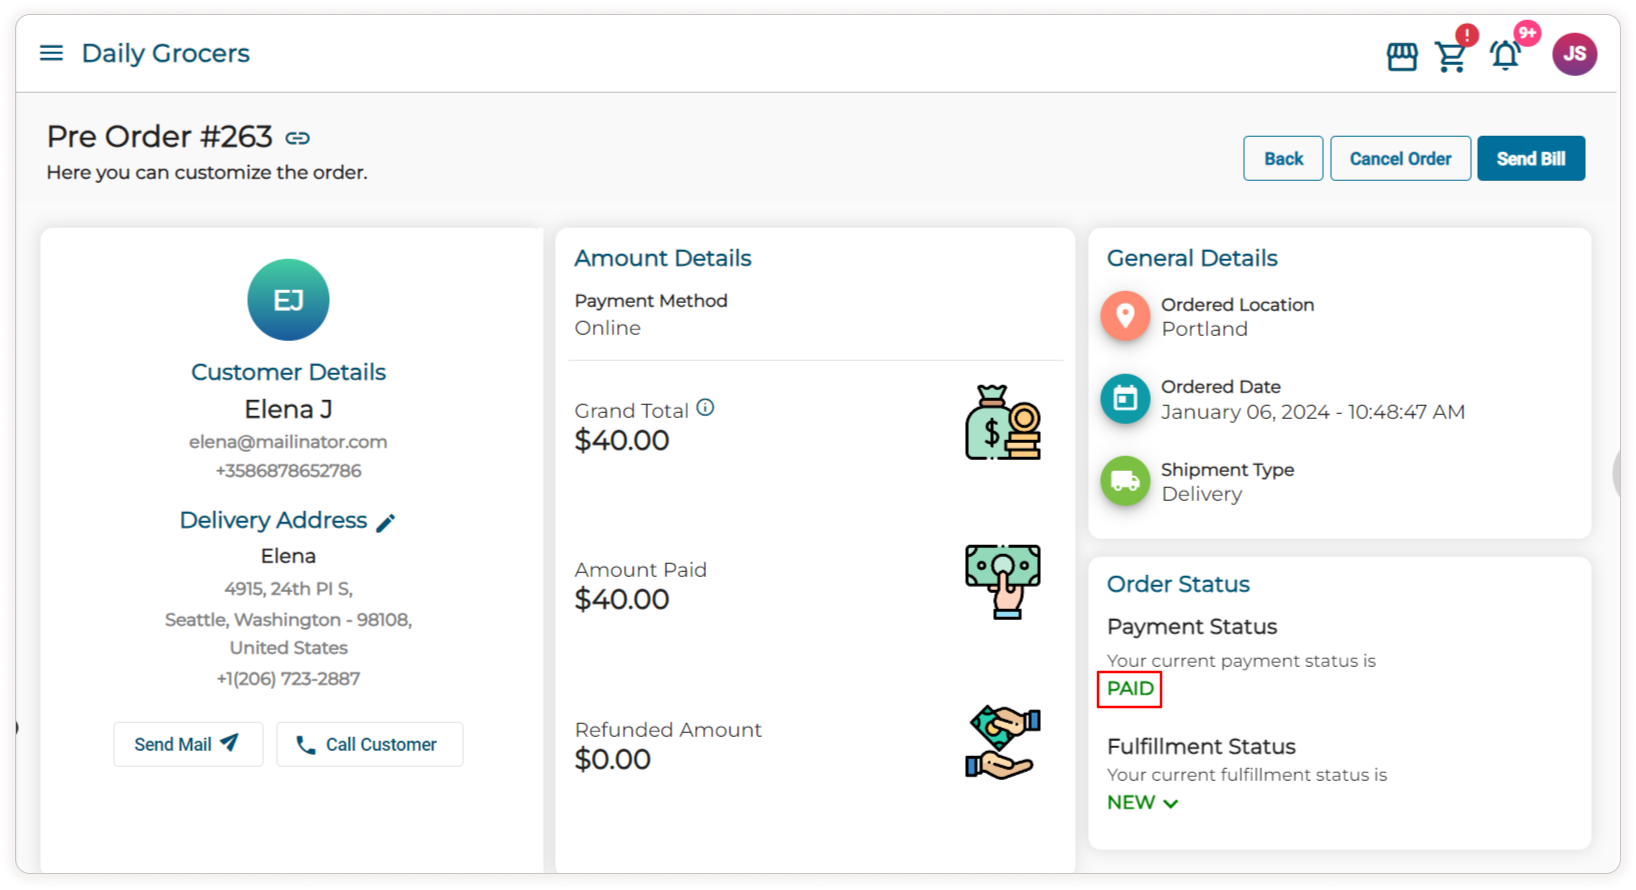
Clicking on the Capture Amount button will change the Payment status from Authorized to Paid.
-
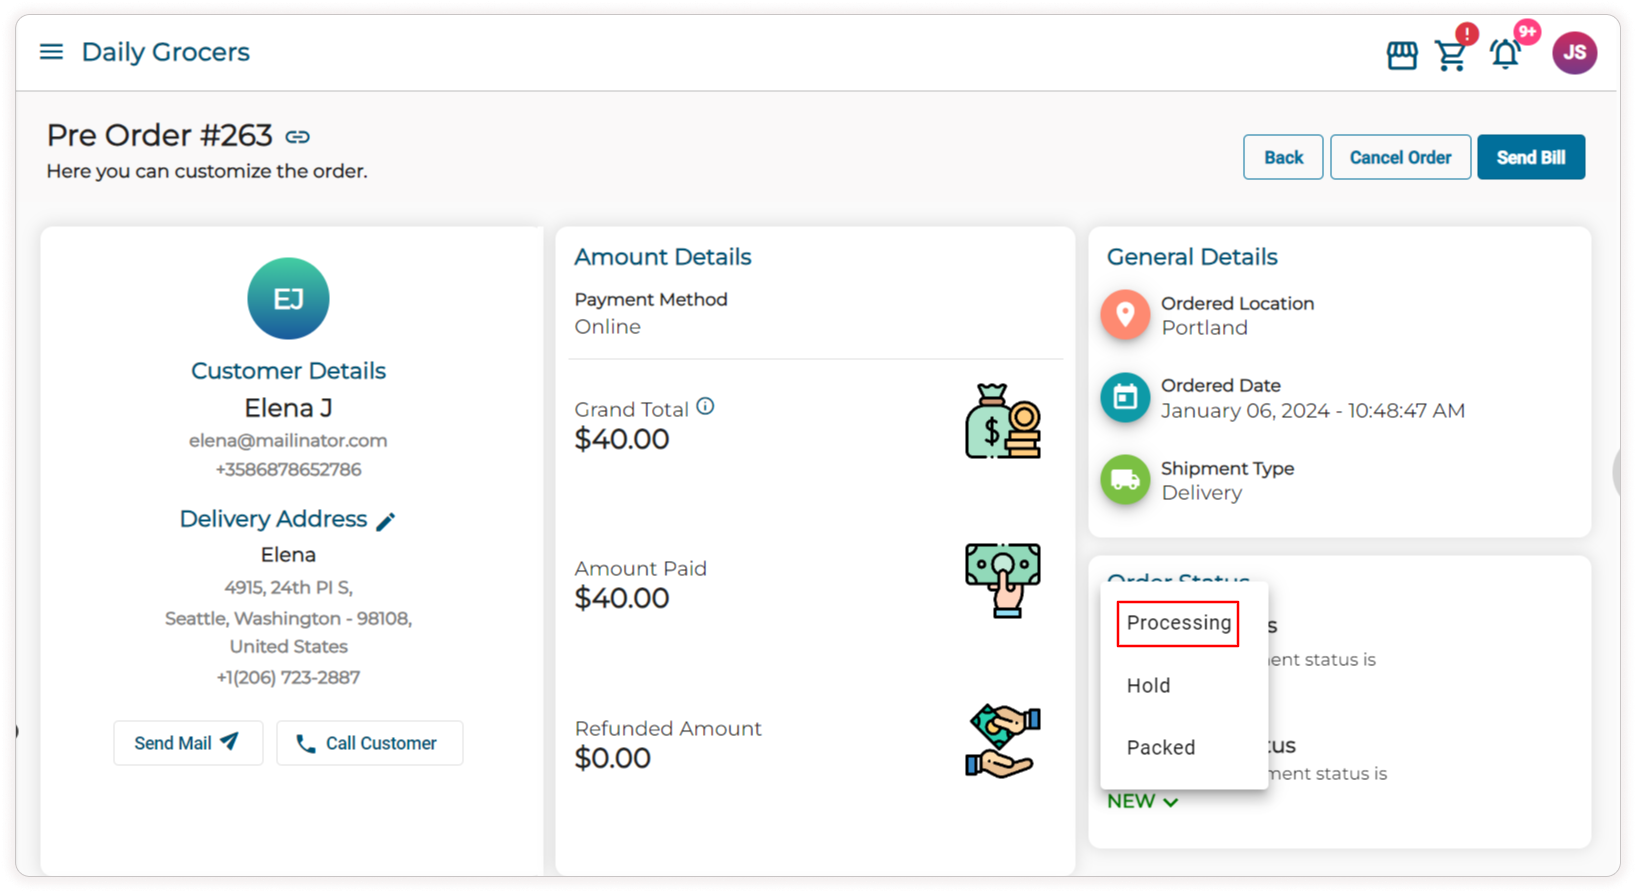
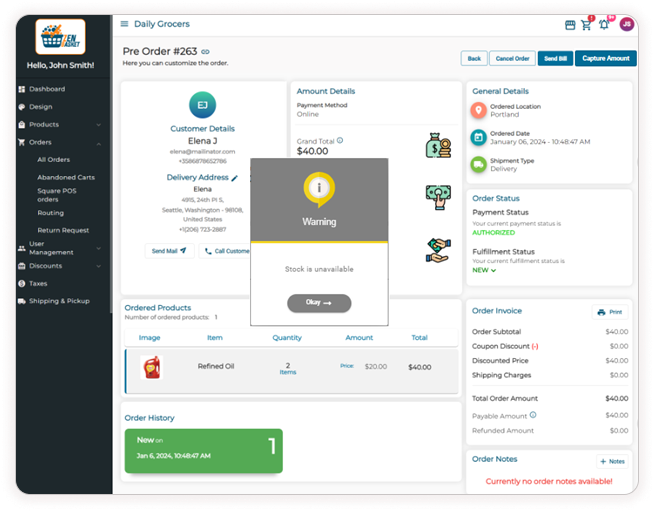
Click on Processing to process the pre-order product for the customer. If the stock count is not updated, the Stock is unavailable Warning popup will display.
-
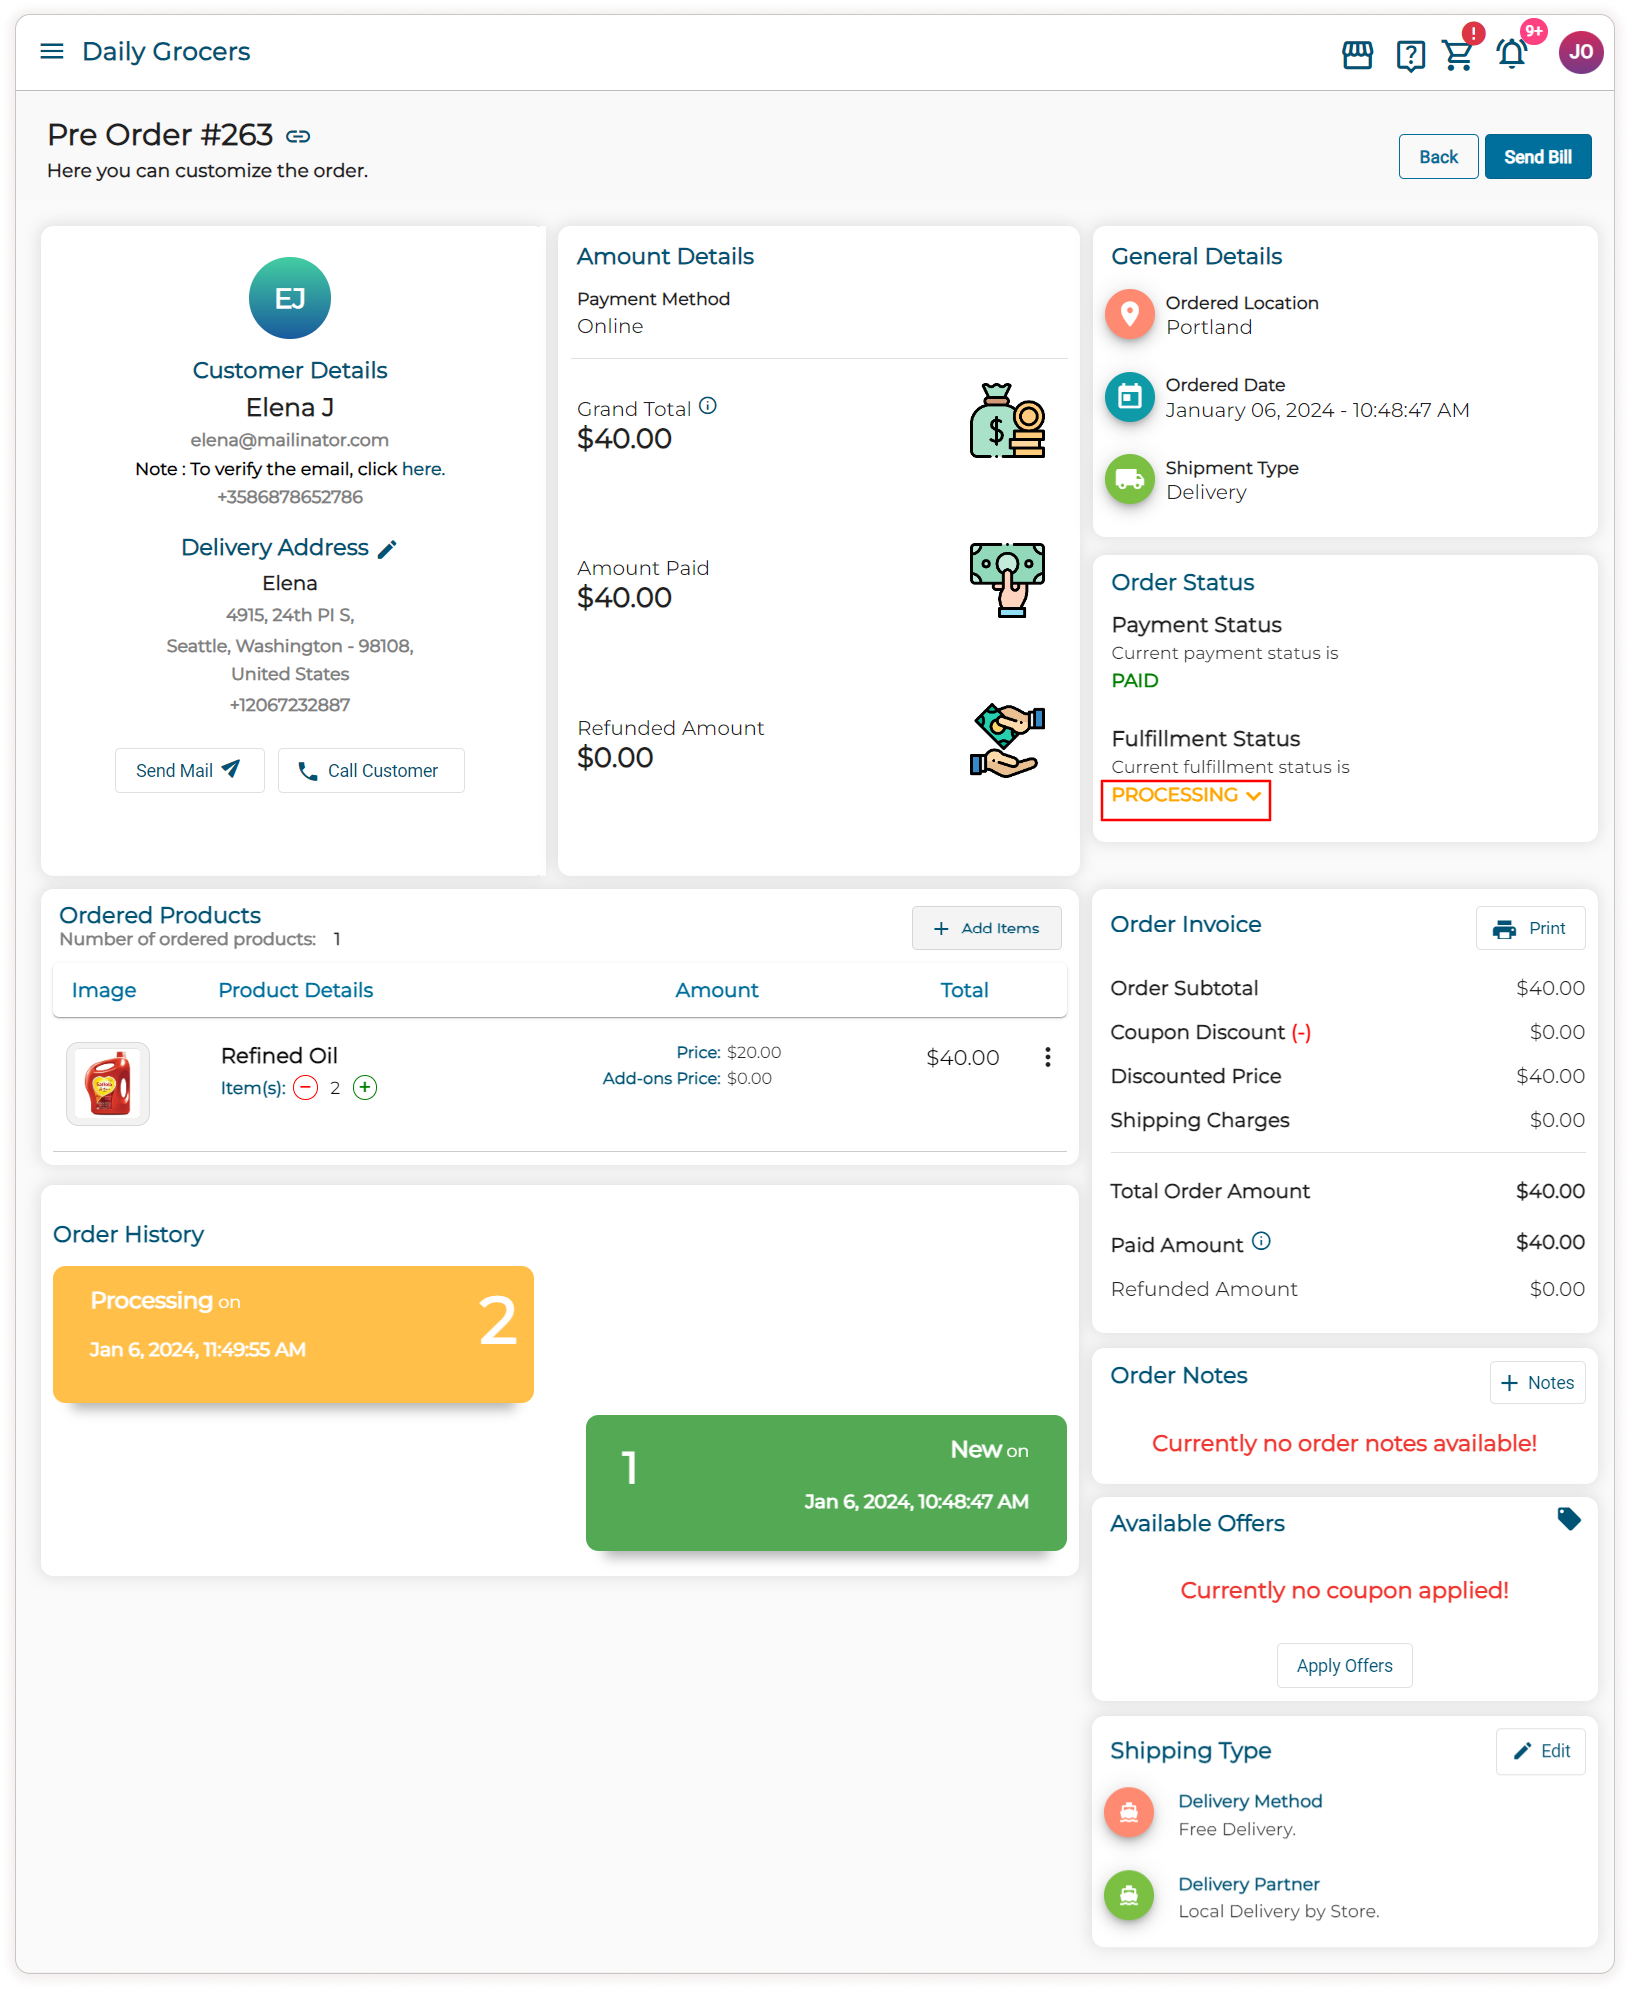
When the product’s stock becomes available, the admin can change the status to Processing. At this status, additional items can be added, by clicking on the Add items button.
Note: Pre-orders cannot be placed for the customers by the admin in Manual Order. Customers can only pre-order their products from the storefront.