
Campaign
The shopowners can create and manage marketing campaigns. It offers features like segmentation, scheduling, and performance tracking to optimize campaign effectiveness. With this sub-module, users can target specific customer groups, automate campaign workflows, and measure the impact of their marketing efforts.
How to Create Campaign?
-
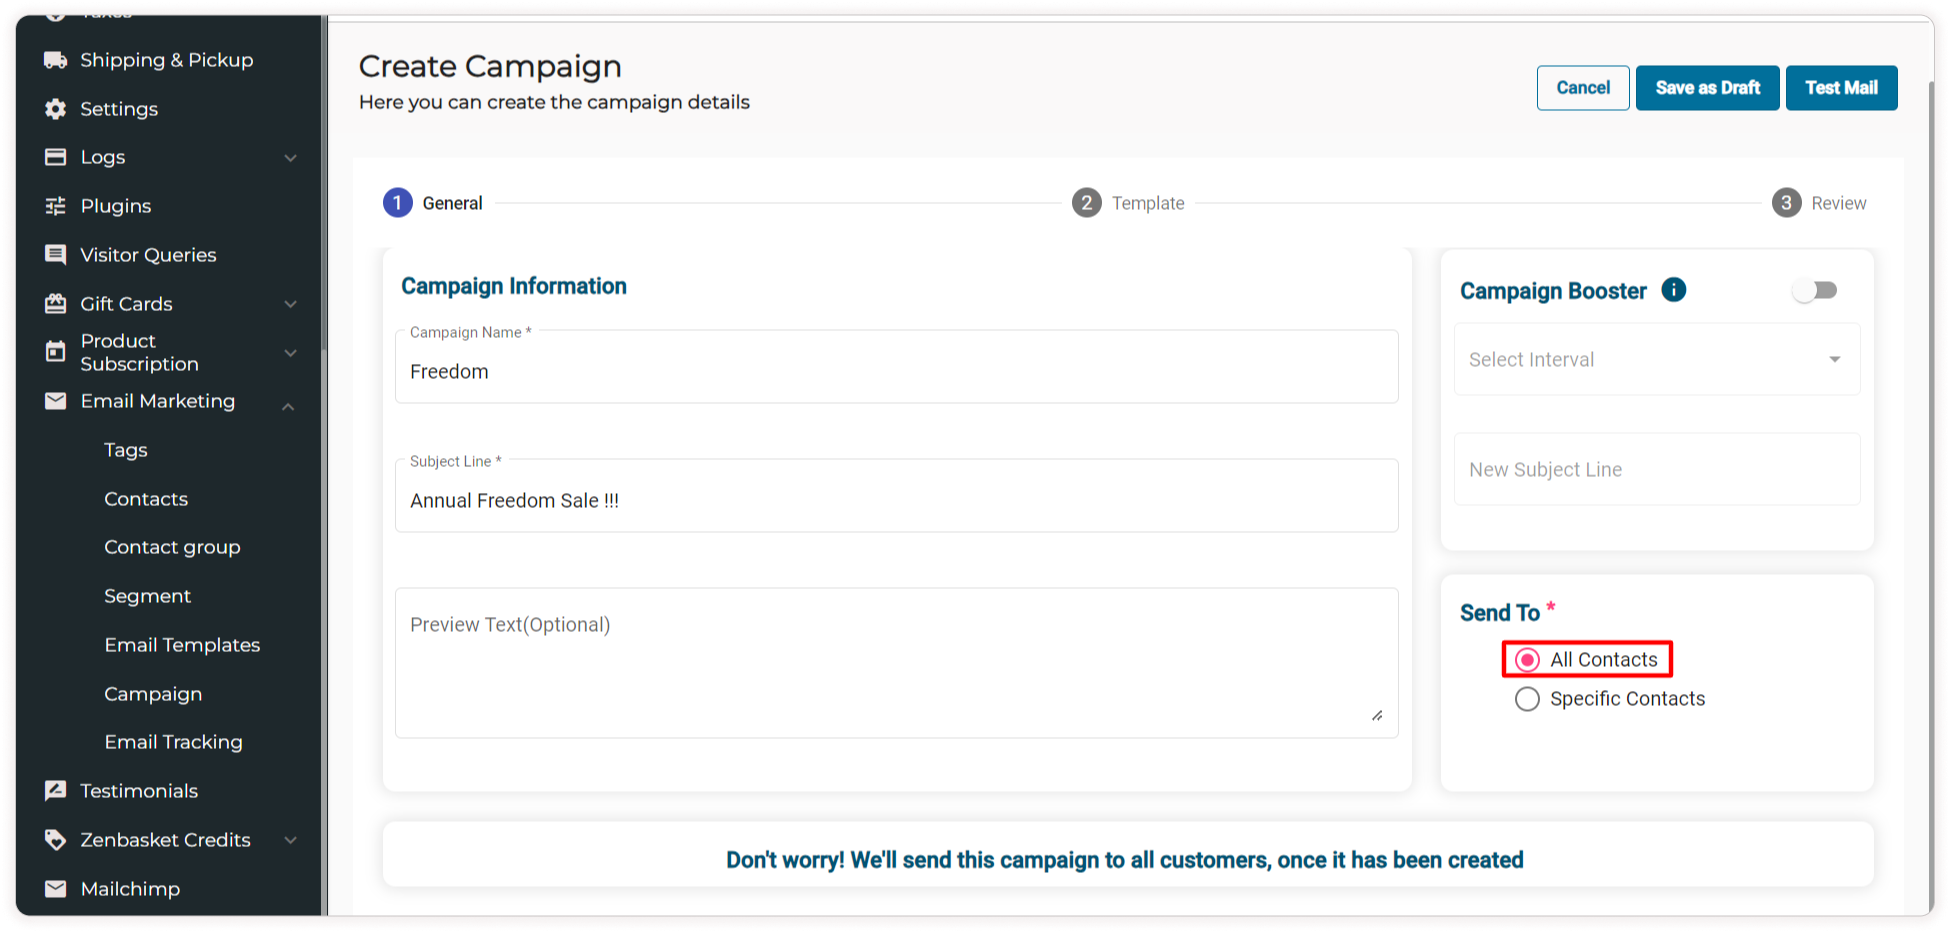
In the Email Marketing menu select the Campaign sub menu.
-
Click on Create Campaign.
-
Under the General tab provide the Campaign Name, Subject Line, and Preview Text (Optional).
-
Select All Contacts to send the campaign to all the contacts.
-
For specific customers, then select Specific Contacts and choose from the available customer list.
-
Else under the Specific Contacts section select the Segments or Contact Group and choose the available options from the dropdown list below.
-
Click on Get Contacts and select the contacts from the filtered-out results.

-
And click on Reset to reset the filter.
-
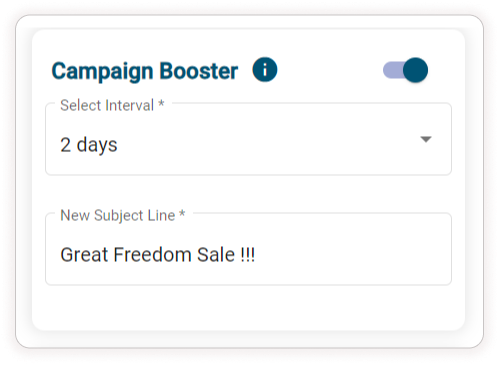
Enable the Campaign Booster toggle to resend the campaign with a new subject line if the sent campaign is left unopened.
-
Select the Interval of 1 or 2 days and provide the New Subject Line.
-
Go to the Template tab.
-
Select Language. Select the required Template.
-
Click on the Desktop View or Mobile View to view it accordingly.

-
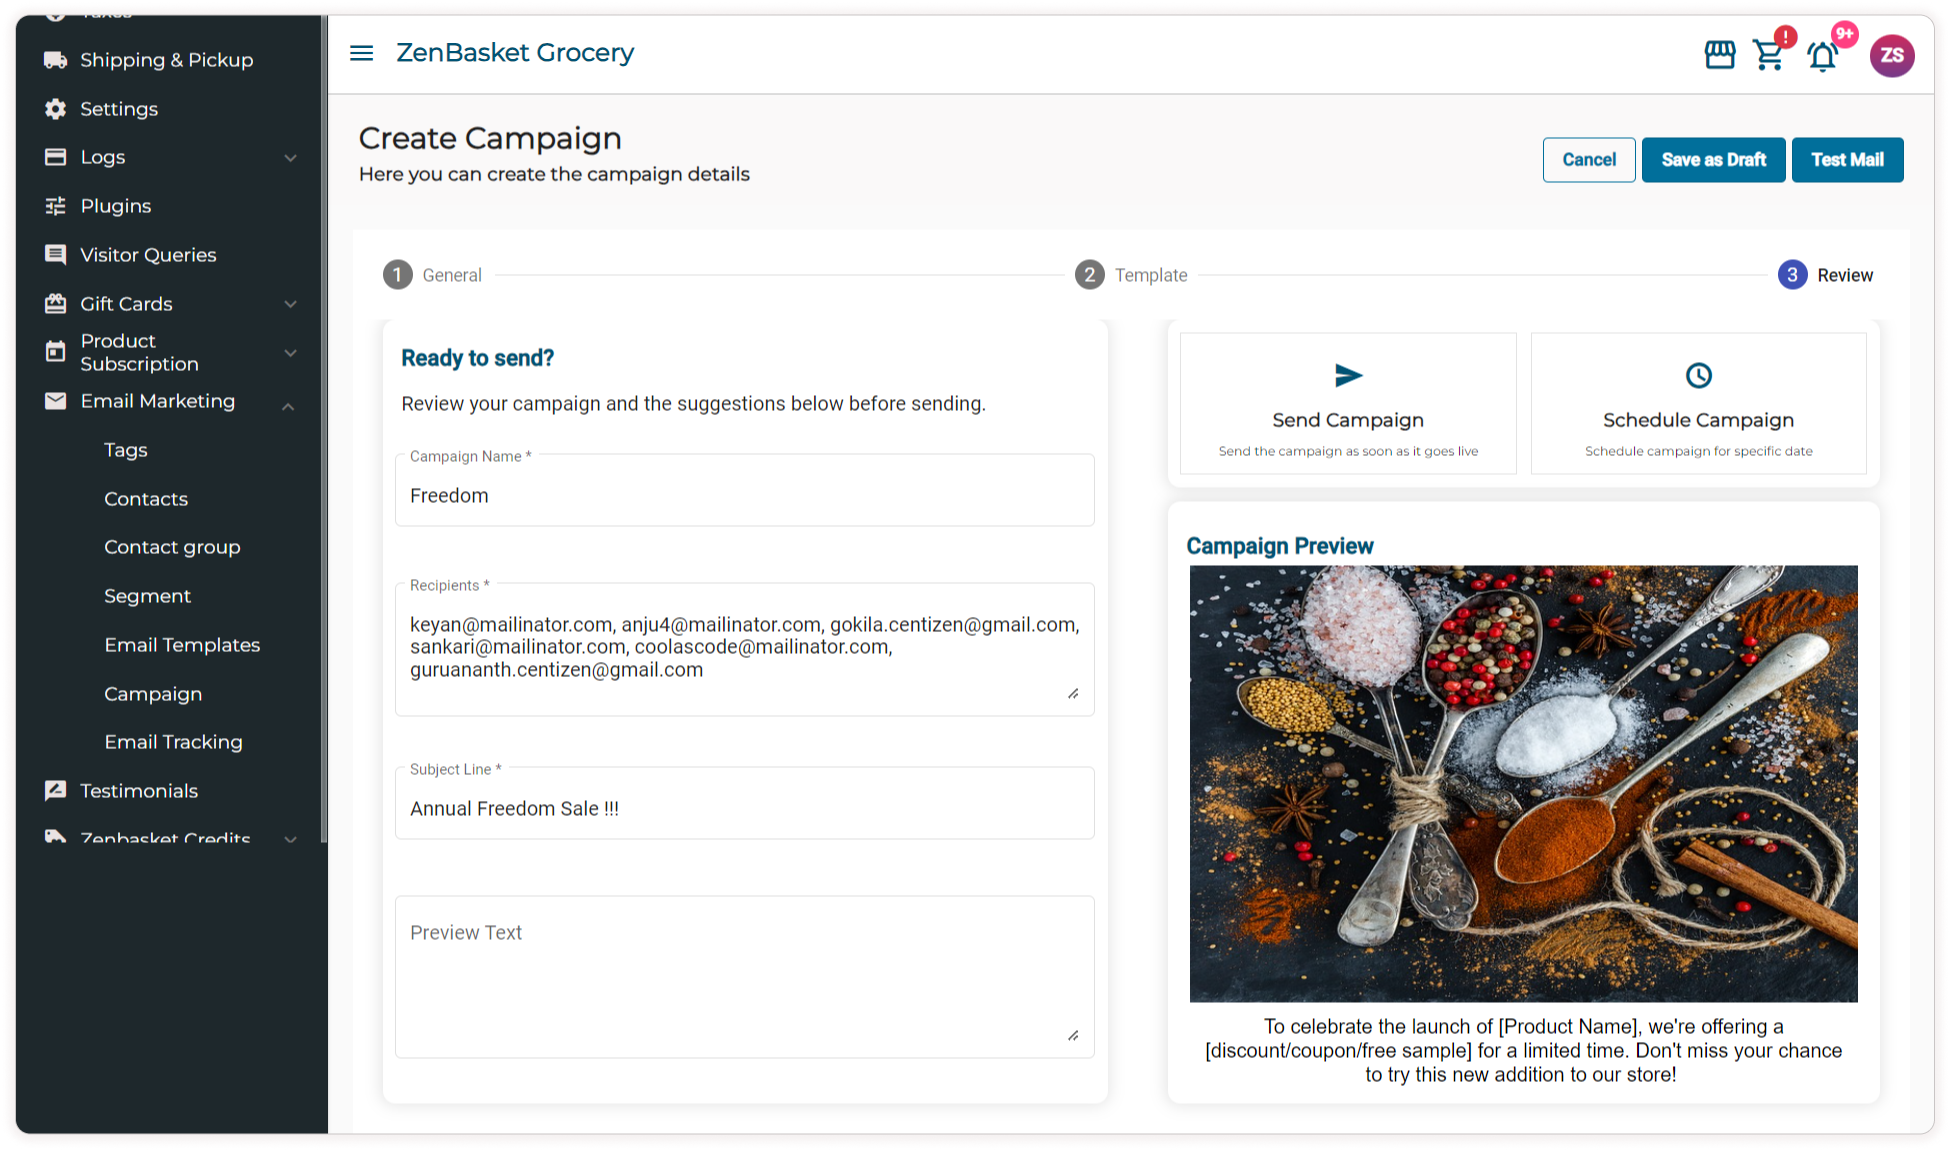
Now go to the Review tab.
-
Over here you can review the campaign details and preview the campaign template.
-
Click on Save as Draft if you choose to save the campaign as a draft.
-
Or select the Send Campaign and click on Save to send the campaign lively.
-
Or select the Schedule Campaign.
-
Now provide the Schedule Date according to which the Campaign needs to be scheduled.
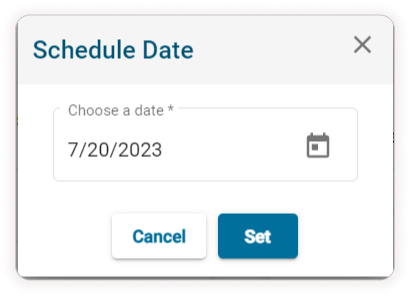
-
And click on Set to send the campaign according to the specified scheduled date.
-
To test the Email campaign click on Test Mail and provide the recipient email ids.
Note: A maximum of 10 mail ids can be given

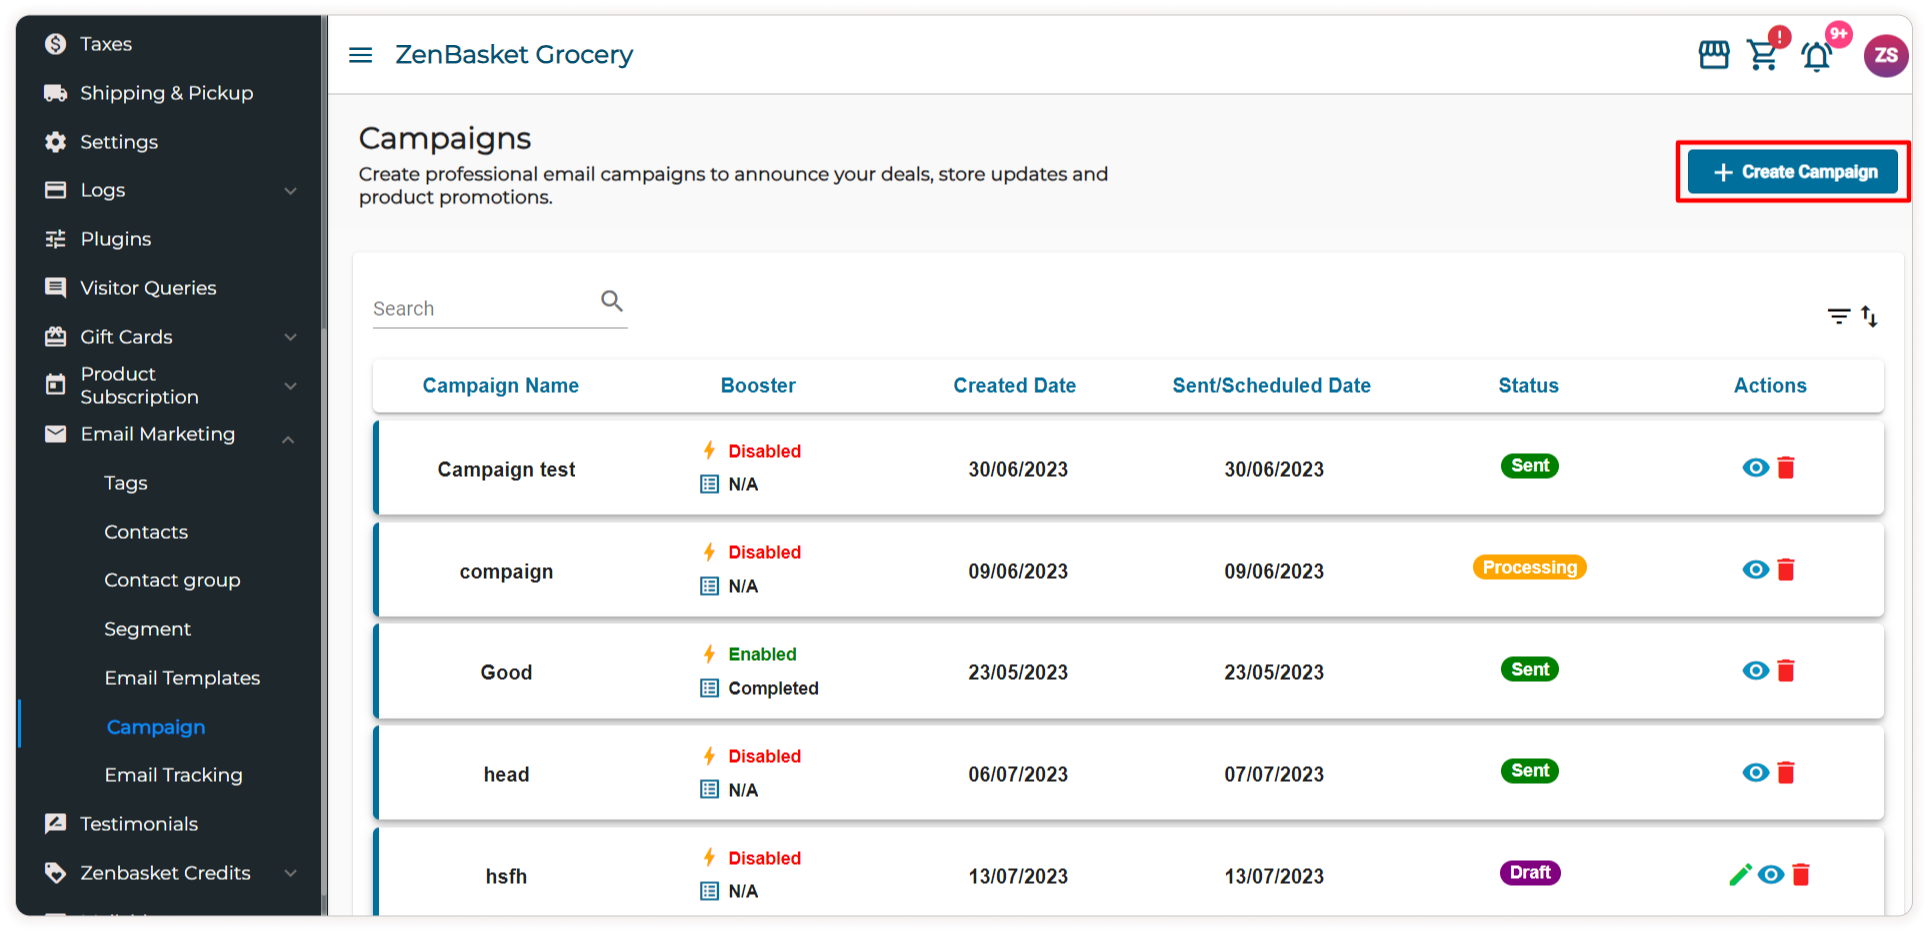
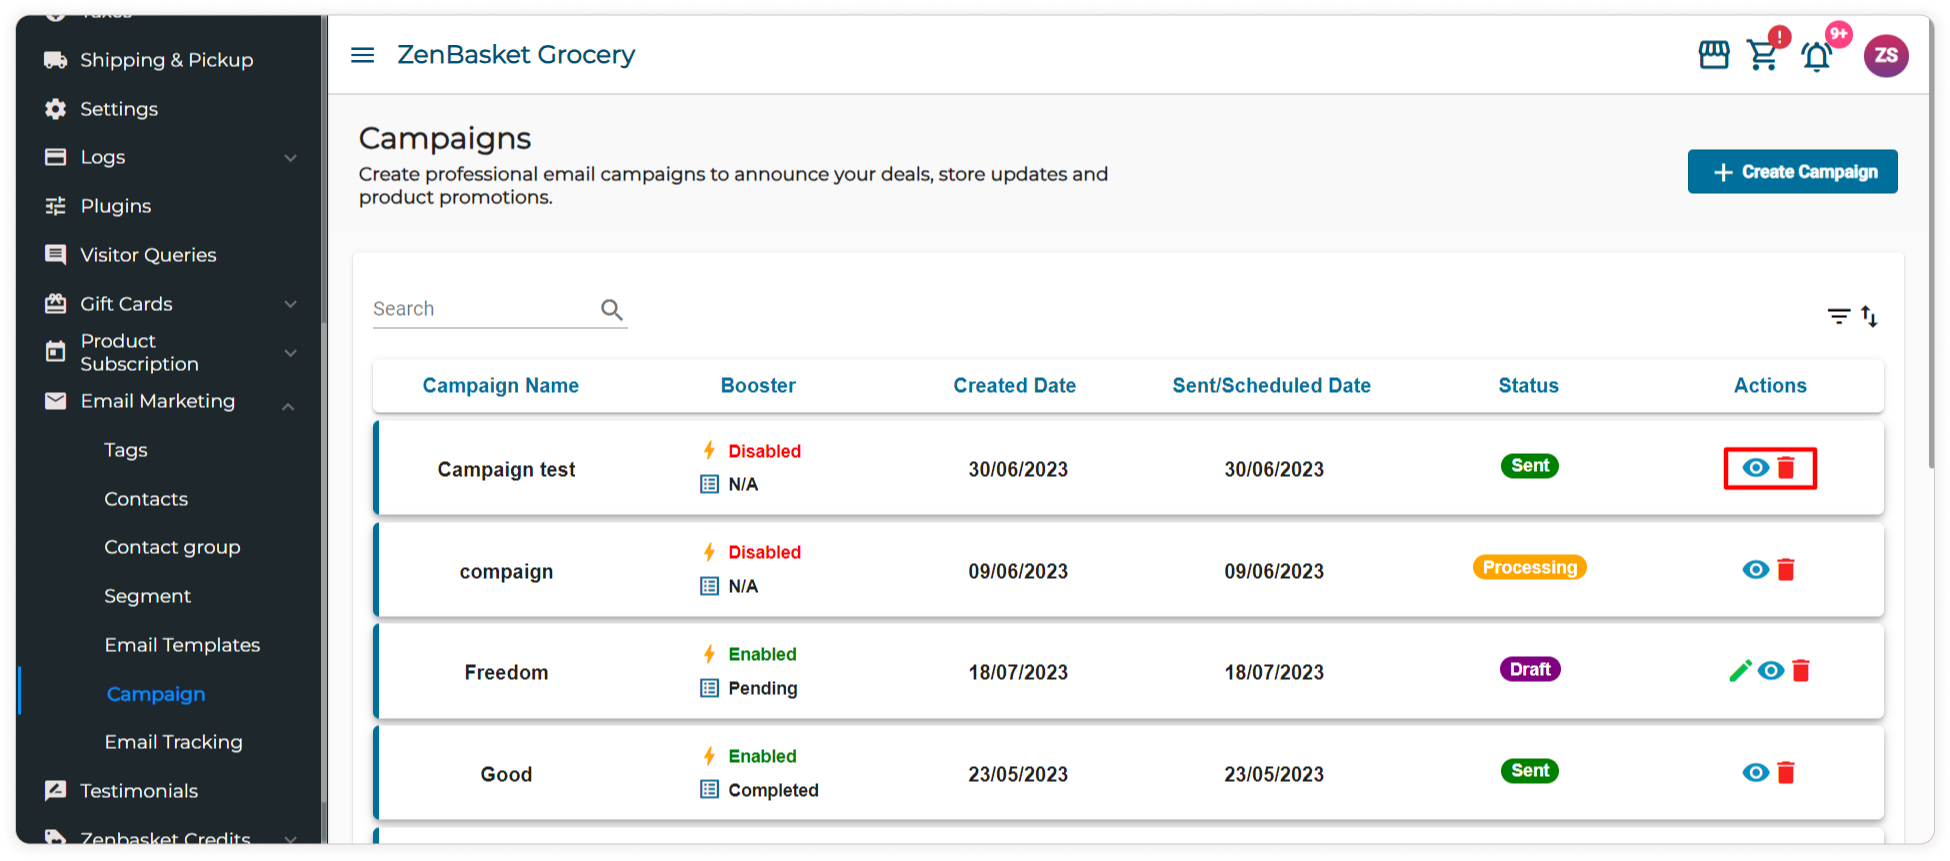
How to View/ Delete a Campaign?
-
In the Email Marketing menu, select the Campaign sub menu.
-
Under the Actions tab, click on the View icon to view the campaign.
-
Click on the Delete icon to delete the campaign. You can click on the Edit icon to edit the details of a campaign that is in draft status.
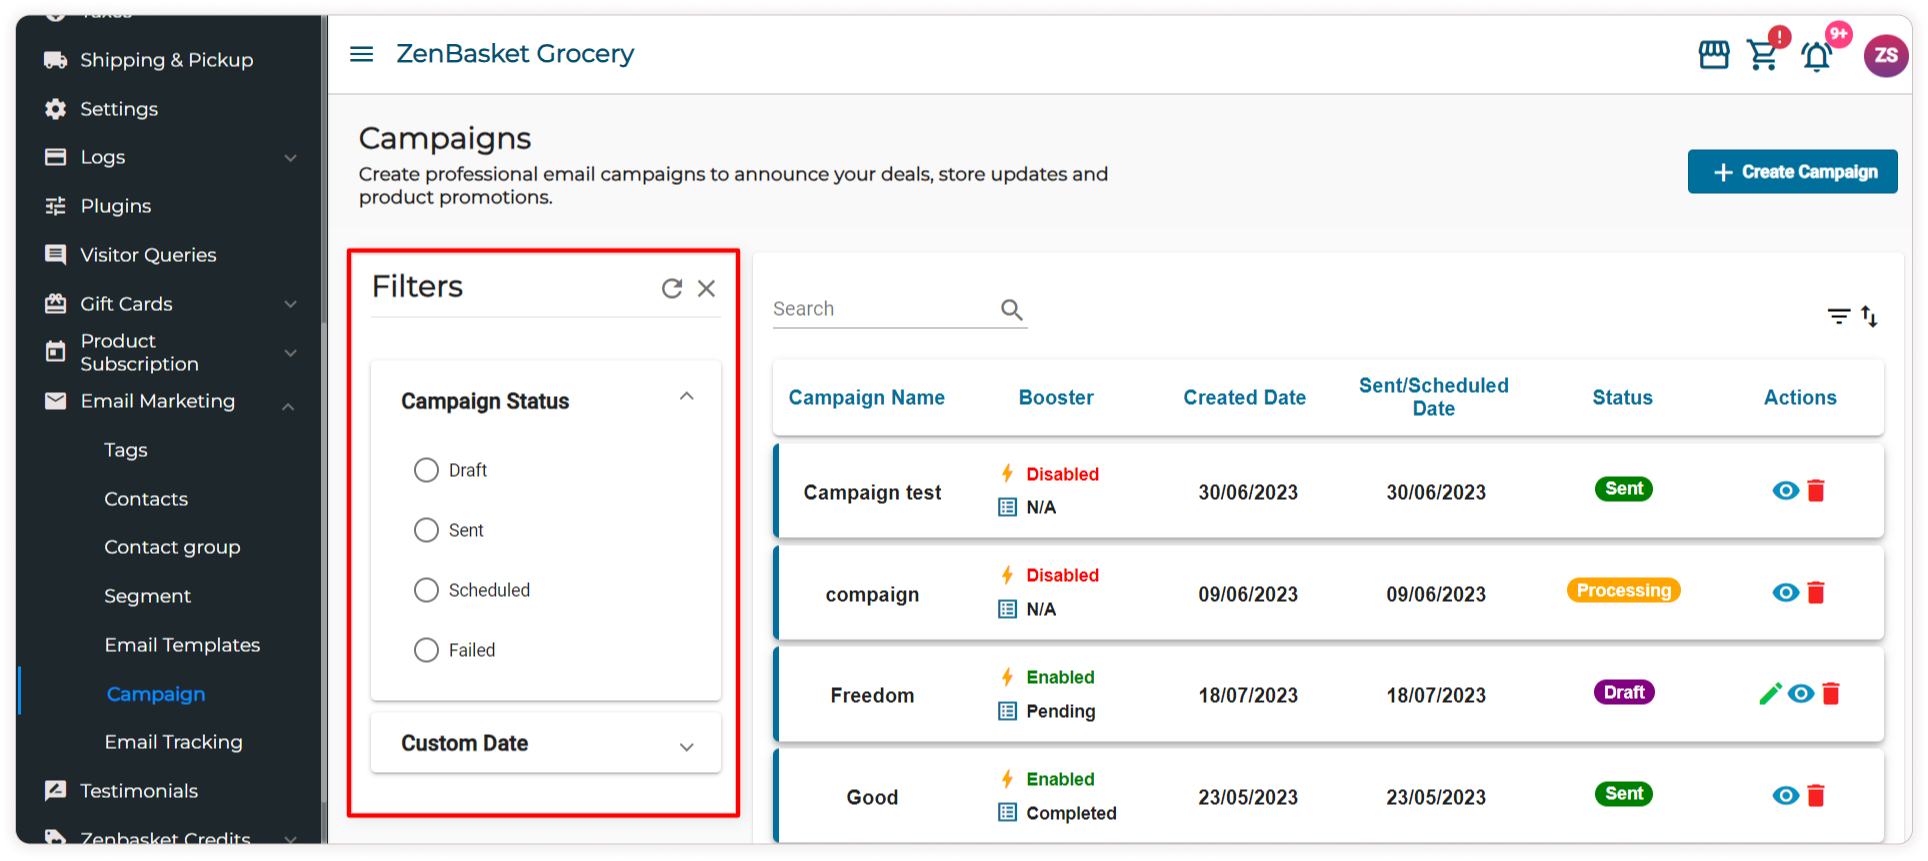
-
The campaign can also be filtered based on the Campaign Status and the Date range in which the campaign was created.
Video Tutorial