
Constant Contact is a powerful email marketing tool that can be seamlessly integrated as a third-party plugin into the ZenBasket. With Constant Contact, users can create stunning email campaigns, manage subscriber lists, and track campaign performance metrics, all while benefiting from a user-friendly interface. The plugin enables businesses to segment their customer base, personalize email content, and automate email sequences based on customer behavior and preferences. Constant Contact also offers a range of customizable templates, design tools, and list-building resources to help businesses craft compelling email campaigns.
How to integrate Constant Contact with ZenBasket?
-
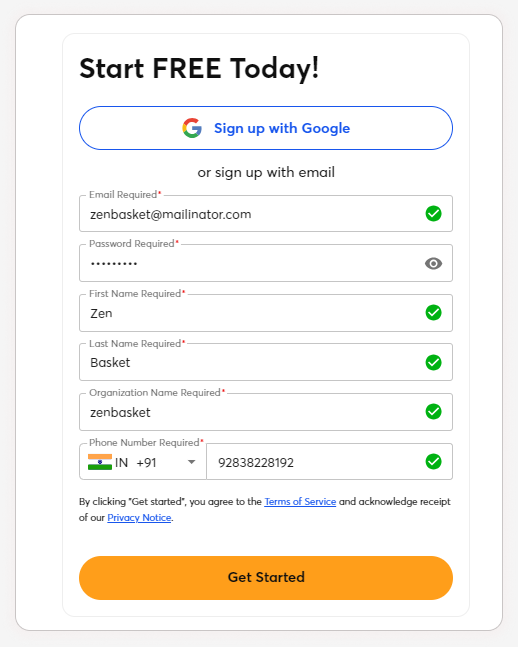
Visit Constant Contact Sign Up page.
-
Sign up with your basic information and click on the Get Started button.
-
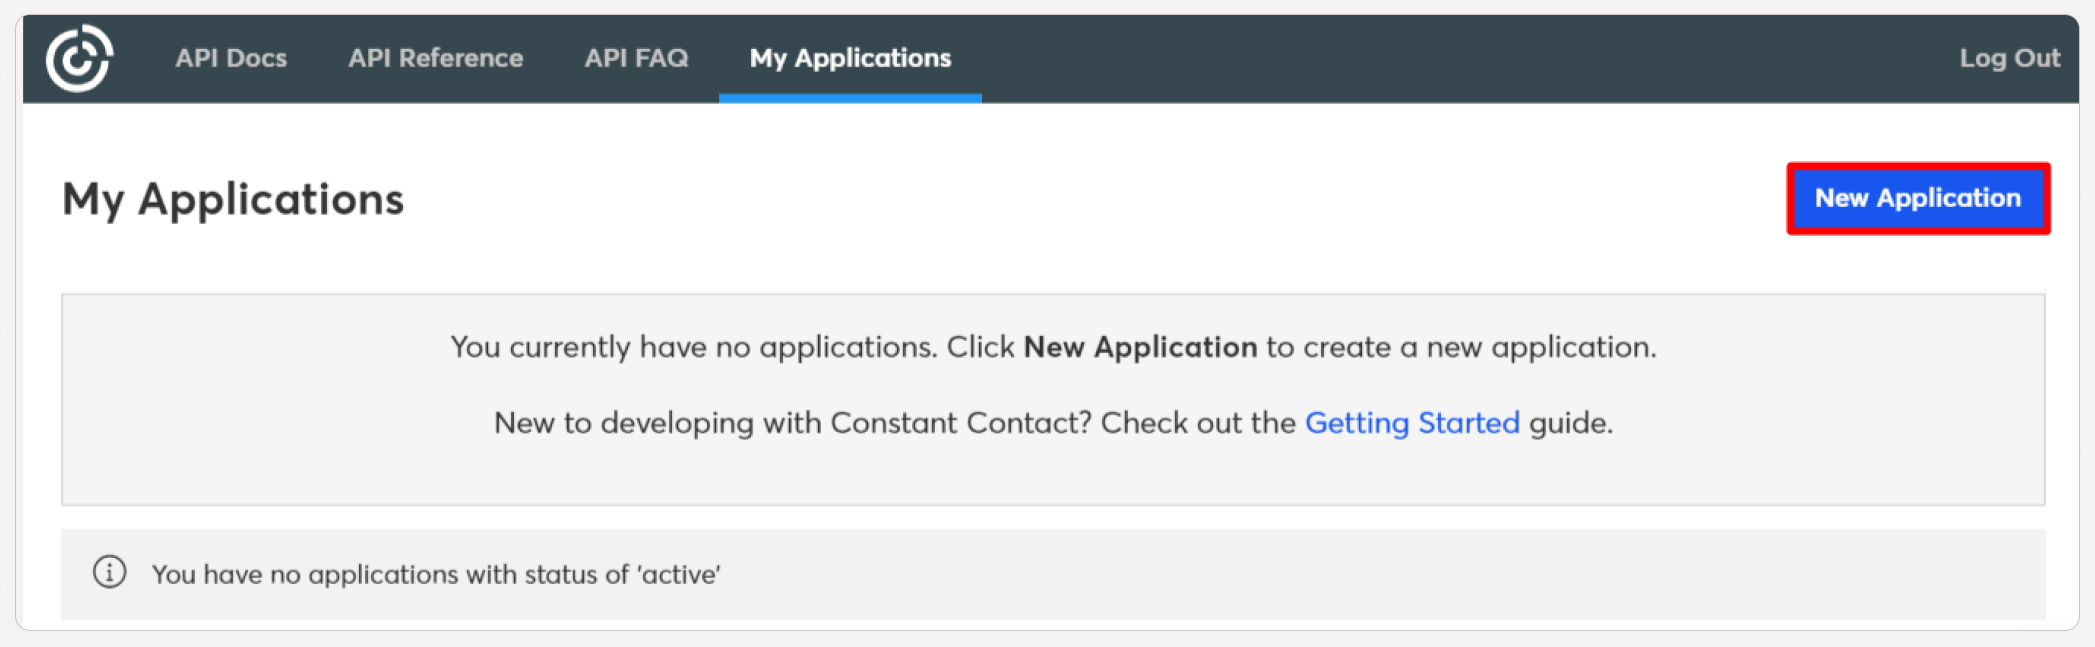
Login to the Constant Contact Developer Portal
-
Click on My Applications and select the New Applicationbutton.
-
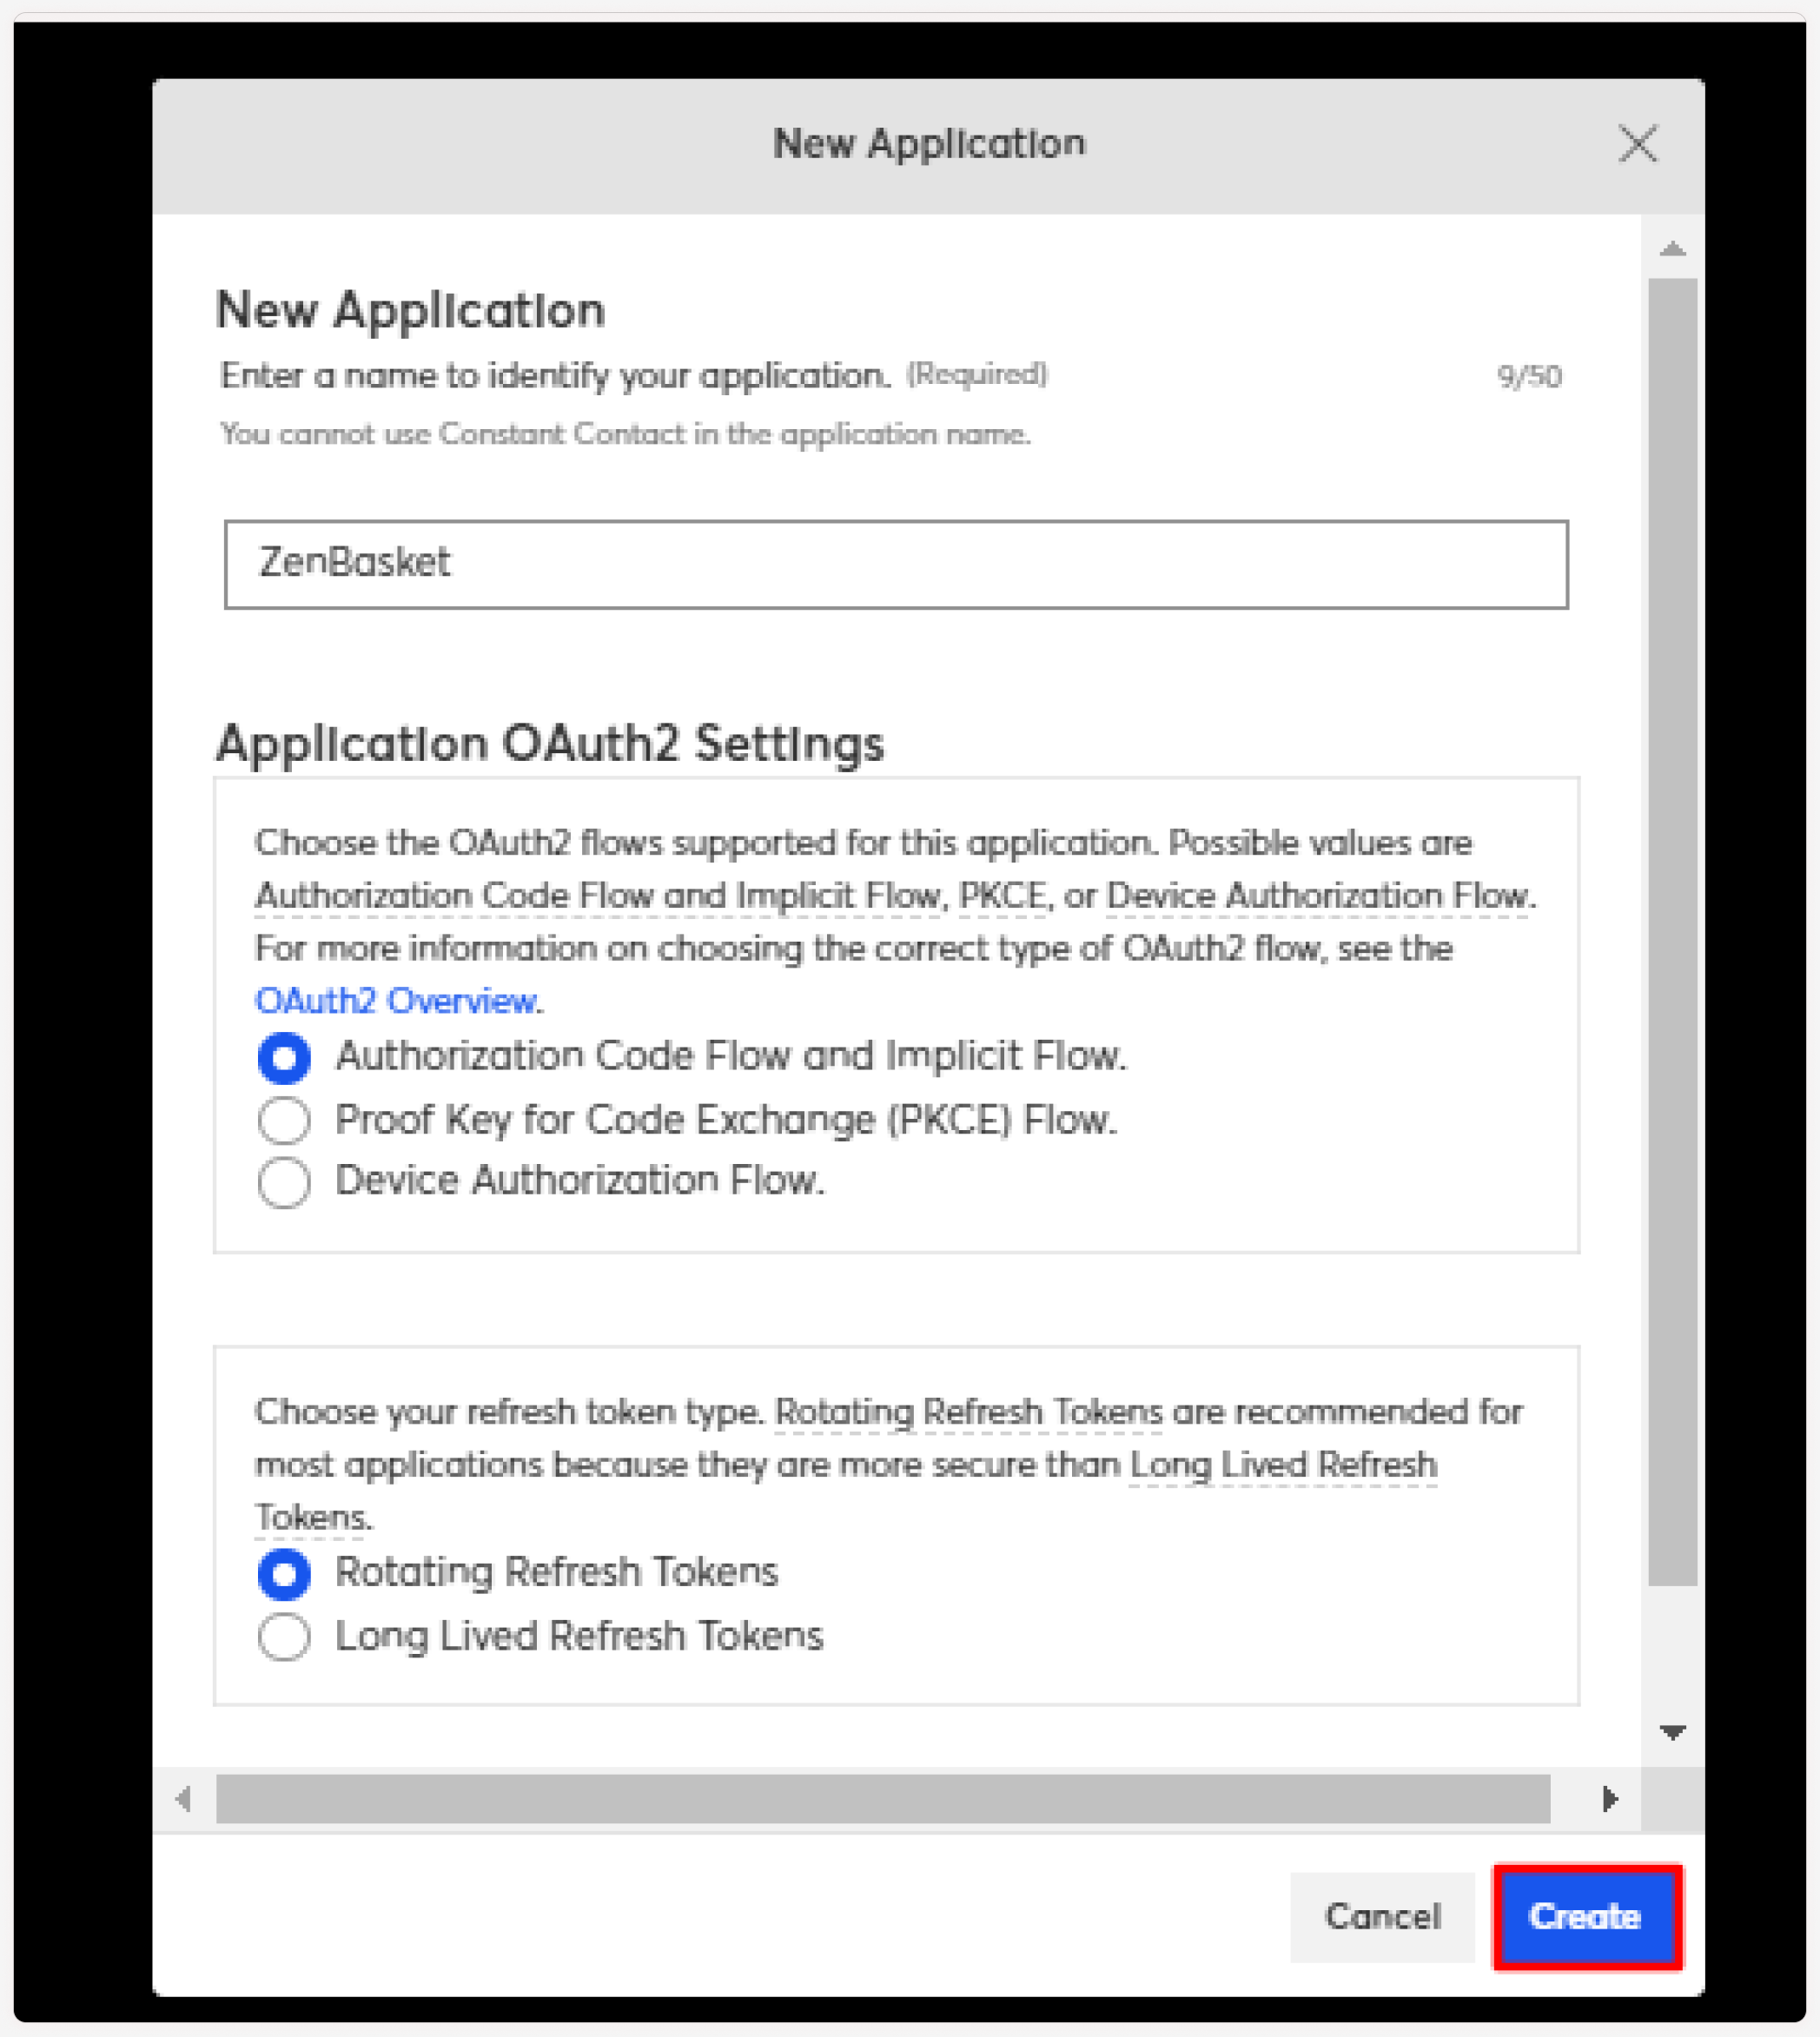
Enter the application name and configure the application settings.
-
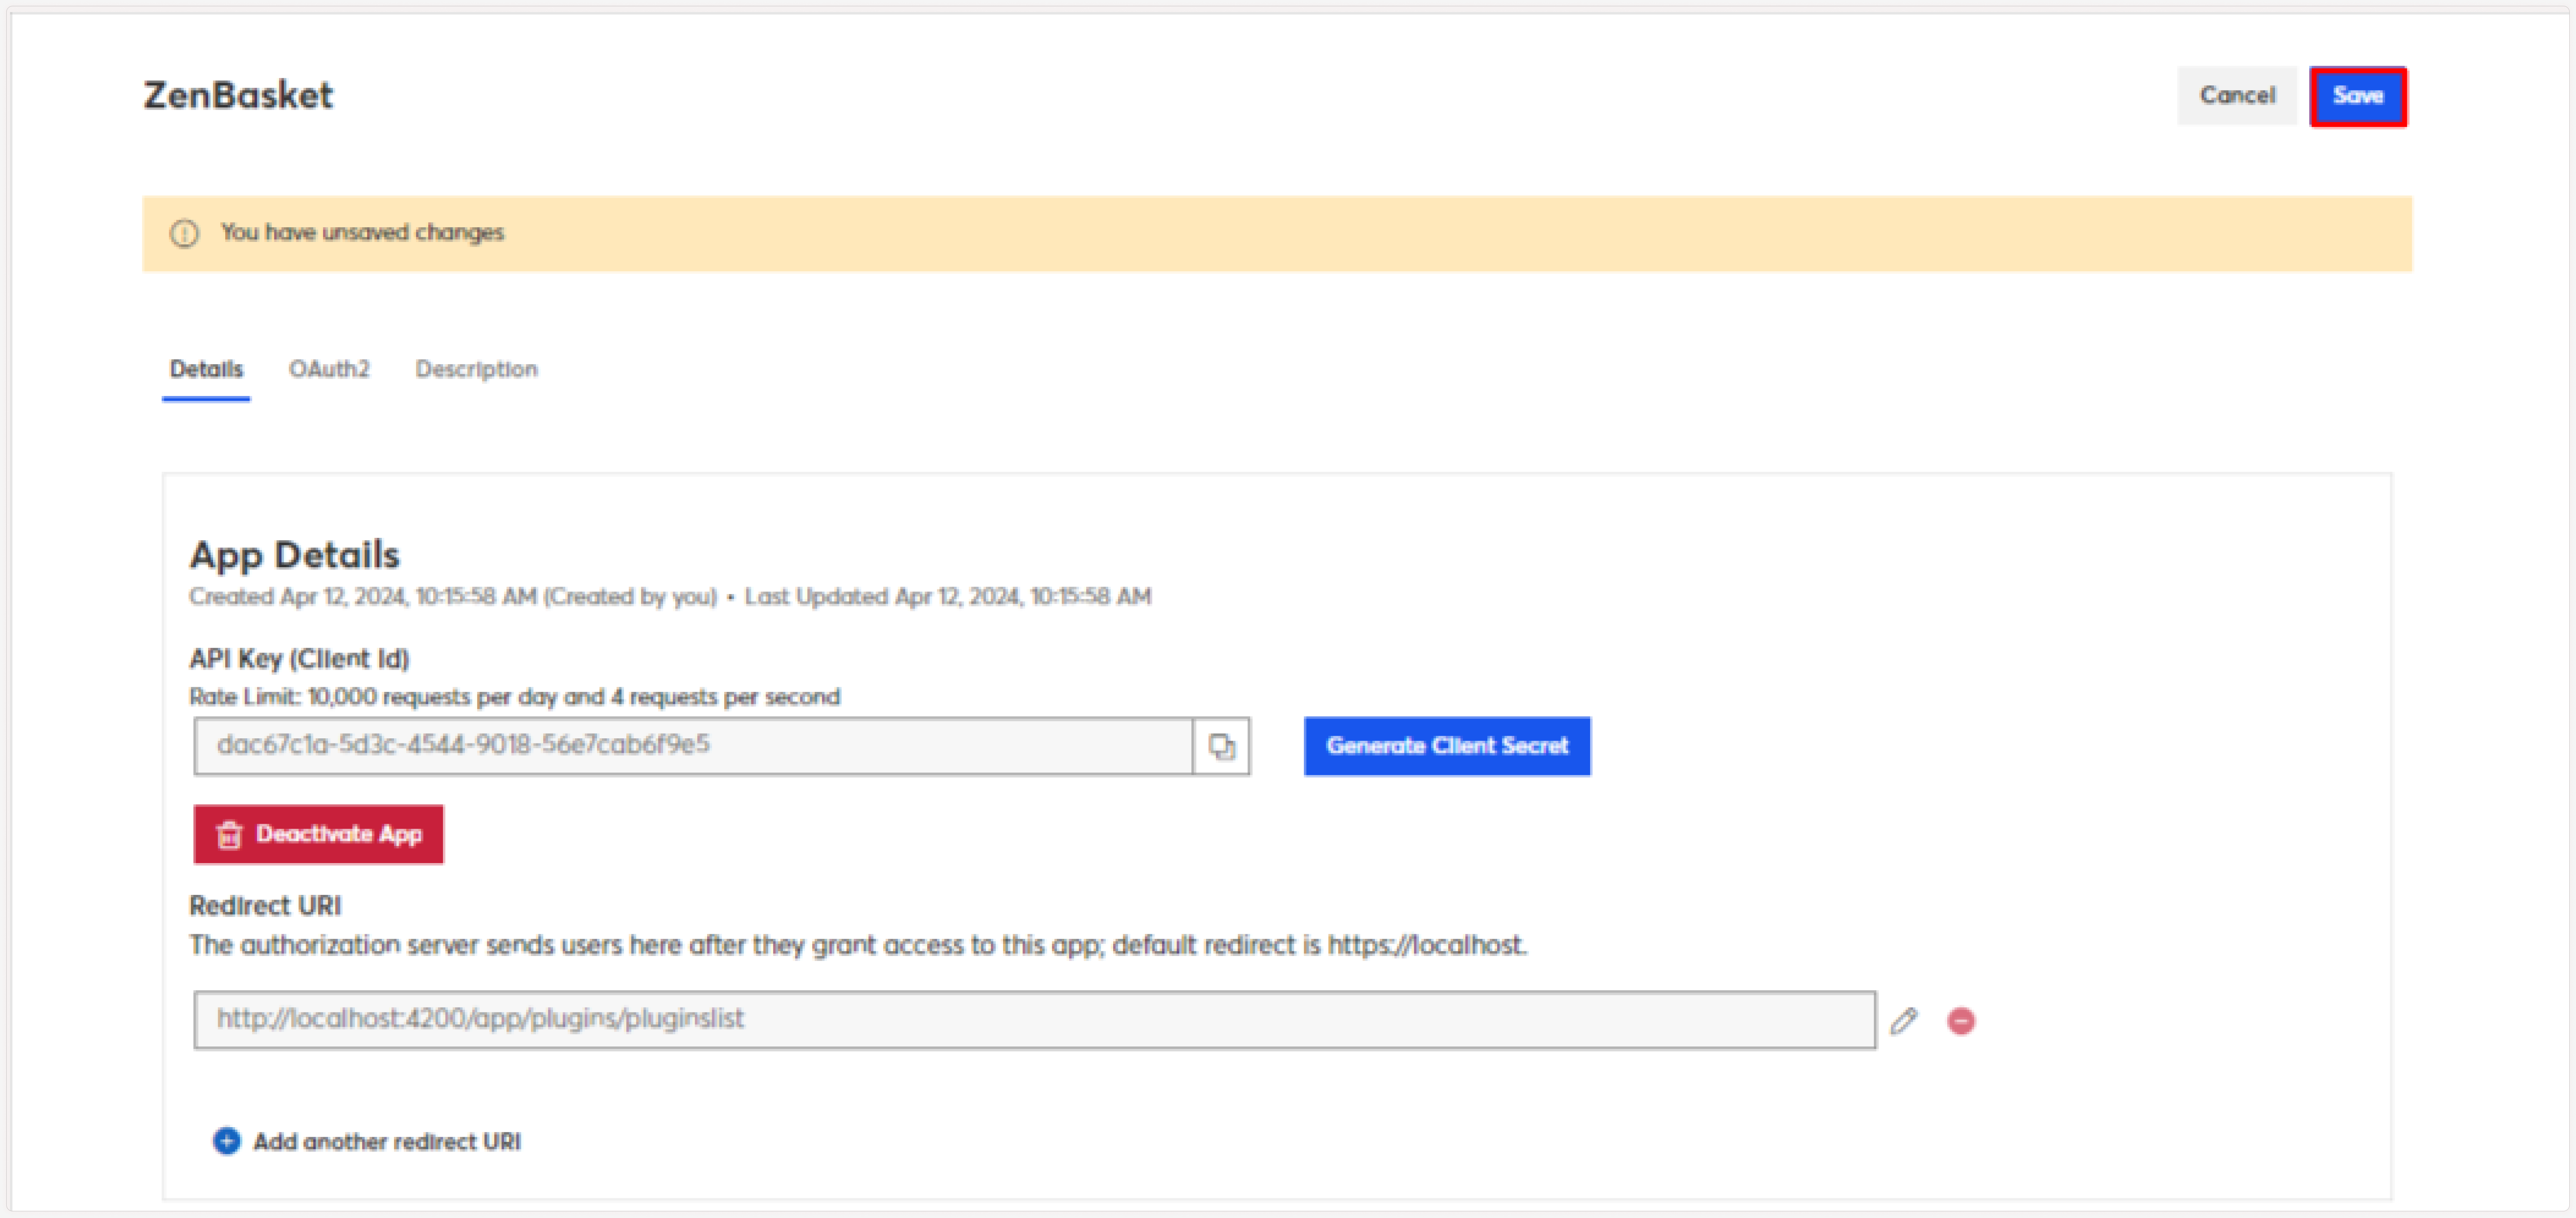
Upon application creation, an API key will be generated. You can also generate a client secret by clicking on Generate client Secret. Remember to add the redirect URI and save the details.
-
Link details need to be filled by the ZenBasket Super Admin to access.
-
Navigate to the ZenBasket admin page and select the Plugin menu.
-
Search for Constant Contact in the third-party plugins and enable the toggle.

-
Under the Constant Contact menu, select Contact Group List.
-
Information such as List Name, Number of Contacts in the group, and Created Date will be displayed.
-
You can view, delete, or edit the contact group list under the actions.
Note: When there is only one group entry available, it is not possible to delete the contact group.
-
To add a Contact Group List,click the Add Group List button & enter the List name, description, and choose contacts. Save the details.
-
Utilize the search and filter options available for efficient contact management.
-
Navigate to the Contacts sub-menu to find unsynced contacts with details like First Name, Last Name, Email Address, and Created Date.
-
To sync contacts, click on the refresh icon under actions. You can also use the option to sync all contacts together by clicking the Sync All Contacts button.
-
In the Constant Contact plugin section, click on the settings icon under the toggle.
-
Follow the given link to connect to your Constant Contact account.
-
Log in using your email and password.
-
You can see all your contacts by selecting All contacts and navigate to the Lists tab to search for specific group names.

-
Under Marketing, go to the Email section.

-
Choose a template to edit, select recipients, and send the email immediately or schedule it for later.

-
You can also send a test email to preview your message.
-
Send customized emails to contacts in specific groups to enhance engagement.
Note: When an admin deletes a contact, it is essential to also delete that contact in Constant Contact.