Timer Element
The Timer element is used to display a countdown or stopwatch on your site, often for limited-time offers, events, or launches to create urgency and engagement.
In ZenBasket Builder, you can easily add and customize the Timer element — set the countdown duration, style, and actions to trigger when the timer ends.
Adding a Timer to Your Layout
-
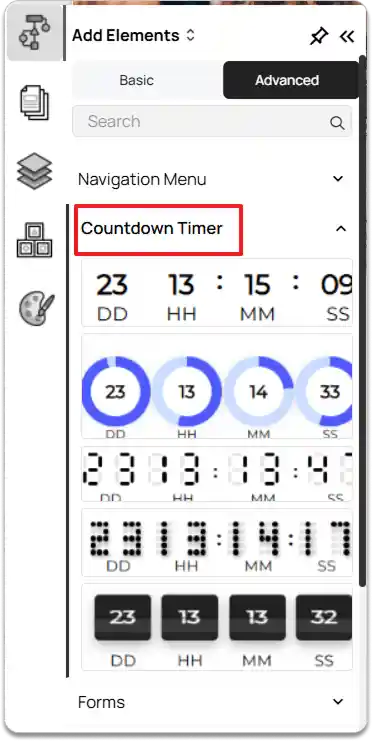
Go to the Left Tools Panel and click on the Add Elements option.
-
Under Advanced elements, scroll down or search for the Countdown Timer element.
-
Drag and drop the Timer element into your desired section or layout area.
-
Adjust its position and size as needed using the drag handles.
Customizing the Timer
-
Select the Timer element on your layout.
-
Navigate to the right tools panel and click on the Properties option.
-
Under Effects & Animations, choose an effect and an animation action as needed.
-
Under Borders & Shadows, you can enable and set the Box Shadow if needed, and adjust the margin and padding as required.
To remove the Timer element, click on the Delete Element button.

-
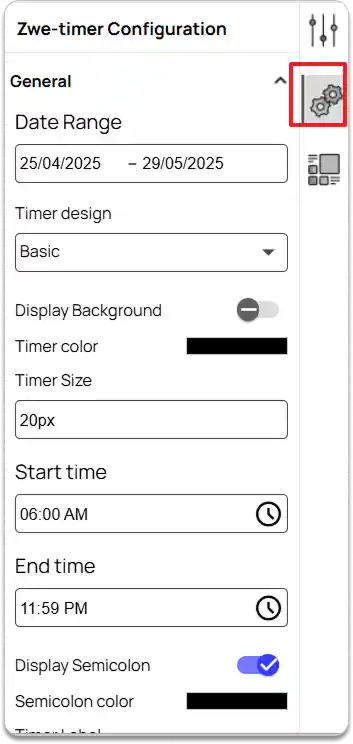
Next, navigate to the right tools panel and click on the Configuration option.
-
Under General, you can:
-
Set the Date Range.
-
Choose a Timer design.
-
Enable Display Background and Separate Background if required, and set the Background color and Background Border Radius.
-
Customize the Timer color and Timer Size.
-
Set the Start time and End time for the timer.
-
Enable Display Semicolon if needed and set the Semicolon Color.
Choose a Timer Label Type, and set the Label color and Label Size.