
Configure Shipping
Setting up shipping in ZenBasket involves activating the right plugins, configuring your delivery and pickup methods, managing zones, and optionally connecting third-party shipping carriers. Follow each section in order to get your store fully ready for delivery.
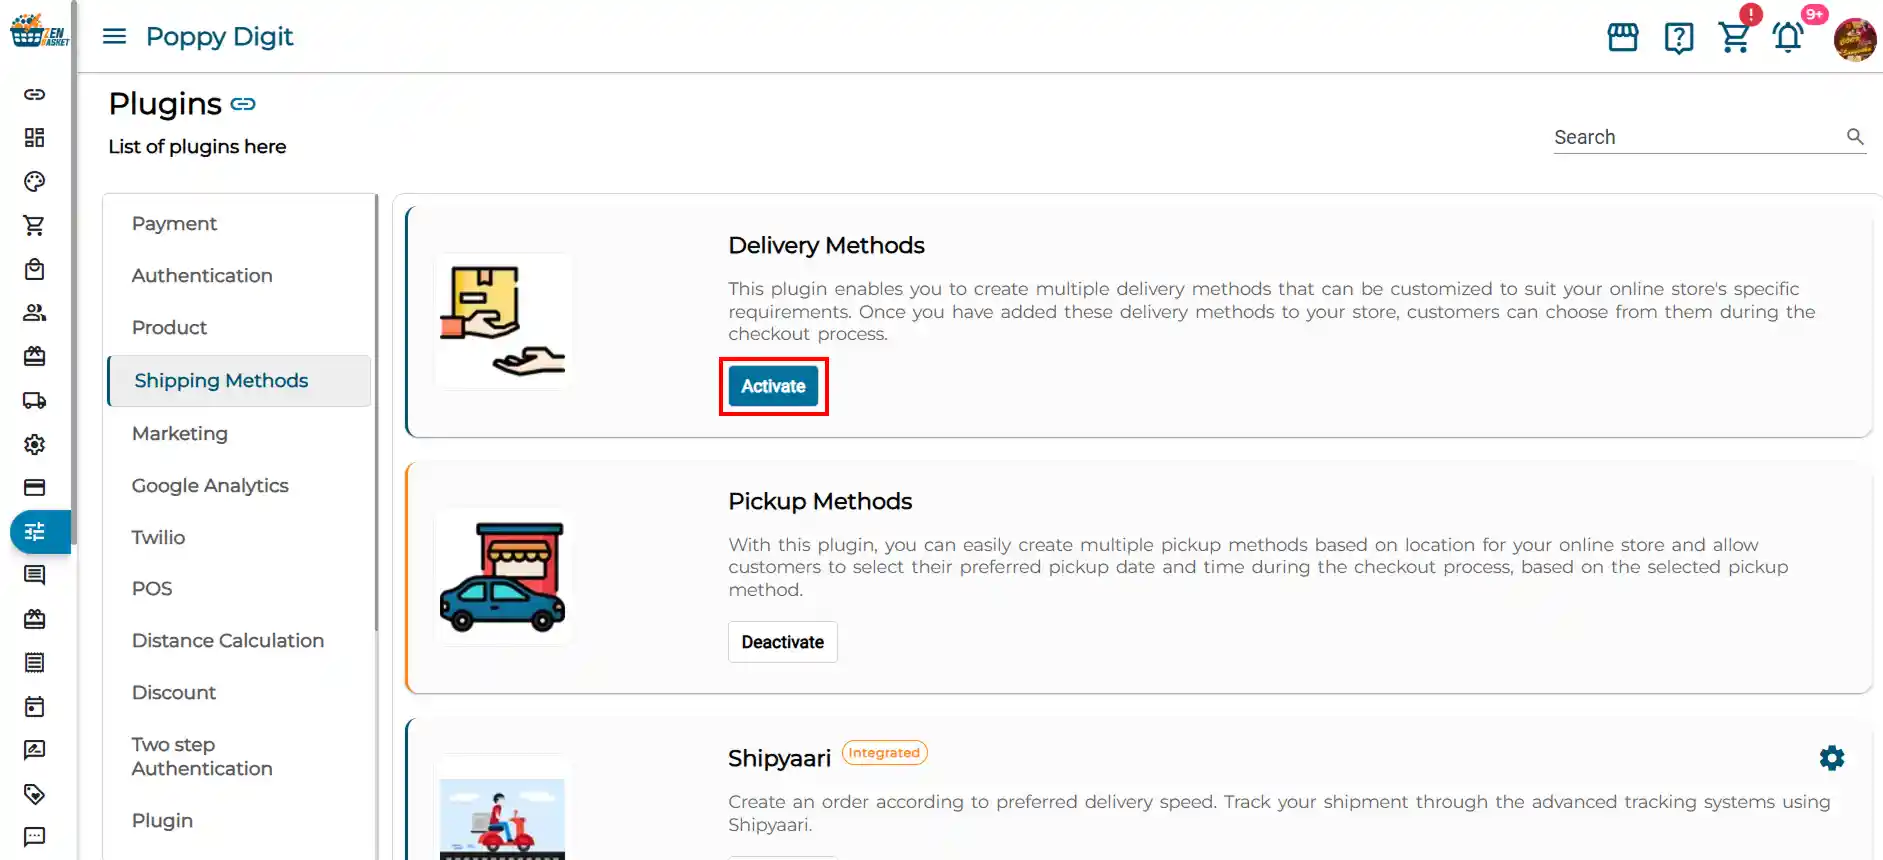
Step 1: Activate the Delivery Methods Plugin
Before you can set up any shipping methods, you need to activate the plugin first.
-
Go to Plugins in your ZenBasket admin.
-
In the Plugin List, search for Delivery Methods.
-
Click Activate.
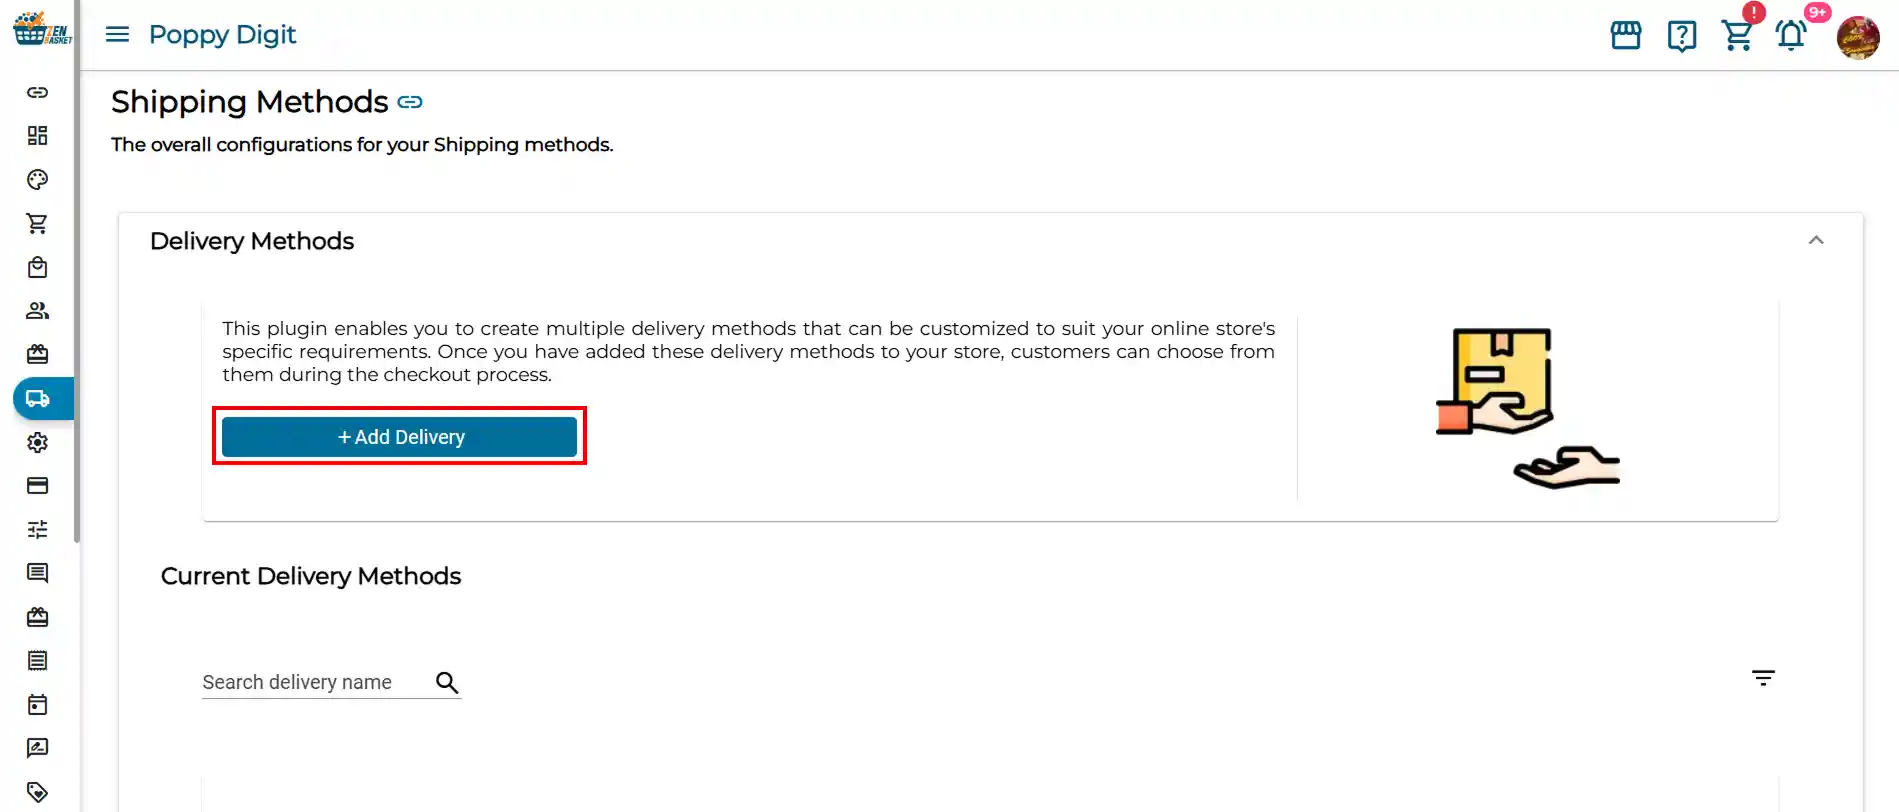
Step 2: Add a Delivery Method
-
Navigate to the Shipping Methods module.
-
Click the + Add Delivery Method button.
-
You will see five types of delivery methods to choose from.
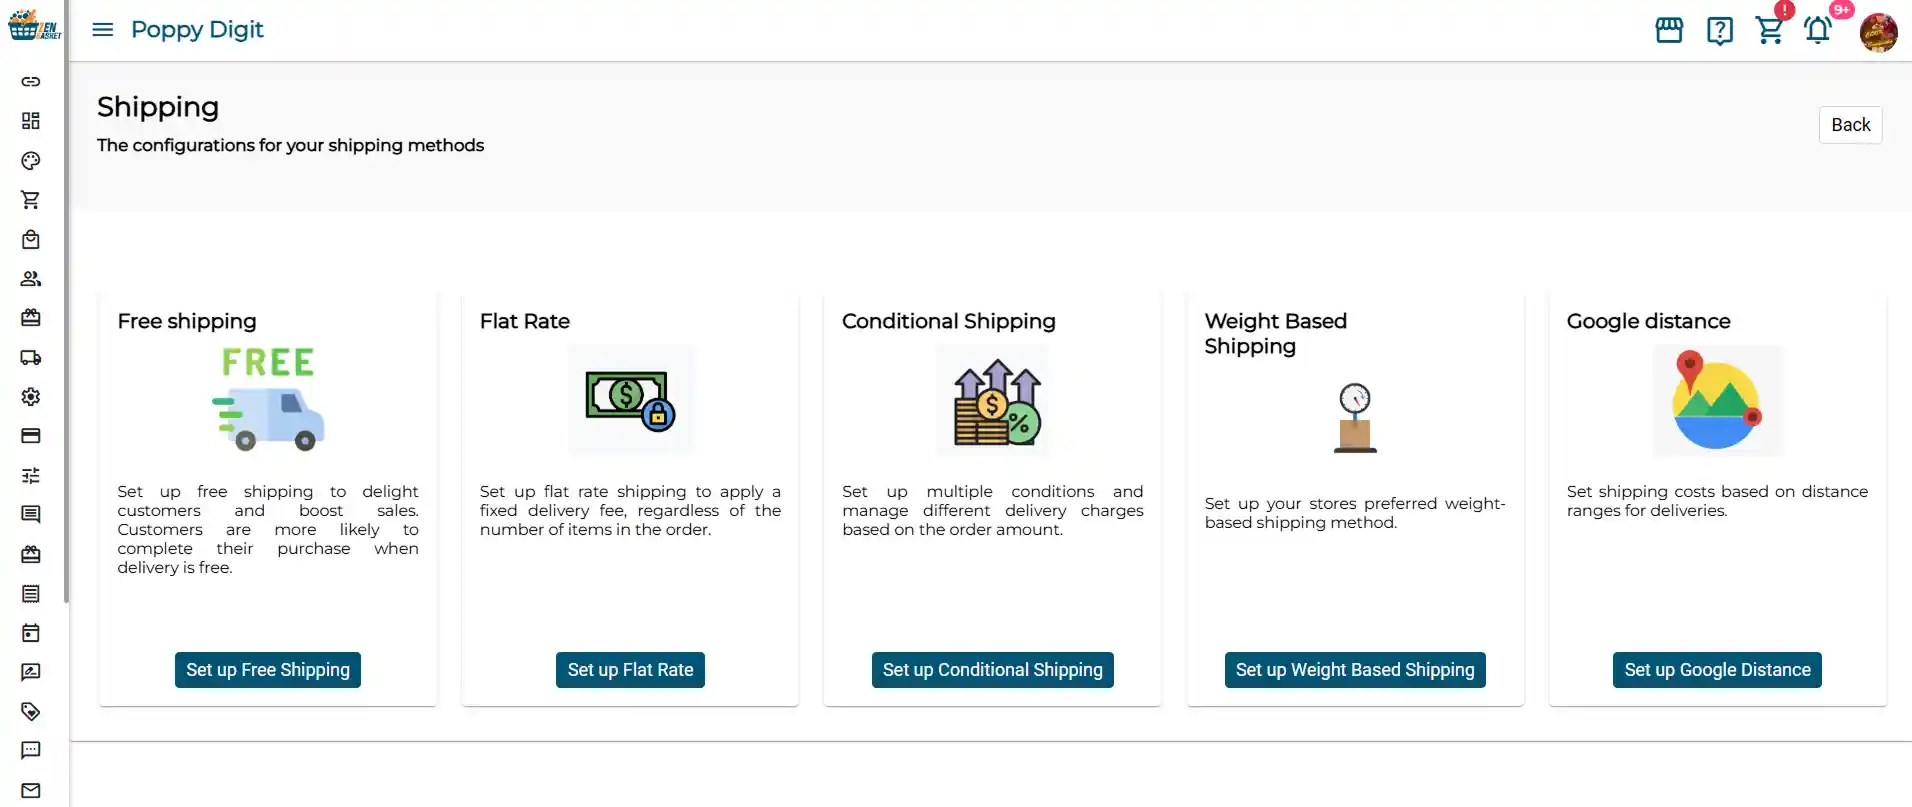
Types of Delivery Methods
| Delivery Method | Description |
|---|---|
| Free Shipping | Offer delivery at no charge to your customers. You can optionally set a minimum order subtotal that qualifies for free shipping. |
| Flat Rate | Charge a fixed delivery fee on every order, regardless of order value or weight. Simple and predictable for both you and your customers. |
| Conditional Shipping | Set different shipping rates based on order subtotal ranges. For example, charge a higher rate for small orders and a lower rate for larger ones. |
| Weight Based Shipping | Calculate the shipping charge based on the total weight of items in the order. Ideal for stores selling heavy or bulky products. |
Step 3: Set Up a Delivery Method
To configure any of the methods above:
-
Click the Setup button located on the respective delivery method card.
-
Fill in the required details such as name, rate, region, and any conditions.
-
Save the method.
For detailed step-by-step instructions on setting up each delivery method, refer to the full guide: Shipping & Pickup Setup Guide
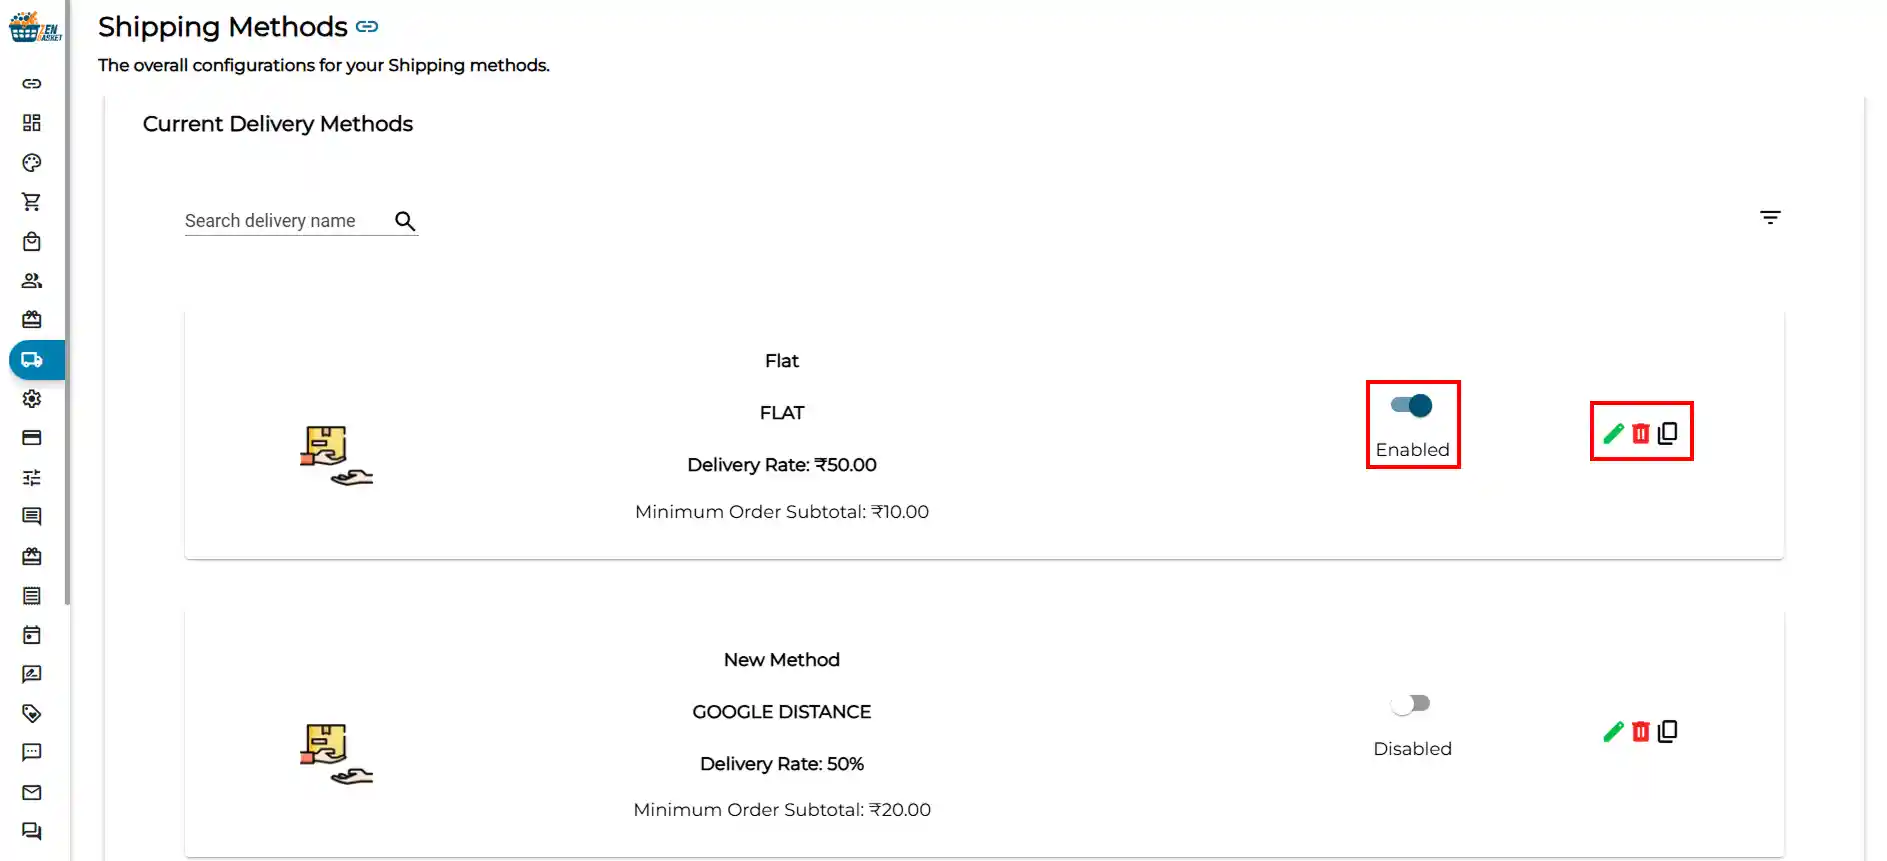
Step 4: Manage Your Delivery Methods
Once your delivery methods are set up, you can manage them anytime from the Shipping Methods module. For each method you can:
-
Enable or Disable: Toggle the method on or off. Only enabled methods appear to customers at checkout.
-
Edit: Update the method name, rate, or any other details.
-
Duplicate: Create a copy of an existing method to use as a starting point for a new one.
-
Remove: Permanently delete a method you no longer need.
Step 5: Set Up Delivery Zones
Delivery zones let you restrict specific shipping methods to specific geographic regions, so customers only see the delivery options available to their location.
-
Go to Settings in your ZenBasket admin.
-
Under Store Settings, select Zone Management.
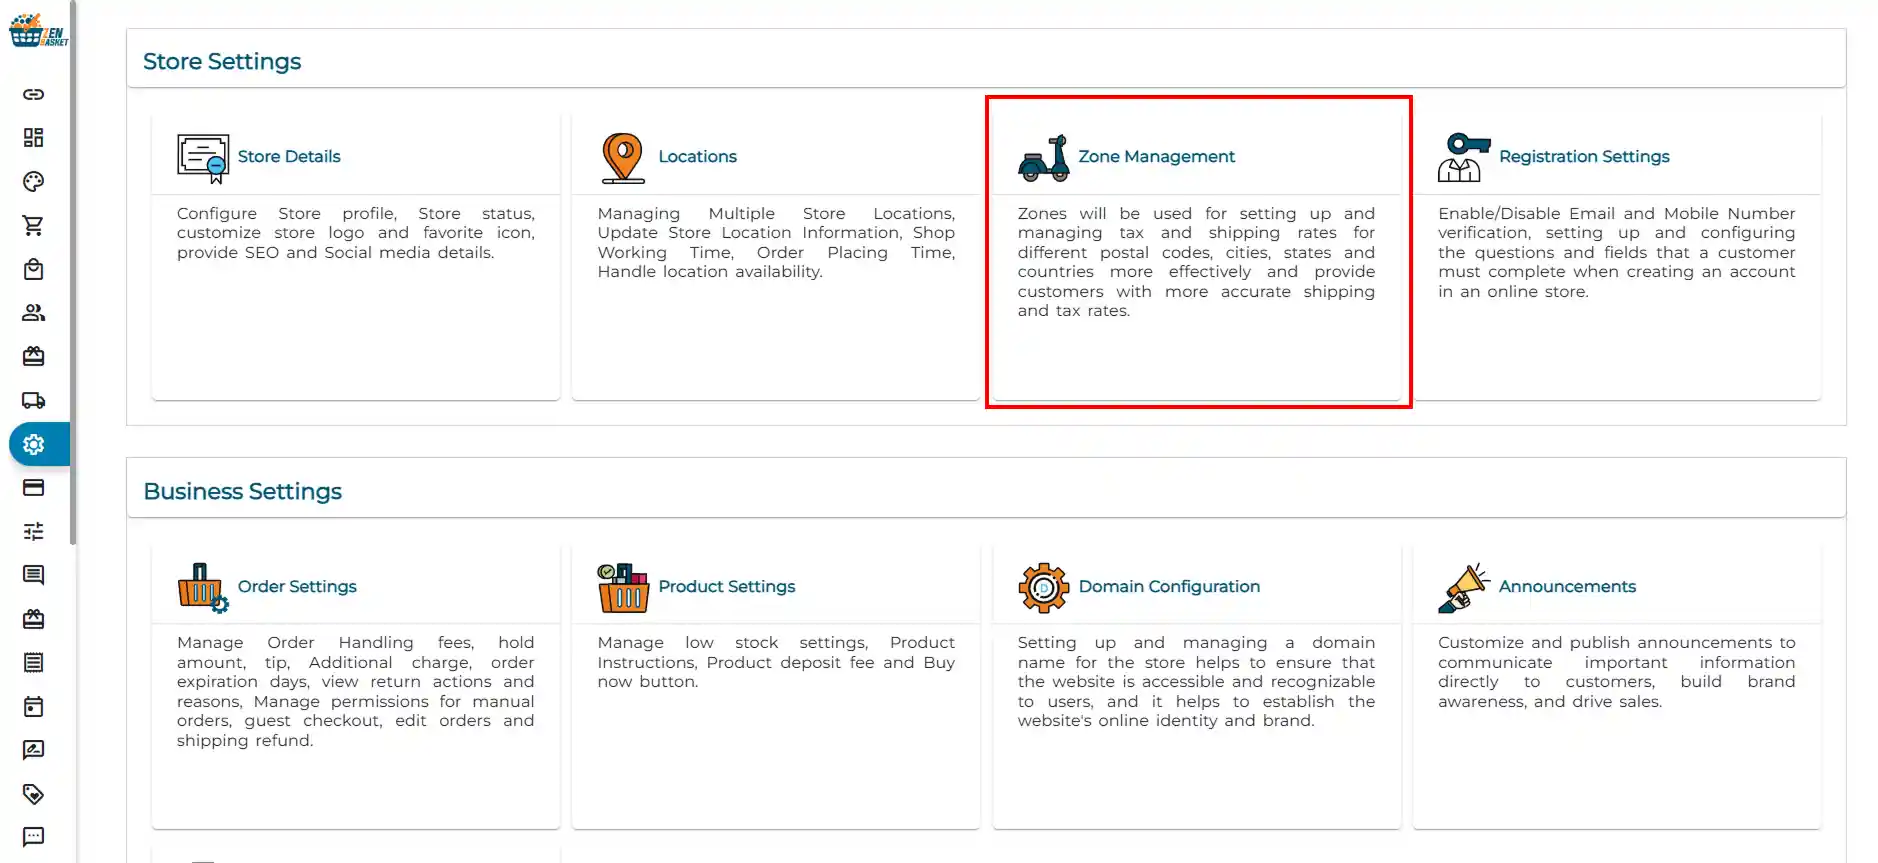
-
Follow the steps to create and configure your zones.
For the full zone setup guide, refer to: Zone Management Guide
Note: Once your zones are created, you can assign them to the relevant delivery methods so only customers within that zone see the method at checkout.
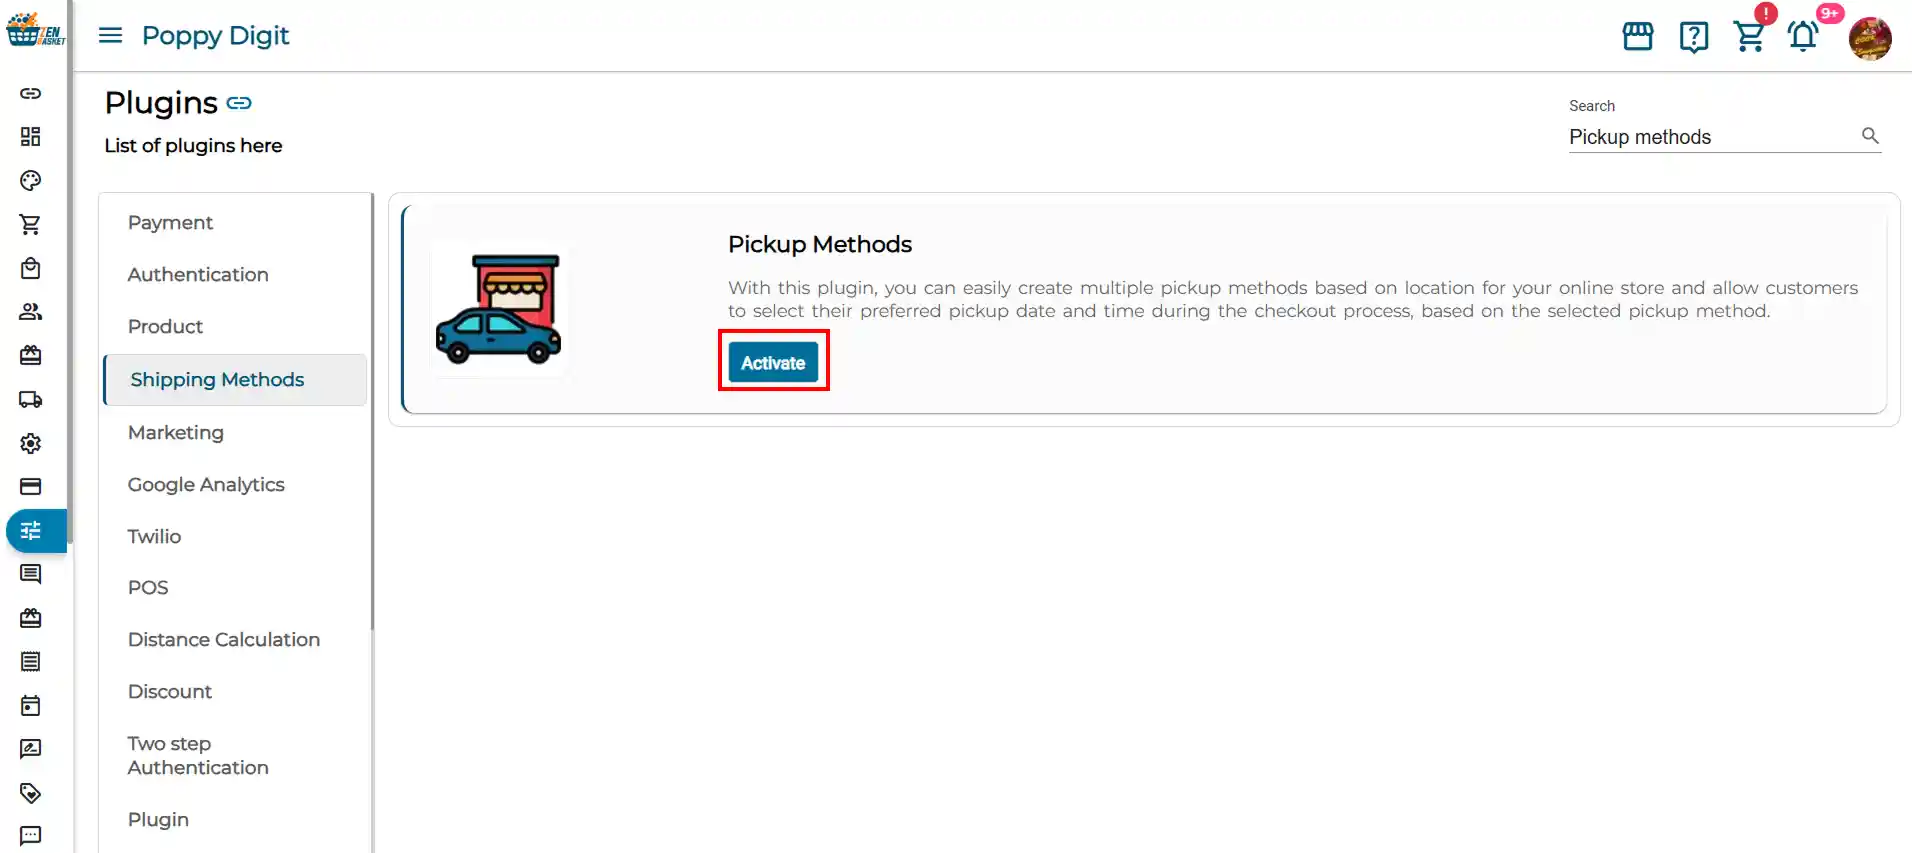
Step 6: Activate the Pickup Methods Plugin
Setting up pickup follows the same process as delivery methods, activate the plugin first, then configure.
-
Go to Plugins → Plugin List.
-
Search for Pickup Methods and click Activate.
-
Navigate to the Shipping module.
-
Click the + Add Pickup button.
-
Enter your pickup details: name, location, instructions, and any applicable zone restrictions.
-
Click Save.
For detailed steps on setting up pickup methods, refer to: Shipping & Pickup Setup Guide
Step 7: Connect Third-Party Shipping Carriers
In addition to your configured delivery methods, ZenBasket supports integration with major shipping carriers as third-party plugins. These can be activated additionally to handle shipment booking, label generation, and order tracking directly from your admin.
Supported carriers:
-
Shipyaari
-
Shipyaari Latest
-
Shippo
-
Delhivery
-
FedEx
-
EasyShip
-
AfterShip
-
Shiprocket
-
Vamaship
-
The Professional Courier
To connect a carrier:
-
Go to Plugins → Plugin List.
-
Find your preferred carrier and click Activate.
-
Enter the API credentials provided by the carrier.
-
Click Save.
Note: When a carrier plugin is activated, a dedicated sub-menu for that carrier is automatically added under the Orders module in your admin. You can manage all shipments for that carrier from there.
Individual setup guides for each carrier will be linked here.
Frequently Asked Questions
-
Do I need to activate a plugin before setting up shipping methods? Yes. Both Delivery Methods and Pickup Methods require their respective plugins to be activated from the Plugin List before you can configure them.
-
Can I have multiple delivery methods active at the same time? Yes. You can activate as many delivery methods as needed. Customers will see all enabled methods at checkout and can choose the one that suits them.
-
What is the difference between Conditional Shipping and Weight Based Shipping? Conditional Shipping applies different rates based on the order’s subtotal value. Weight Based Shipping applies rates based on the total physical weight of the items in the order.
-
What is Google Distance Shipping? Google Distance Shipping calculates the delivery charge based on the distance between your store location and the customer’s delivery address using Google Maps. It is best suited for local delivery businesses that charge by distance.
-
What happens when I activate a carrier plugin? Once a carrier plugin is activated and credentials are saved, a new sub-menu for that carrier appears under the Orders module. You can use it to book shipments, generate labels, and track deliveries without leaving ZenBasket.
-
Can I disable a shipping method without deleting it? Yes. Use the enable/disable toggle on each method in the Shipping Methods module. The method is saved but hidden from customers at checkout until you re-enable it.