
Webhook
Connect your ZenBasket store to any CRM or external tool using Webhook, which sends customer and order data automatically in real time.
Overview
ZenBasket allows you to connect your store to a CRM or any external tool using Webhooks. When a specific event occurs in your store, such as a new customer signup, the relevant data is automatically sent to the connected system in real time.
What is a CRM?
A CRM (Customer Relationship Management) is a software tool used to store and manage your customer information in one place. It helps you track customer details, monitor interactions, and run follow-up communications for your business.
Why integrate a CRM with your ZenBasket store?
When a customer signs up or places an order on your ZenBasket store, their details are stored within the store. Without integration, you would need to manually export and enter this data into your CRM every time.
By connecting your CRM to ZenBasket using a Webhook, customer data is pushed to your CRM automatically the moment an event occurs , eliminating manual data entry and keeping both systems in sync at all times.
What is a Webhook?
A Webhook is an automatic data transfer triggered by a specific event in your store. When the event occurs, ZenBasket sends the relevant customer or order data to the URL of the connected system instantly without any manual action required.
For example, when a new customer signs up on your store, the Webhook sends their name, email, and phone number to your CRM automatically.
Activating the Webhook Plugin
Before creating webhooks, you need to activate the Webhook plugin from your store’s Plugin List.
How to activate the Webhook plugin?
-
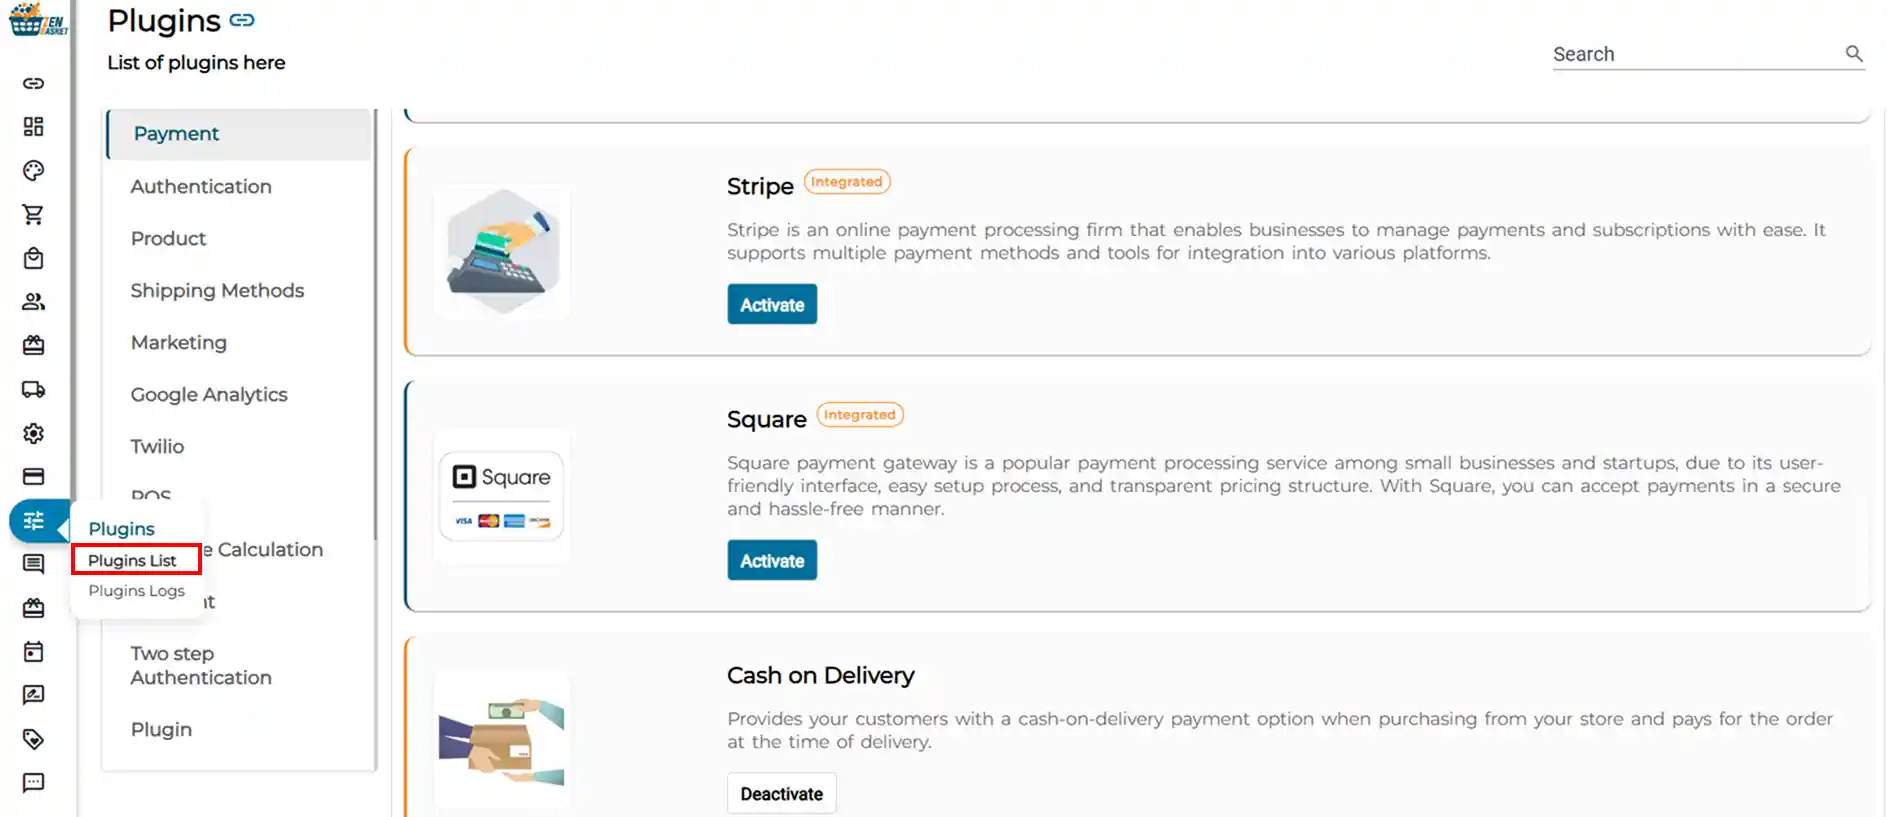
Go to the Plugins menu from your ZenBasket admin panel.
-
Click on Plugin List to view all available plugins.
-
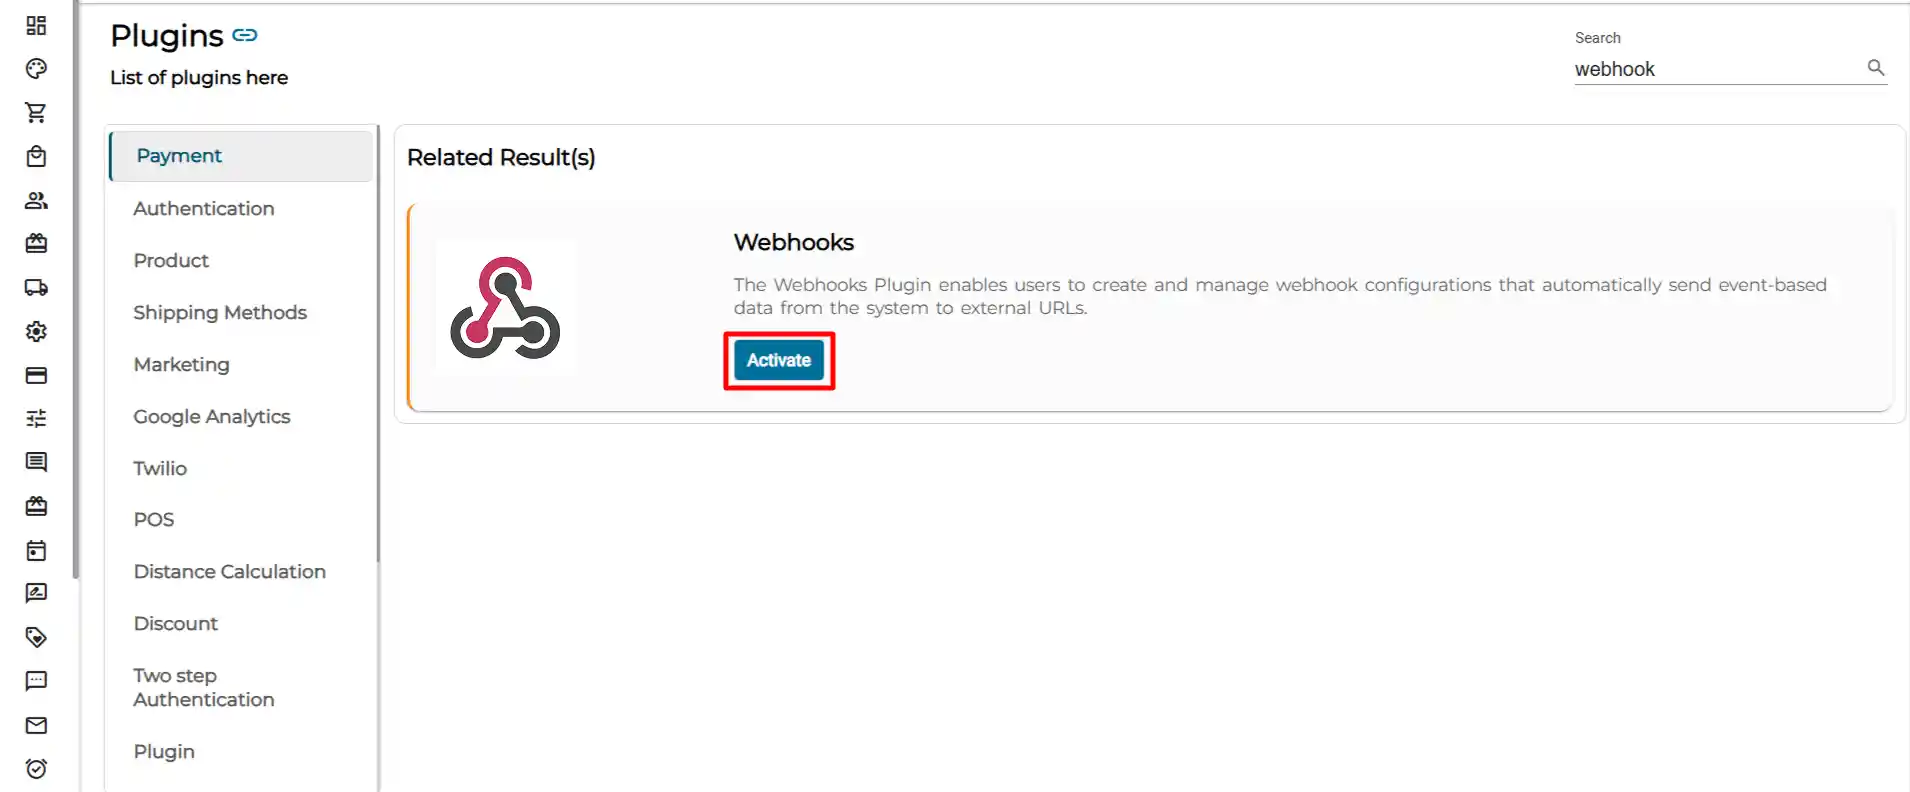
In the search bar, type Webhook.
-
Click the Activate button next to the Webhook plugin.
-
Once activated, a Webhook module will appear in your Control Panel, just above the Dashboard in the left-side navigation menu.
Webhooks
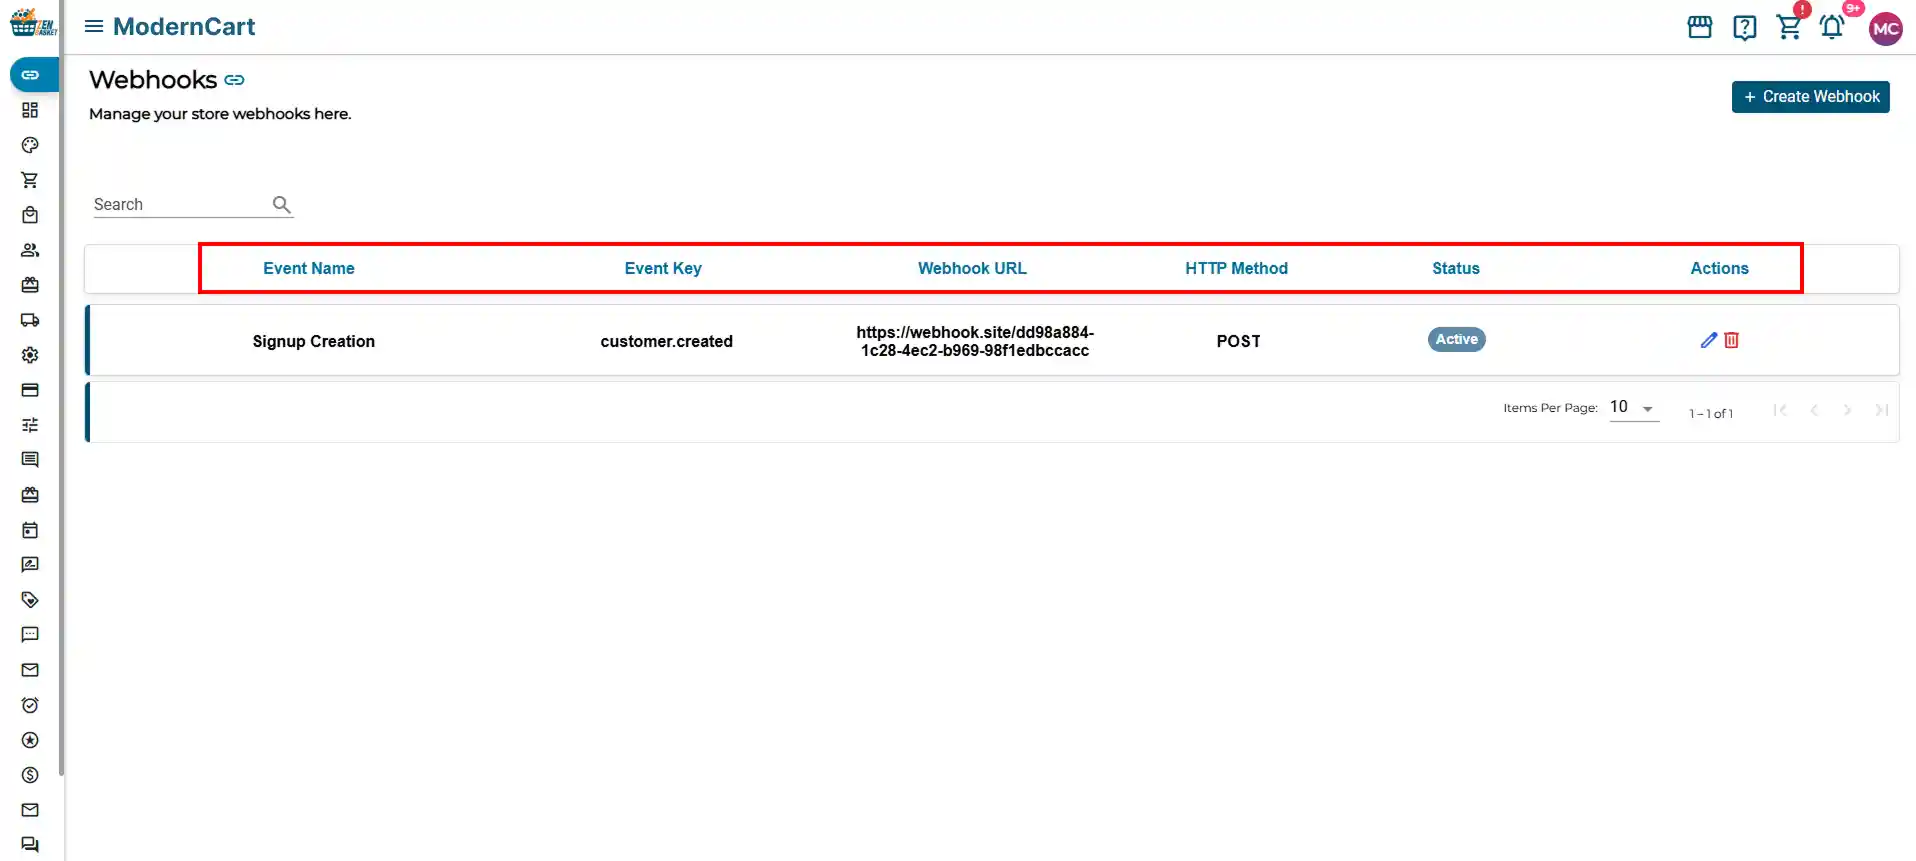
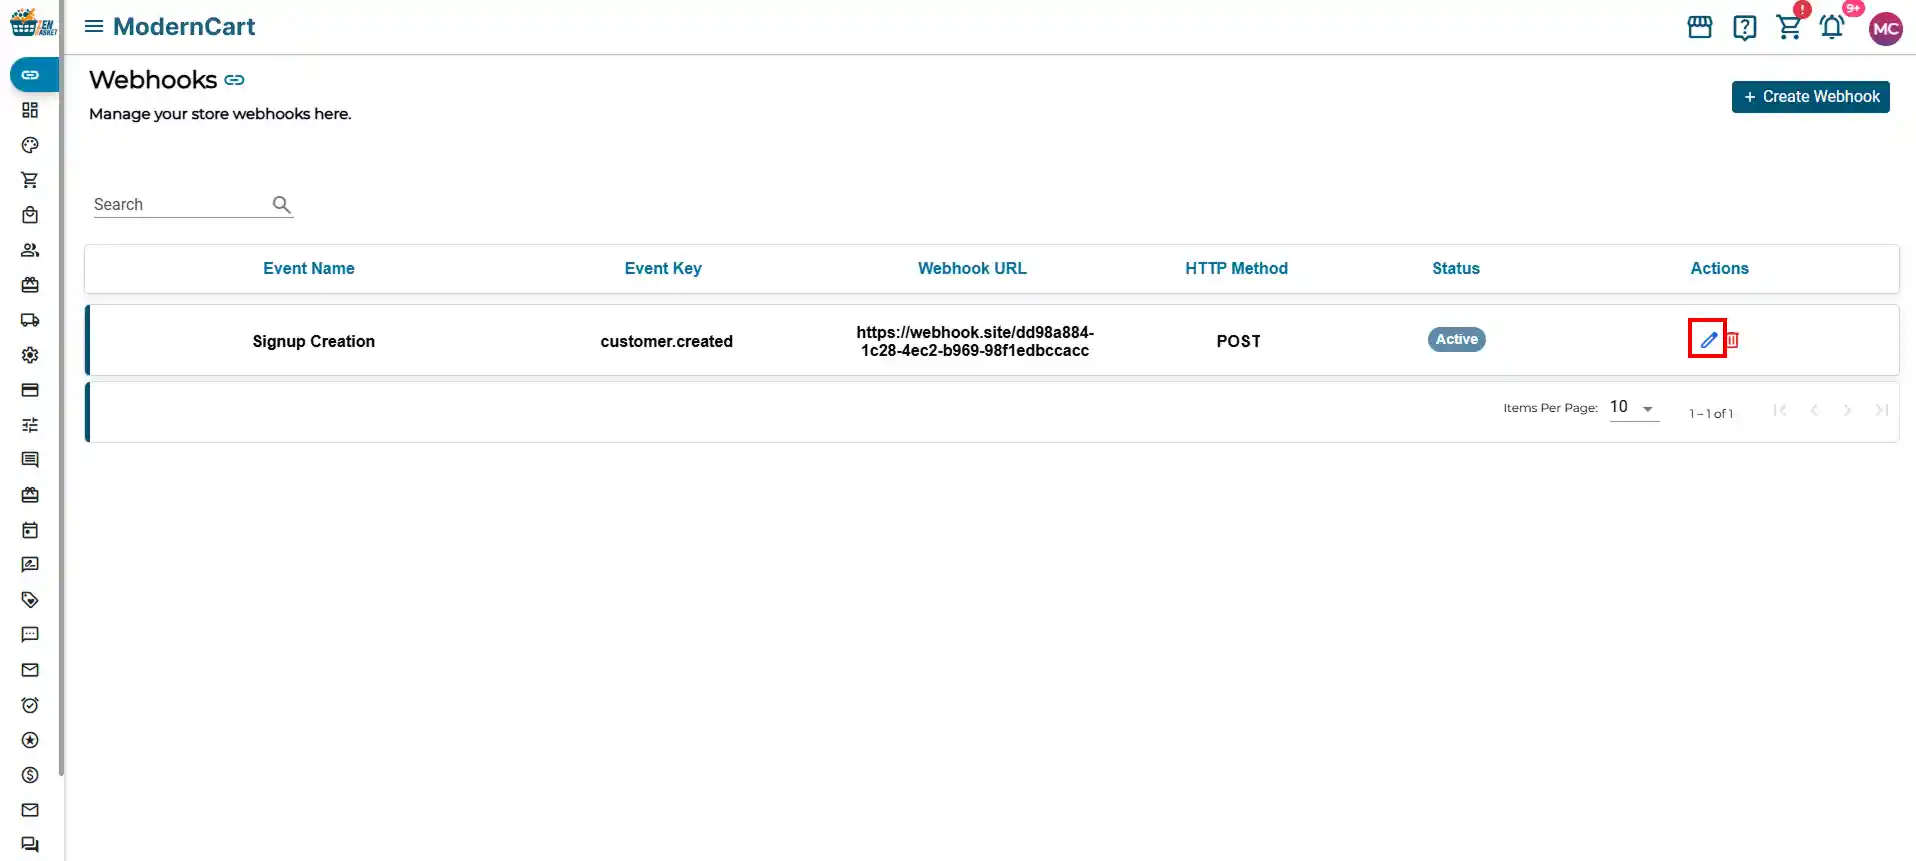
The Webhooks page gives you a complete list of all the webhooks you have set up for your store. You can view, manage, edit, and delete webhooks from this page.
The Webhooks list displays the following columns:
Event Name: The name you assign to the trigger event (e.g., Signup Creation).
Event Key: A unique system code that identifies the event internally (e.g., customer.created). This is automatically assigned.
Webhook URL: The destination URL where your store sends data when the event occurs. Provided by your CRM or external tool.
HTTP Method: The type of request used to send the data, for example, POST or GET.
Status: Shows whether the webhook is currently Active or Inactive.
Actions: Edit (pencil icon) or Delete (bin icon) any existing webhook.
Creating a Webhook
To set up a new webhook for any store event, follow the steps below.
How to create a new webhook?
-
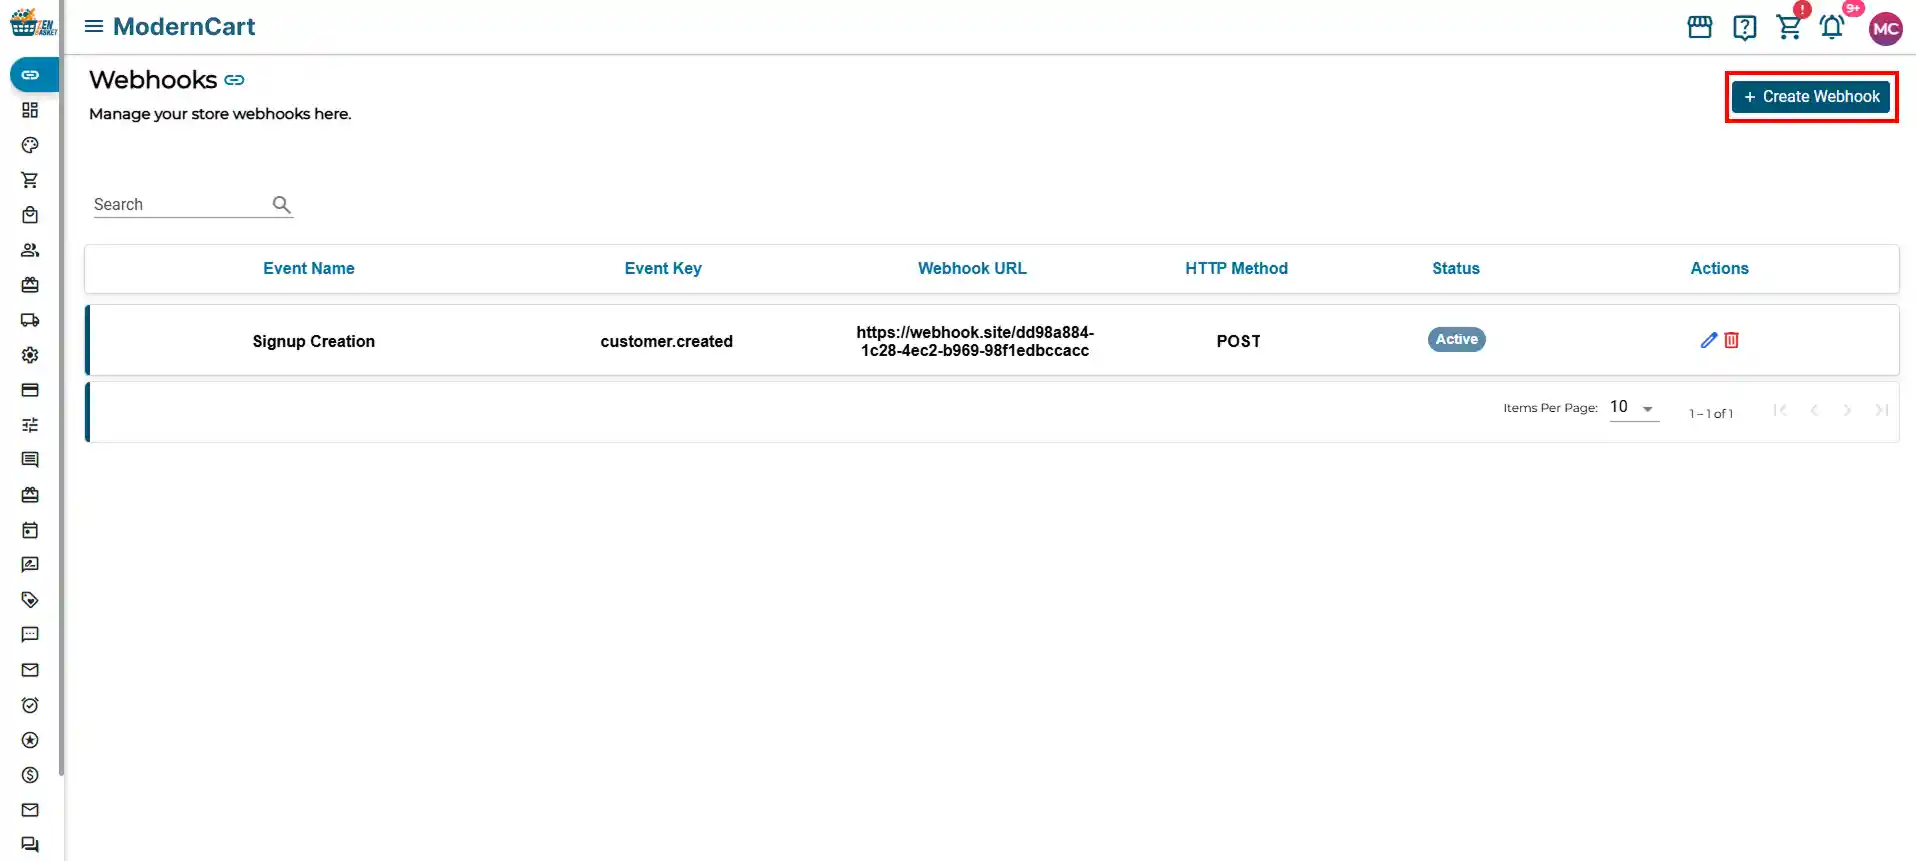
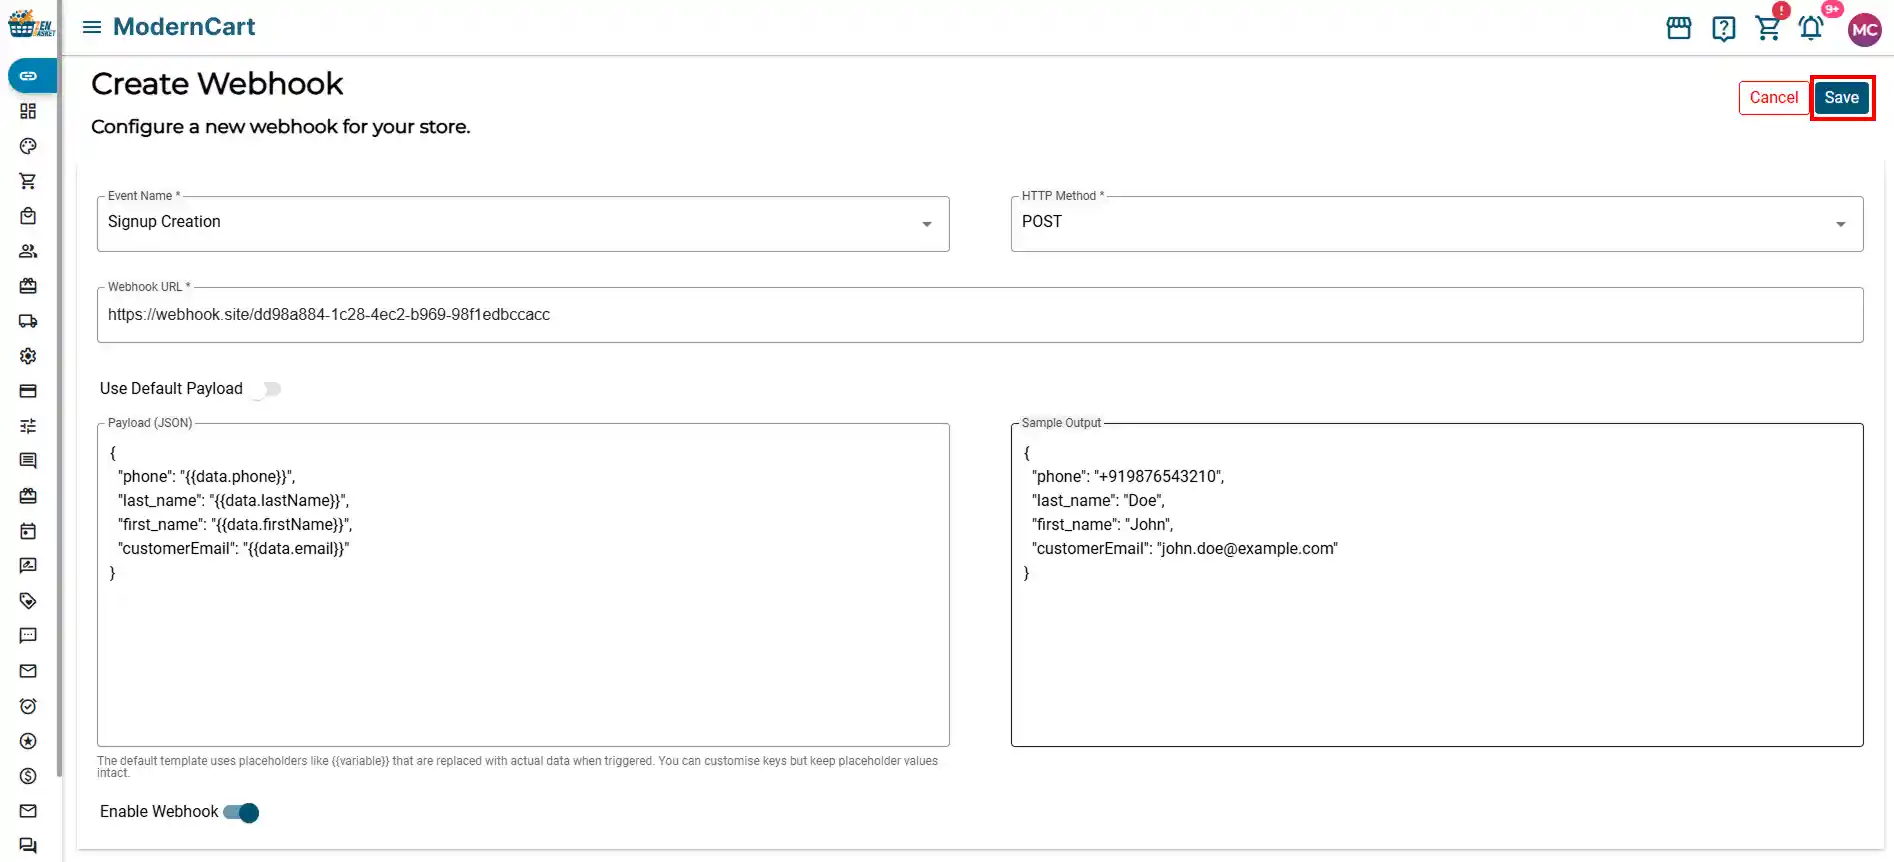
From the Webhook page, click the ‘+ Create Webhook’ button in the top-right corner.
-
Select the Event Name from the dropdown. This is the trigger event; for example, select ‘Signup Creation’ to find whenever a new customer registers.
-
Enter the Webhook URL. This is the URL provided by your CRM or external system where data will be delivered.
-
Choose the HTTP Method from the dropdown (see HTTP methods below for details).
-
Enable the Use Default Payload toggle to use the pre-built data format. You can customize the key names to match your CRM’s requirements.
-
The Sample Output column on the right shows a preview of the data that will be sent.
-
Toggle Enable Webhook to ON to make this webhook active.
-
Click Save to complete setup.
Note: Once a webhook is created with a specific Event Name, you cannot create another webhook using the same Event Name. Each event can only have one webhook assigned to it.
HTTP Methods
When creating a webhook, you must select an HTTP Method. This determines how data is sent to the external system. ZenBasket supports the following methods:
| Method | What It Does | When to Use |
|---|---|---|
| POST | Sends new data to your CRM or external system. | Use when a new customer signs up or a new order is placed. |
| GET | Retrieves existing data from the CRM. | Use when you want to fetch records or check current data. |
| PUT | Replaces an entire existing record with new data. | Use when updating a complete customer profile. |
| PATCH | Updates only specific fields of an existing record. | Use when updating just the email or phone number of a contact. |
| DELETE | Removes a record from the connected system. | Use when a customer account is closed or a record needs to be removed. |
For most CRM integrations (like adding new customer records), you will use POST.
Customizing the Payload
The payload is the data package that gets sent to your CRM when a webhook is sent. By default, the system sends a standard set of fields based on the event type.
Using the Default Payload
When the Use Default Payload toggle is turned ON, the system automatically formats the data for you. For a customer signup event, the default payload includes fields such as
-
phone — Customer’s phone number
-
first_name — Customer’s first name
-
last_name — Customer’s last name
-
customerEmail — Customer’s email address
Customising the Payload Keys
You can rename the keys (field names) to match what your CRM expects. For example, if your CRM uses email instead of customerEmail, you can update the key name in the payload editor.
Note: Only modify the key names (e.g., customerEmail). Never change the placeholder values inside these are automatically replaced with real data when the webhook fires. The default template uses placeholders like that map to actual store data.
How does it work when a new customer signs up?
Here is a step-by-step example of how the Signup Creation webhook works end to end:
-
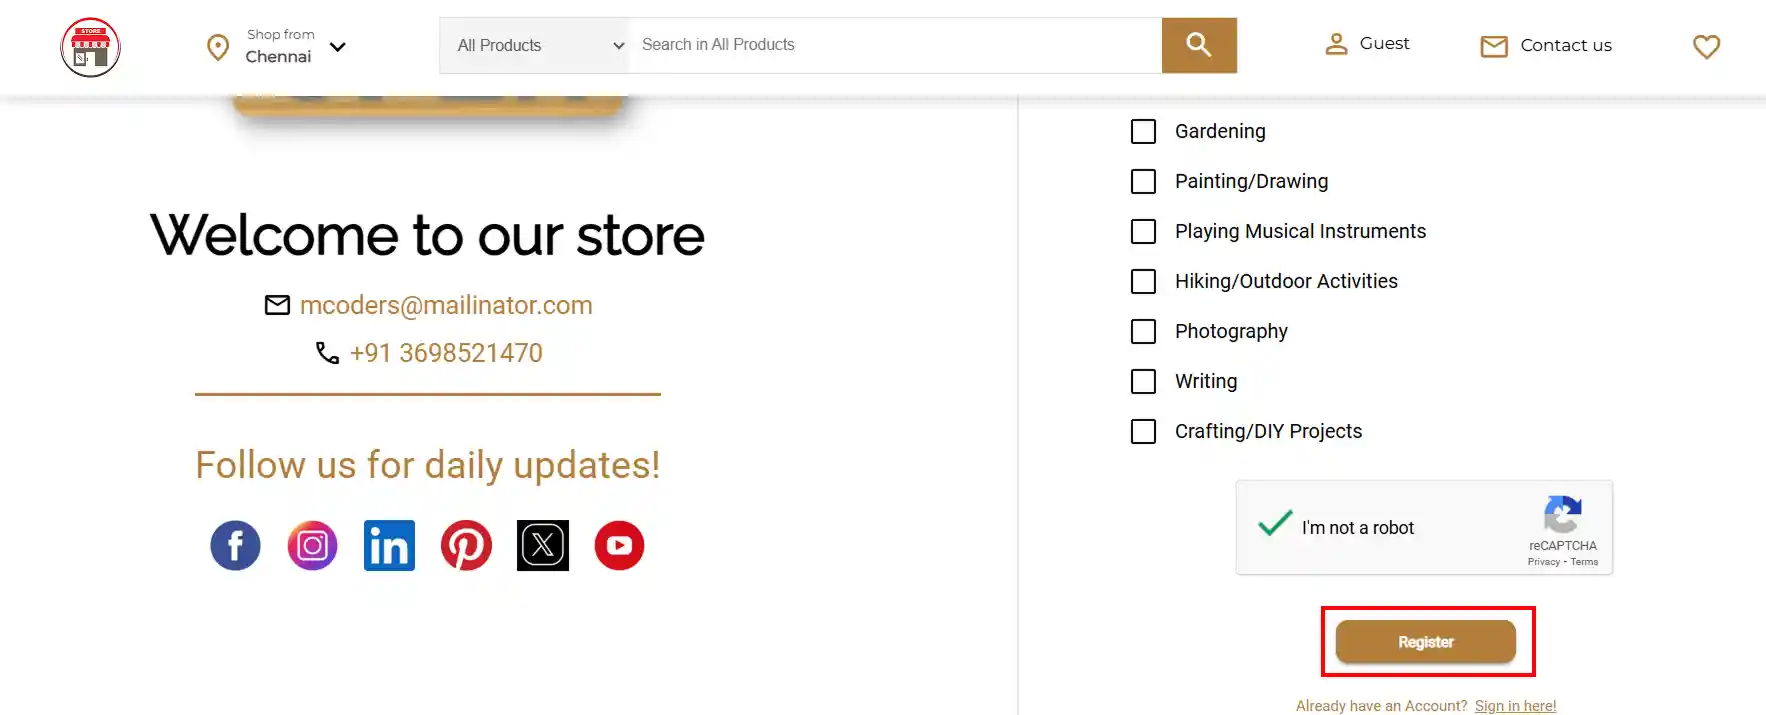
A new customer visits your store and fills in the signup form with their name, email, and phone number.
-
The customer clicks Register , this triggers the customer.created event in ZenBasket.
-
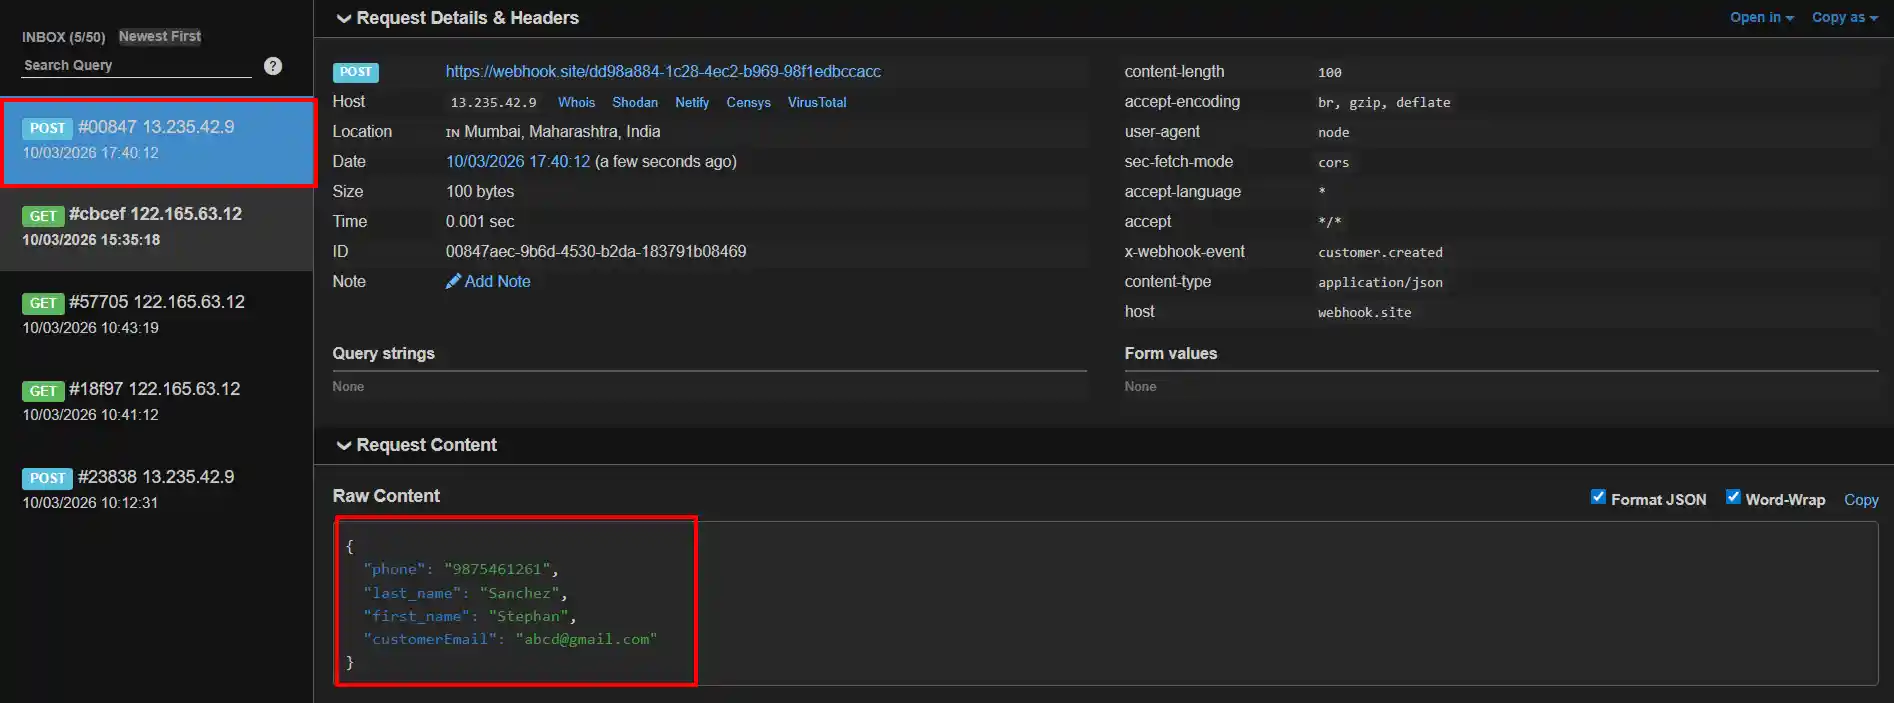
ZenBasket instantly fires the webhook and sends the customer’s details to the Webhook URL you configured.
-
Your CRM or connected tool receives the data and creates a new contact record automatically.
-
You can verify the delivery by checking your CRM or by viewing the incoming request on your webhook testing tool, the request will show the HTTP method used (e.g., POST), the event key customer.created in the headers, and the customer data in the payload.
Editing & Deleting a Webhook
You can update or remove any existing webhook directly from the Webhooks module using the Actions column.
How to edit a webhook?
-
Go to the Webhook page from your Control Panel.
-
Find the webhook you want to update.
-
Click the Edit icon under the Actions column.
-
Make your changes; you can update the URL, HTTP method, or payload settings.
-
Click Save to apply the changes.
How to delete a webhook?
-
Go to the Webhook page from your Control Panel.
-
Find the webhook you want to remove.
-
Click the Delete icon under the Actions column.
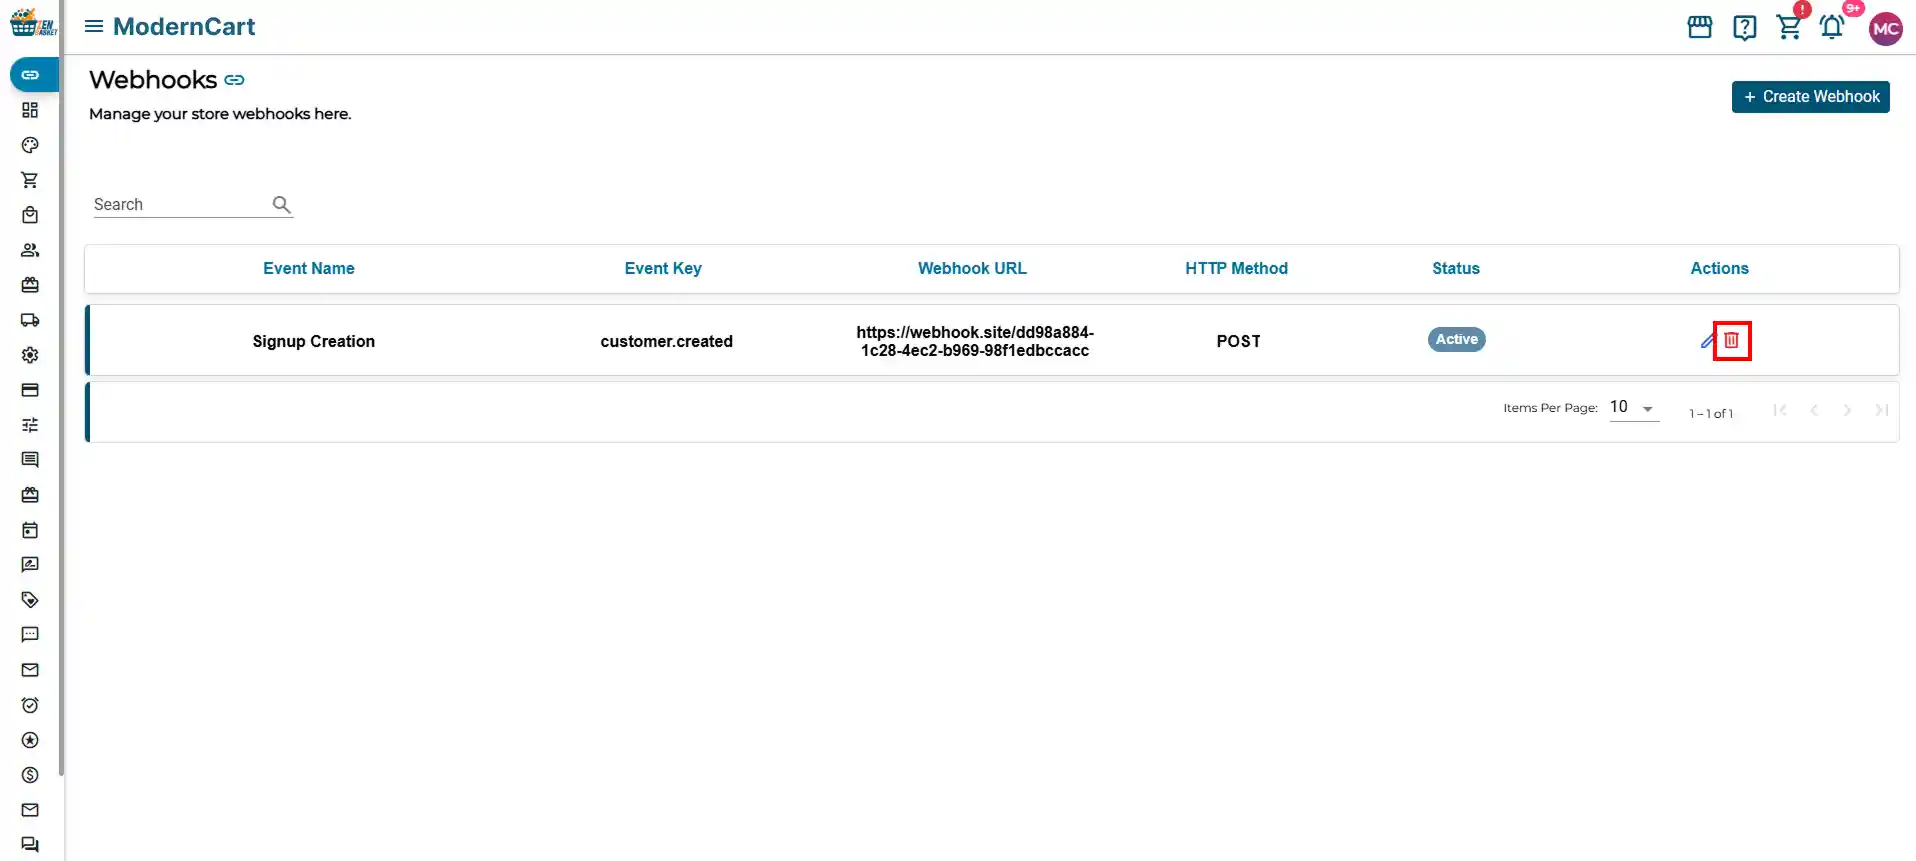
-
Confirm the deletion when prompted.
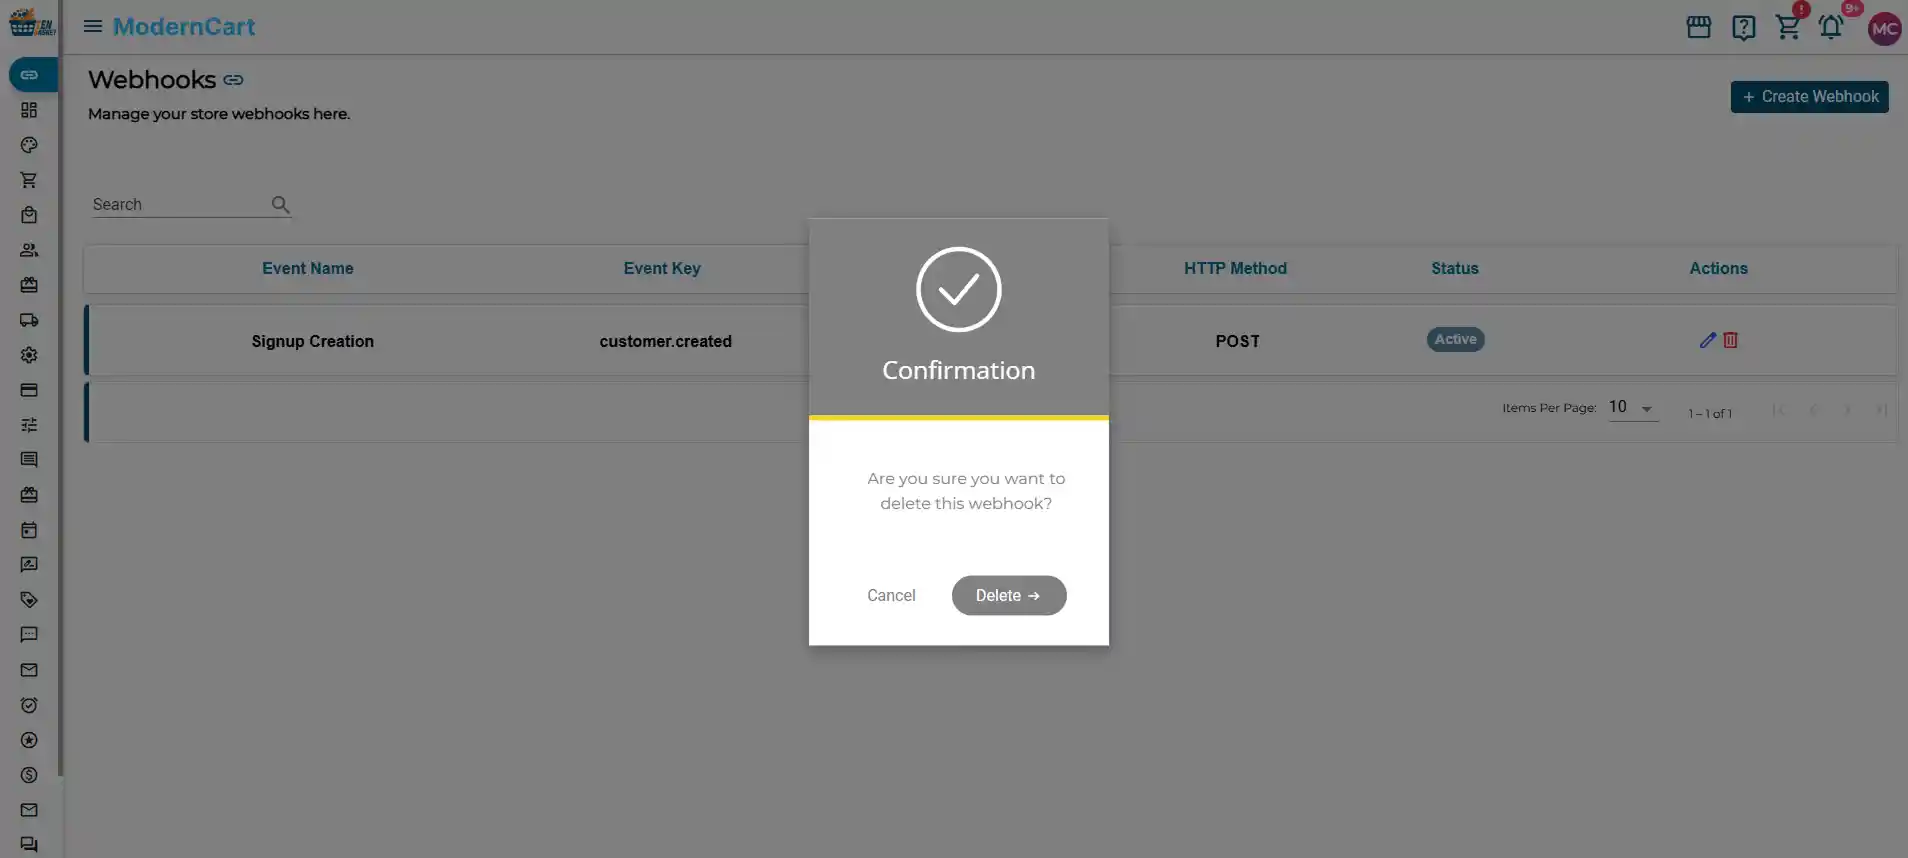
Note: Deleting a webhook will immediately stop all data from being sent for that event. If you want to pause a webhook temporarily, disable it using the Enable Webhook toggle instead of deleting it.
Frequently Asked Questions (FAQs)
1. Can I create two webhooks for the same event?
No. Each event name can only have one webhook assigned to it.
2. What happens if my webhook URL is wrong or inactive?
If the URL is incorrect or the receiving server is down, the webhook will fail to deliver the data. Always test your webhook after setup to confirm it is working correctly.
3. Can I change the payload format?
Yes. You can customise the key names in the payload to match what your CRM expects. Just make sure to keep the placeholder values (inside ) unchanged — only rename the keys.
4. How do I know which HTTP method my CRM needs?
Check your CRM’s API documentation or help centre. Most CRMs use POST for receiving new data. If you are unsure, contact your CRM’s support team with the webhook details.
5. Is there a limit on how many webhooks I can create?
You can create one webhook per event type. The number of available events depends on your store plan and installed plugins.