
PhonePe
The PhonePe Payment plugin offered by ZenBasket enables businesses to provide a smooth checkout experience by accepting secure payments from customers via UPI, cards, and popular digital wallets.
Setting Up a WebHook in PhonePe
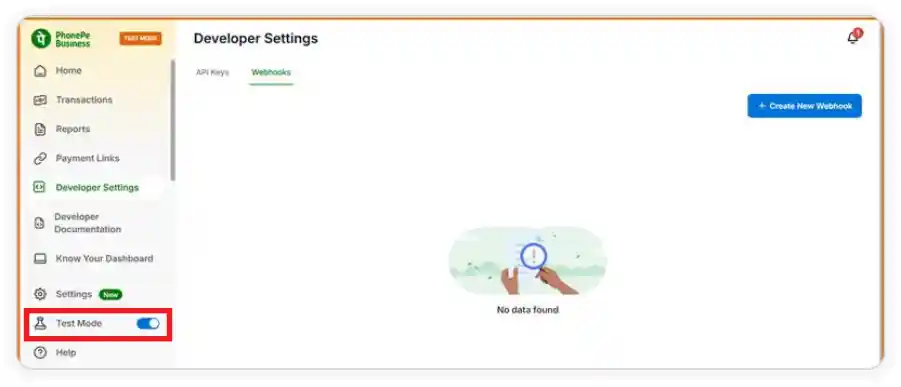
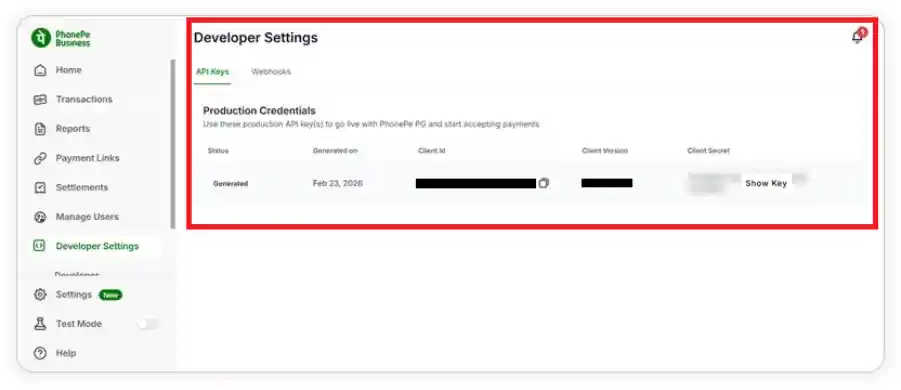
1. Access Developer Settings
-
Log in to your PhonePe Dashboard.
- If Test Mode is enabled, make sure to turn it off.
- Navigate to Developer Settings.
-
Locate the required API keys for plugin configuration:
- Client ID
- Client Version
- Client Secret
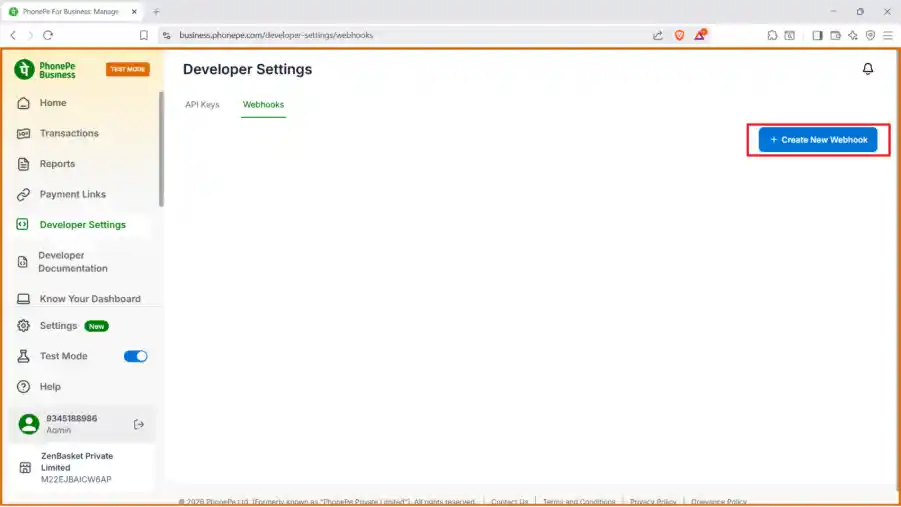
2. Create a New Webhook
- Go to the Webhooks section in the developer settings.
- Click on Create New Webhook to start the configuration.
3. Configure the Webhook
- Enter the required details in the webhook setup form.
Webhook URL
- Use the following URL:
https://api.zenbasket.in/paymentwebhook-uat/v1/payment/webhook?paymentType=PHONEPE
Authentication Credentials
- Provide the following credentials:
- Username
- Password
(Please contact the ZenBasket team to obtain these details.)
Webhook Events
-
Select and enable the following events:
- checkout.order.completed
- pg.order.completed
- checkout.order.failed
- pg.order.failed
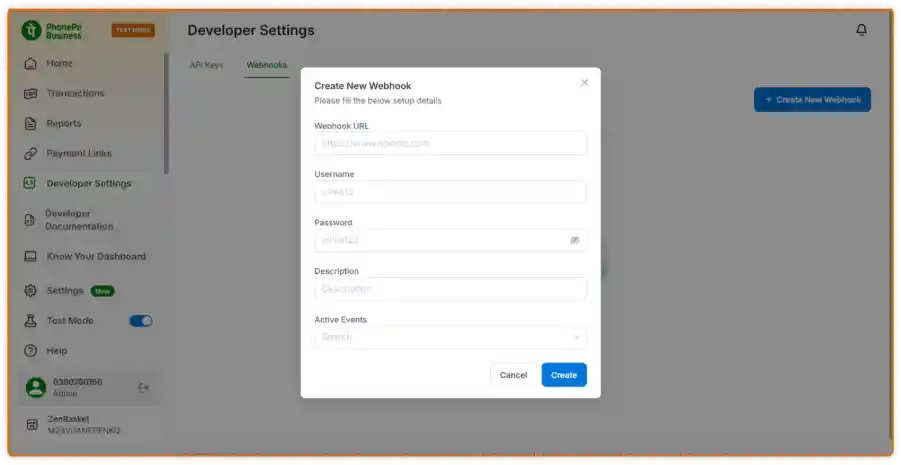
4. Complete the Setup
-
Review all the details you have entered.
-
Click Create to save the webhook configuration to activate it.
Note:
-
After completing the setup, perform one live payment test.
-
This step is required because PhonePe strictly enforces domain restrictions for webhook validation.
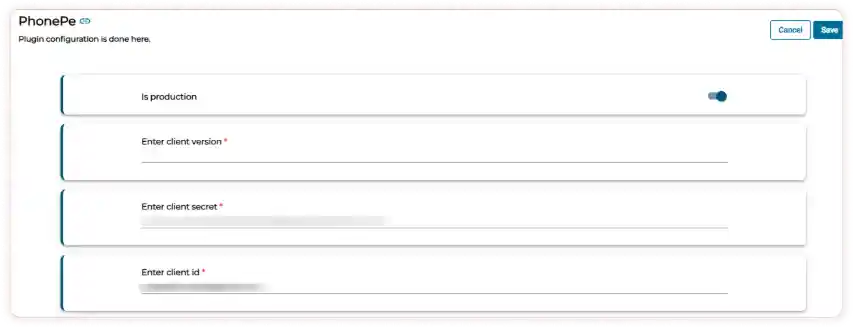
How to configure PhonePe Payment Gateway for your ZenBasket Store?
-
Log in to your ZenBasket Admin Panel.
-
Go to Plugins and navigate to the Plugin List.
-
Search for the PhonePe Plugin and click the Activate button.
-
Click on the Settings icon to configure the plugin.
-
Enter the following details:
-
Client Version
-
Client Secret
-
Client ID
-
-
Enable the Is Production toggle to make PhonePe payments live on your storefront.
-
Finally, click the Save button to complete the PhonePe plugin configuration
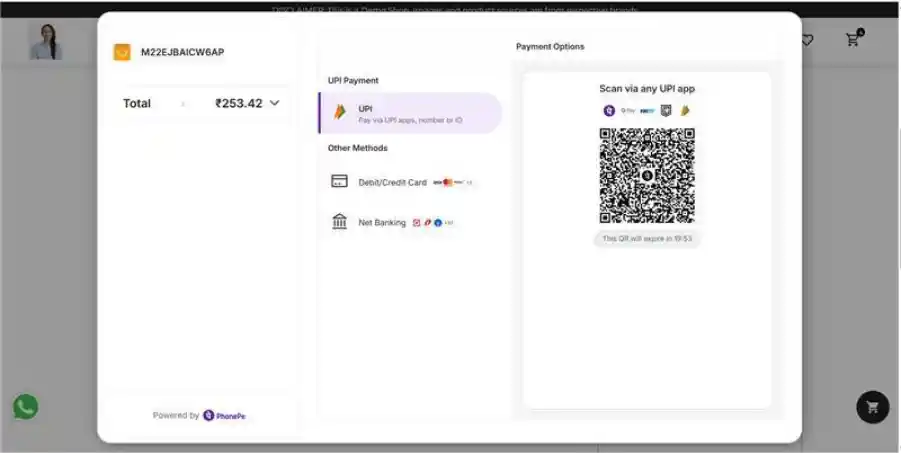
Payment Process on the Storefront
After selecting the delivery option, customers will be prompted to choose a payment method during checkout.
-
Select Online Payment as the preferred payment option.
-
Click the Pay Now button to proceed.
-
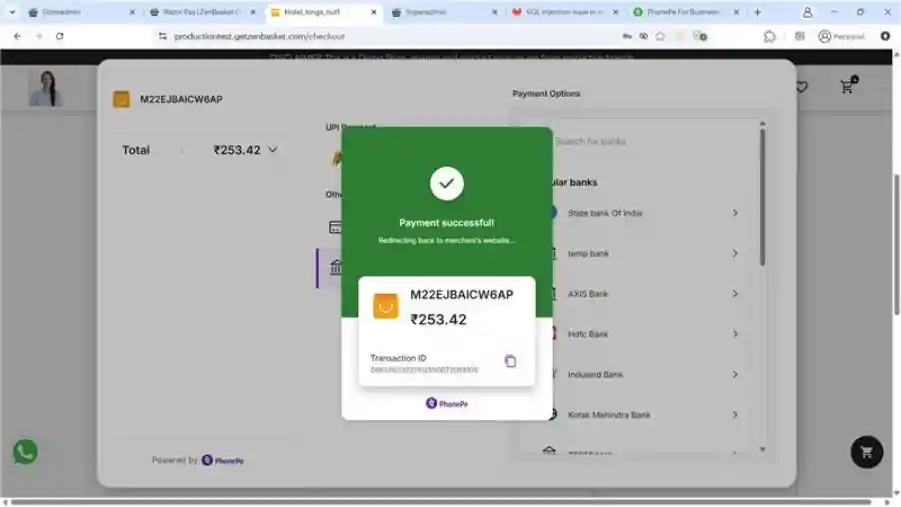
By choosing UPI as the payment method, customers can complete the payment by scanning the QR code displayed on the screen or by being redirected to the PhonePe payment page.
- Once the payment is successfully completed, the order will be placed and confirmed.
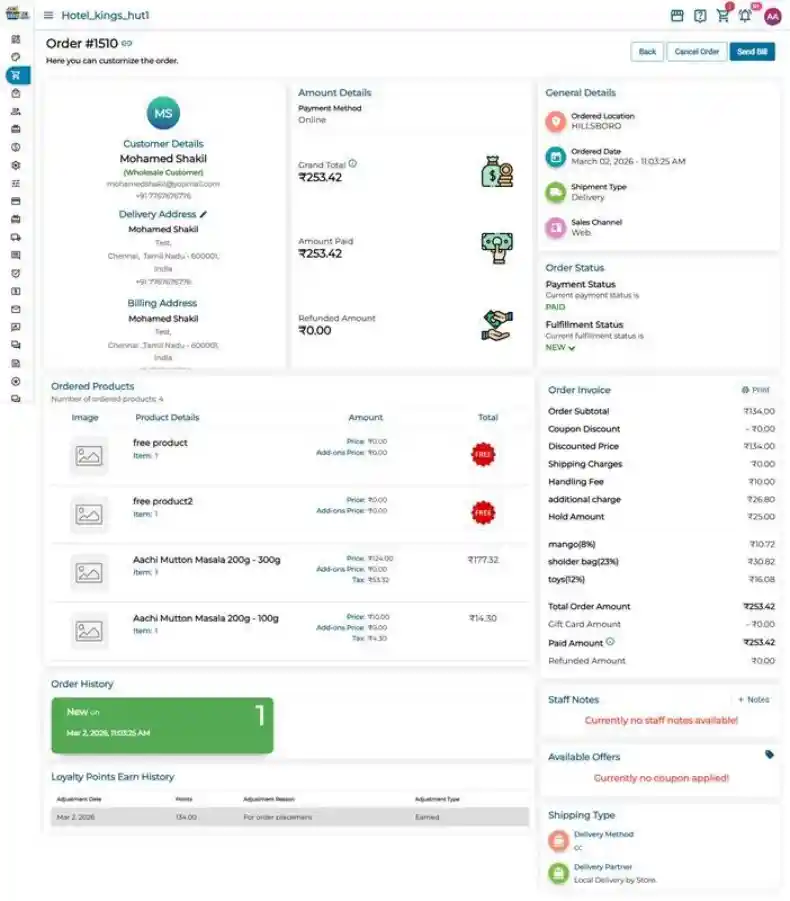
Viewing PhonePe Orders in the Admin Panel
- You can view and manage orders placed through PhonePe from the admin panel.
To view order details:
- Navigate to the Orders module in the admin panel.
- Click on All Orders to view the list of orders.
- Click the View icon associated with the required order.

- The payment status will be displayed in the Order Status section. If the payment is successful, the status will appear as Paid.
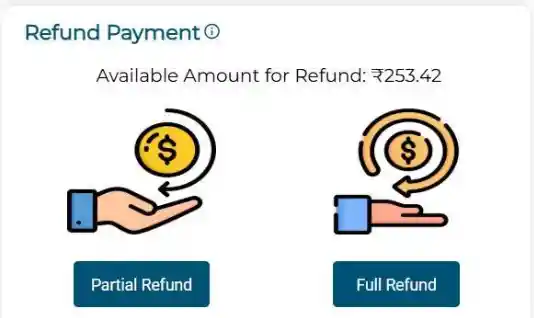
Order Cancellation and Refunds
-
Both customers and store owners can cancel an order as long as the fulfillment status is set to New.
-
Use the Cancel Order button to initiate the cancellation process.
-
Once the order is cancelled, the refund must be manually triggered by the admin using the partial or full refund option, depending on the request.
-
The refund will then be initiated through PhonePe and credited back to the customer’s account accordingly.
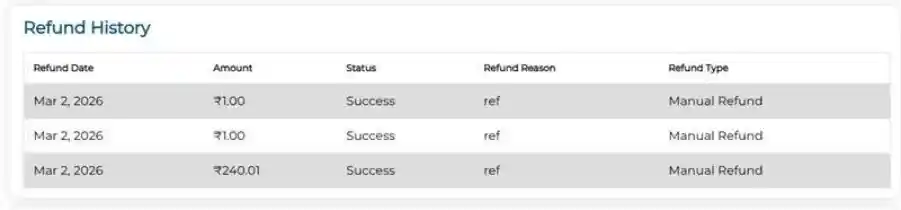
Note:
- Refunds are typically processed within a few business days.
- Refunds will succeed only if refund access is enabled for your PhonePe account.